|
|
|||||||||||||||
|
Natasha Pages: Camp Site Pages: Camper Pages: Modification & Service: Camping Links: GSD Links:
|
Winterizing Your Pop-Up When should I winterize? Obviously, the decision to winterize your pop-up is a personal one. If you have no plans for additional camping trips this year, now is the time. Winterizing should be done before the water system is exposed to prolonged freezing temperatures. Think about leaving a cup of water outside during the temperatures you expect to be encountered. Would it freeze solid? Would it get just a skim coating of ice on it? Damage occurs when the water pipes (hoses) freeze solid and thus expand, breaking the pipe (hose). Most pop-up campers have very little exposed outside the interior space. Crawl underneath and take a look at your unit. If it only has a couple of inches of hose going from the water tank to the hole through the floor you should be fairly safe until the exterior of the camper will be exposed to freezing temperatures both day and night for a few days in a row. Remember, this is just my opinion - I recommend you check your owners manual and campers in your area to verify that this information will work in your area. Water System Below is a block diagram of the water system of most pop-up campers. While there are some differences between manufacturers, they are similar. I will describe the steps in winterizing a pop-up with a fresh water system including hot water heater, shower and cassette toilet. The idea of winterizing is to remove any and all water from any area that may be subjected to freezing temperatures. Water freezing in either the fresh water system, gray water system or cassette toilets can cause damage to the water pipes, pumps or other parts. Freezing water expands and if no room for expansion is available will crack or destroy the confining parts. Even if you have a "basic" pop-up with just a hand water pump you still need to winterize the water system!
Three methods of winterizing are available: 1. Replacing the water with an RV anti-freeze through the fresh water tank 2. Replacing the water with an RV anti-freeze direct from a bottle of antifreeze 3. Using air pressure to clear all pipes of water Caution regarding the use of RV anti-freeze Replacing the water with an RV anti-freeze through the fresh water holding tank
Replacing the water with an RV anti-freeze pumped directly from the bottle
Click for Step By Step Photos of RV Anti-Freeze Use
Using air pressure to clear all pipes of water Some people decide to use air to displace water in the system
rather than flooding the system with anti-freeze. This is a personal decision
and while I have used this method in the past in temperate areas, I'm not sure I
would use it in extremely cold areas. After you blow out the lines and
residue water on the walls of the water lines tends to fall to the lowest point
over time. If sufficient water residue collects and it is in a confined space,
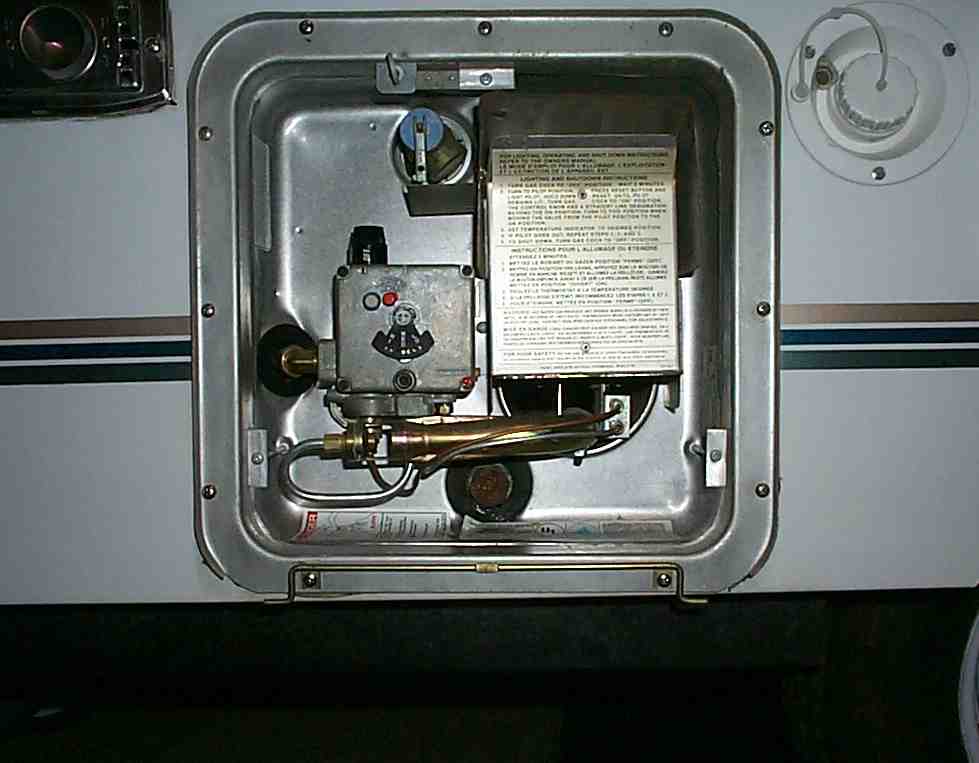
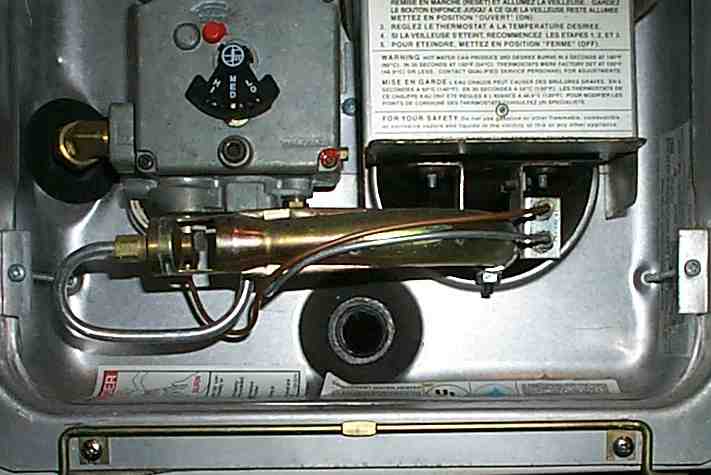
damage to water lines could result. The first step using the air pressure method again is to bypass the hot water heater. There should be two connections on your heater, a fresh water inlet and the hot water line out. While most pop-ups come with a bypass hose, you can make one from simple parts. All you are doing is making a jumper hose from the inlet hose to the HW out line, which will take the HW heater out of the fresh water system. You will now connect an air adaptor (photo above, available at RV stores) to the camp site water connection and then attach an air pump. Utilizing this method, you will need a pump of sufficient pressure and volume to displace all water in the system. Be careful if you compressor will provide more than 40 PSI. Higher pressures can damage the water system! Using this system once air pressure is applied to the exterior water connection you will open each fixture (one at a time) and allow all water to be expelled. Care should be taken that all water has been removed from the system and that while you are applying air pressure to the system you do not over pressurize the water pipes and damage them. Make sure that you run the water pump to remove water form inside it. Now, drain the HW heater as above, being sure to inspect the anode rod.
Other Chores Many people use the process of winterizing to perform other maintenance tasks. These can include: a full cleaning of the unit (check the canvass and roof of the canvas) clean appliances (refrigerator, stoves) If possible, leave refrigerator blocked open for air flow remove all food items remove any/all items that may rust/explode (spray cans) lubricate the lift system lubricate any moving parts (locks, bed slides, hitch....) repacking the wheel bearings checking the brakes If the unit is to be stored outside: seal any holes on the underside of pop-up (water line openings) remove battery and store inside (remember to keep it charged during the winter) cover any vent openings (refrigerator, furnace, hot water heater...) some people use plastic shrink wrap for this. lower the tongue end as low as possible to allow rain/snow to roll off quicker park pop-up on something so tires are not in direct contact with the ground (dirt) and cover tires to protect them from the sun. refer to you owners manual for ideas. Some people actually lift and block the pop-up so that the tires do not contact the ground and reduce the air pressure. depending on manufacturer, you may want to consider a cover for your unit. Some manufacturers DO NOT want the units covered, again refer to the owners manual
************************************** Anode Rod While not specifically a "winterize" your pop up duty, the anode rod should be inspected on a regular basis, so why not use this yearly task to do it. The anode rod is is in the tank to "sacrifice" itself so that the metal parts of the tank will not corrode. Steel which is found in many forms inside the tank such as drain nipples, heating elements, immersion thermostats, inlet and outlet nipples when exposed to moisture and oxygen will rust and corrode. The anode rod, by means of cathodic protection will corrode in place of the other metals (OK, there is really a lot more going on, but I think you get the picture). When depleted, the rod needs to be replaced. As a matter of fact while we are talking about this, when was the last time you checked the anode on your hot water heater at home? if you want to read a little more about Anode Rods and Cathodic Protection, click away. All pictures are thumbnails, click on them to see a larger version
Opening up your camper in the spring
********************************* Caution regarding the use of RV anti-freeze The winterizing instructions for the Shurflo Water Wizzard Hand Pump, Model 150 states: "WINTERIZING As this manual hand pump/faucet is common on many pop up campers that do NOT have an electric water pump you should read the instructions for all parts that came with your unit to assure that you can use propylene glycol anti-freeze. Many assume that this warning deals with automotive glycol anti-freeze, but it does not. Automotive anti-freeze is ethylene glycol, RV anti-freeze is propylene glycol. **********************************
Many photos on this page are of Camco Manufacturing, Inc. products. They are available at most RV stores. Click on the logo below to go to Camco's web site. Included on the site are descriptions of products and a dealer locator.
Revised: May 08, 2007
|
||||||||||||||
|
Copyright © 2001-2007 TRH [tim5055] All rights reserved Our Privacy Policy
| |||||||||||||||

 There
is a very large difference between automotive anti-freeze and RV
anti-freeze, automotive anti-freeze contains ethylene glycol which is
toxic,
RV anti-freeze contains propylene glycol which is non toxic.
There
is a very large difference between automotive anti-freeze and RV
anti-freeze, automotive anti-freeze contains ethylene glycol which is
toxic,
RV anti-freeze contains propylene glycol which is non toxic.