Single Side Drain
System
All photos are thumbnails,
click on a picture to see a larger version
In all their wisdom Fleetwood Folding Trailers began
designing pop ups with two drains, one on the back side and one on the
front "living" side. I understand their reasoning, we as
pop up owners are demanding more "stuff" inside. To make
it happen they need to drain the water from our sinks and showers somehow,
but it is up to us to direct that water where we want it to go.
Now, on my 2005 Niagara I have the shower drain on the
back side where all the other mechanical type stuff is. This includes
the dinette slide, hot water heater, and refrigerator access
panels.. The drain on this side is really not a problem, as a matter
of fact it is where I would want to put my gray water container to keep it
out of the way. The "living side" of the pop up is where
problems start to occur. This is the side with the door and awning,
where most of us spend time at the pop up. On this side there is an
additional drain, (for the kitchen sink).
I guess the simplest way to beat the "two
drain" problem is to have two gray water containers. On our
first couple of trips in the Niagara this is what we did, but I really
didn't like a gray water container in the middle of my camping living
space.
Another option was pointed out to me:
I just use two "custom" fit
garden hoses and wye them together before dumping them in a bucket or
connecting them to a sewer outlet at the RV park. On my Sequoia, the
"curbside" drain hose can run underneath the trailer through the
'U' shaped pieces that are welded to the frame (for shipping purposes).
Some male and female fittings are needed, along with some garden hose remnants
and a wye (the kind without a shut-off so the water flow is not
restricted).
Now, as I like a project my solution got a little more
involved
 |
My solution is to install a PVC pipe
from the front side of the pop up to the back side. Now on my
unit both drains were aft of the wheels so that determined where the
pipe would run.
Crawling under the pop up (no easy task when you are my size) I
found a support rail that ran between the side frame rails, just aft
of the wheels. I chose this rail as my path.
Now following good plumbing practice I knew I needed some slope
from front to back. To make things easy I chose one inch drop
over the full width. While this may not be to
"code", I won't be draining anything other than kitchen
sink water through this pipe so I figure it will work. Now I
attached the pipe in four locations
- Front side - attached to bottom of the frame rail, no drop
- 27 inches in from front side - dropped 1/4"
- 54 inches from front side - dropped 3/4"
- Back side - attached to bottom of the frame rail, dropped
1"
|
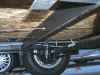 |
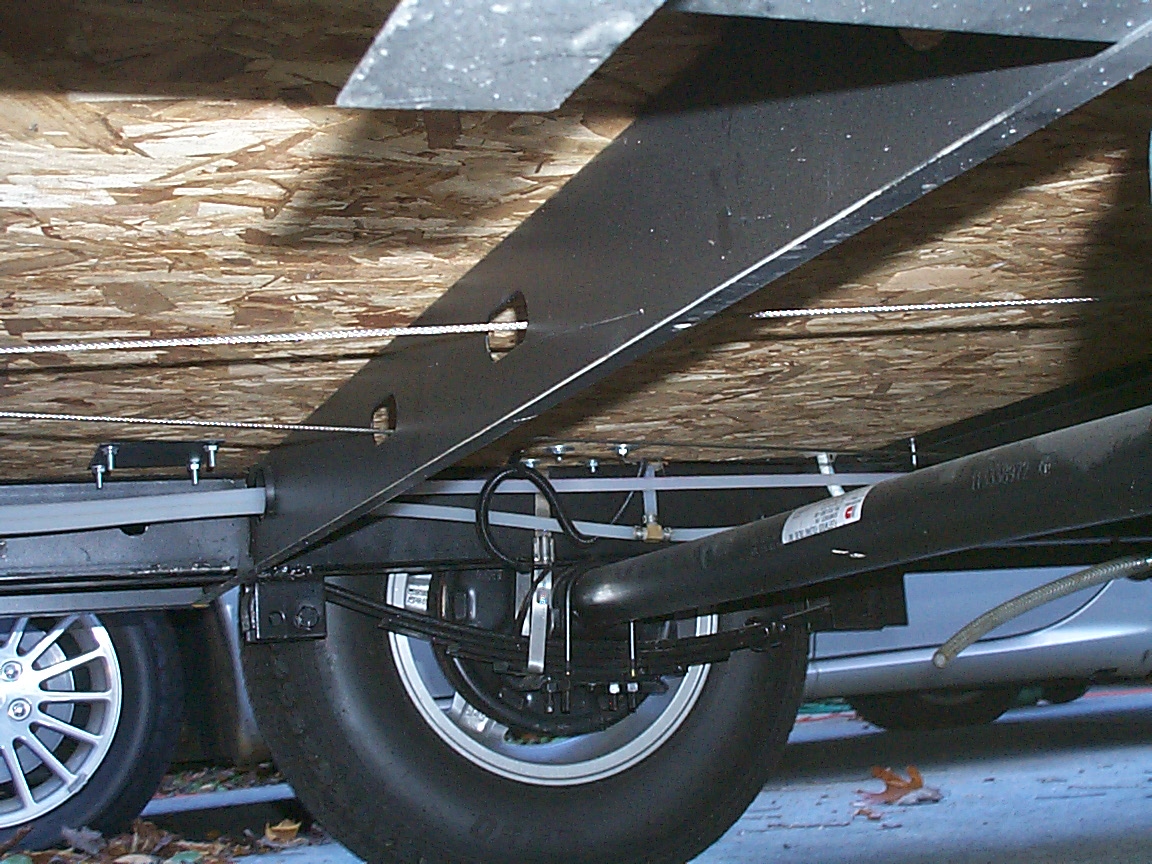
The photo to the left shows the support rail I ran the PVC pipe
along. If you look closely you can see that it has a 90 degree
bend on the bottom.
|
 |
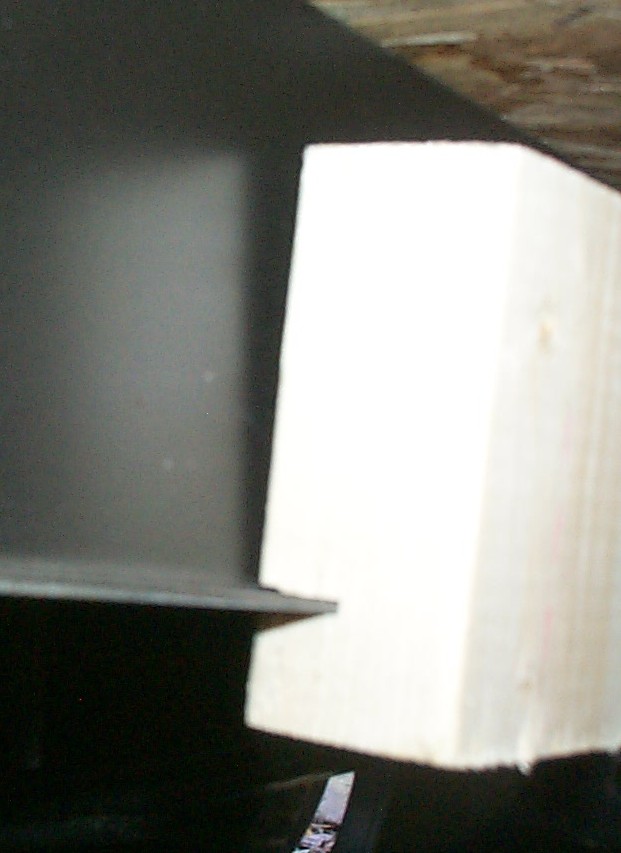
My first thought was to notch a 2 X 4
and bolt it to the support rail. It would then be easy to hang
the PVC from this piece of wood. Looking at it I found out
that this would bring the pipe too far forward and would interfere
with the wheel wells at both sides, plus I was worried about
rot. Ah well, on to plan two.... |
|
I settled on PVC deck balusters
(pickets) which are available at most home improvement stores.
While they look like a wooden 2 X 2 they are in fact a little
smaller. I liked the fact that I would not need to worry about
rot.
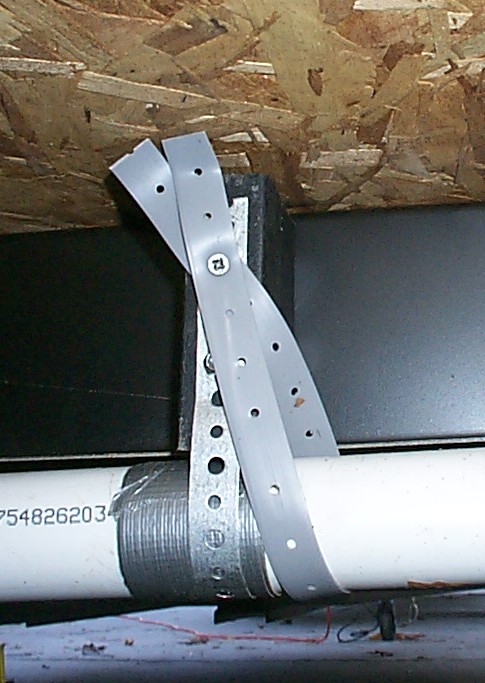
To the left you can see I cut two sections for each
support. I bolted them together and through the support with
10-24 stainless steel bolts and capped them off with
"nylox" locking nuts. Be sure to paint any areas of the
frame you drill and/or scratch.
The PVC pipe is hung using galvanized pipe hanger strap which is
held in place by the two bolts. I also put a few wraps of duct
tape around the PVC pipe so that the vibration of towing would not
cause the hanger strap to cut into the pipe. |
 |
Once the pipe was in place I put a wrap
of plastic hanger tape around it, just to be safe.
While the galvanized hanger was probably sufficient, I just
couldn't get the PVC "snug" against the bottom of the
bracket because I ran the bolts completely through the support,
bracket and hanger tape at both sides. Using the plastic tape
I was able to snug things up a little. |
 |
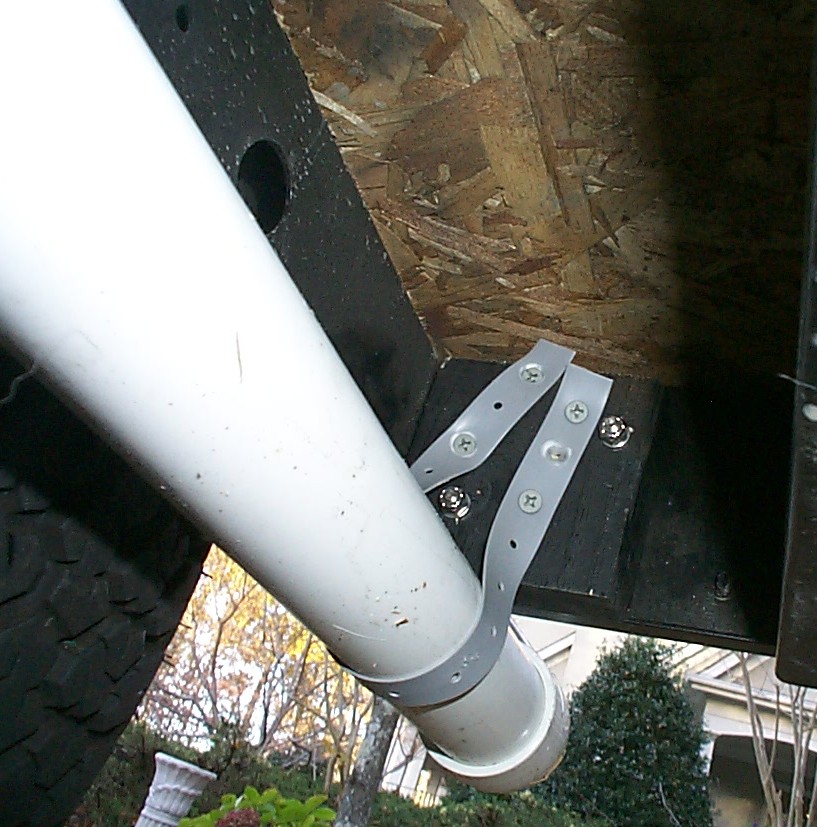
On the sides I did use 2 X 4 to support the pipe. Here you
see one side support. The 2 X 4 was bolted to the side rail
(again stainless fasteners and painted all drilled holes) and the
pipe was hung using plastic hanger tape.
|
 |
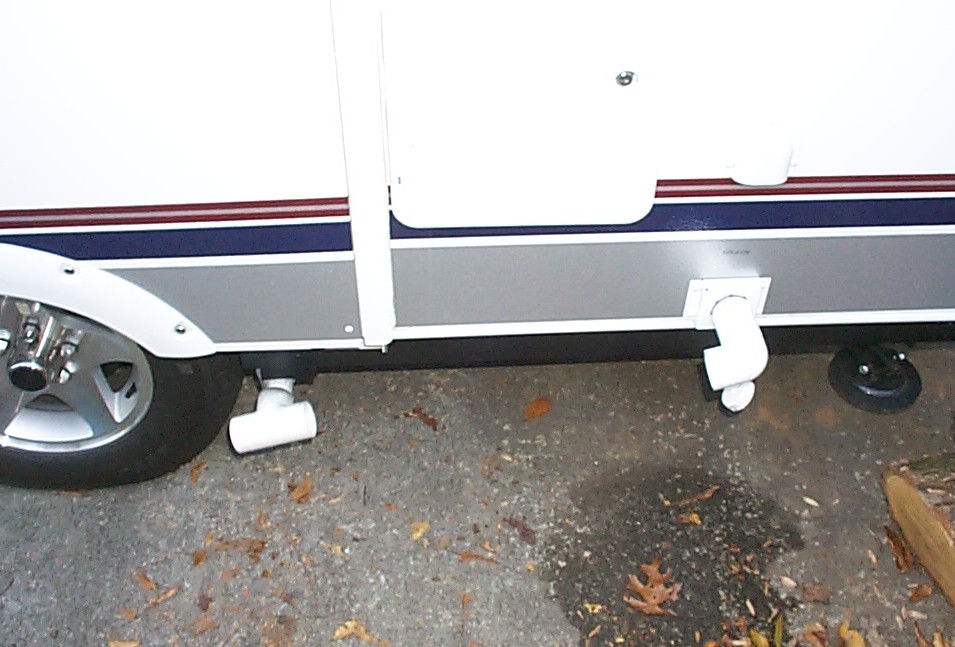
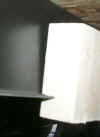
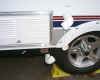
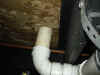
Here you see the PVC pipe sticking out
on the "living side" of the pop up.
Now that the pipe is firmly held in place all that is left is to
connect the plumbing. |
 |
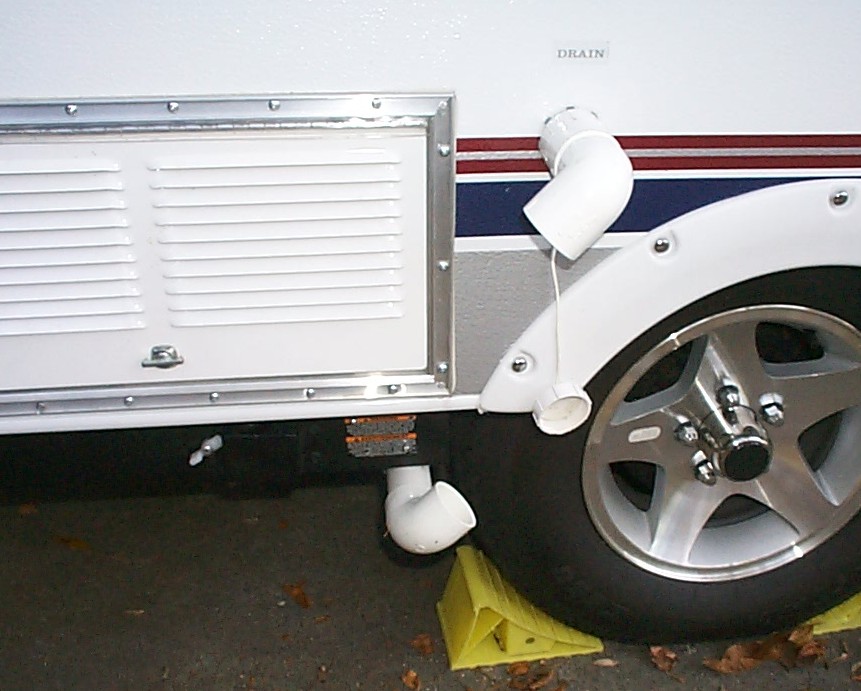
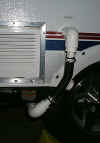
Step one is to terminate the
pipes. The stock drain on a Fleetwood is threaded for standard
1 1/2" PVC. So here you see a threaded adaptor screwed on
the pop up drain then a 90.
Note that these connections are made without PVC cement. As
there is no pressure on the system "friction fit" should
work fine.
Note Update Below for this step |
 |
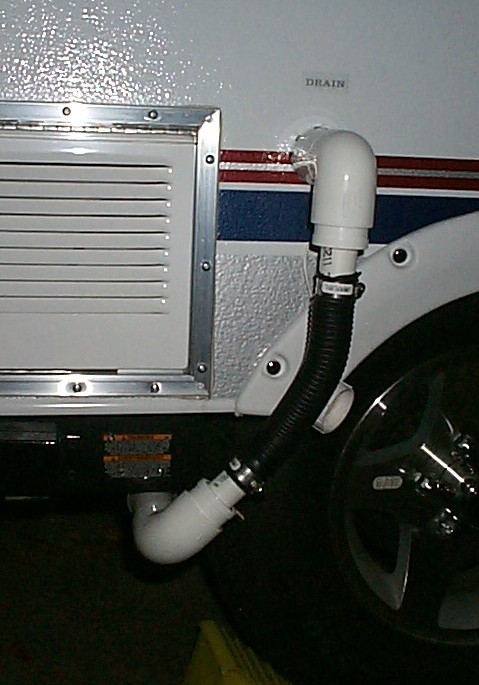
Filling the gap is a piece of flex
pipe. I used rigid sump pump drain hose, but almost anything
that has flex to it will work. I added adaptors and small
sections of 1" PVC pipe to connect the
two sections together.
Note Update Below for this step
|
 |
Now the back side is going to be a
little more complicated. First of all the new drain pipe must
connect to two things on the back side:
- Shower Drain
- Gray water container
Here you see that the drain pipe has a "T" installed on
it and the shower drain has an adaptor just like the one
on the front sink drain. |
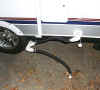 |
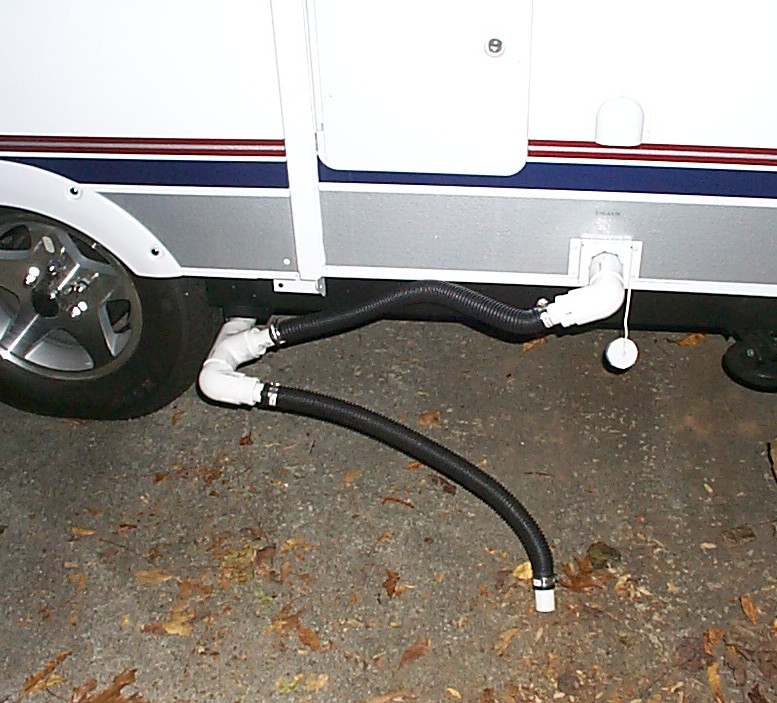
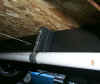
Here you see the back side connected
together. The hose that leads to the ground is the one that
will go into my gray water container. Now both the front and
rear drains flow into a single container. Plus, should we stay
at a campsite having a sewer connection I can just drain
everything there |
During travel, all the parts will be removed so only
the pipe under the pop up body will remain.
Update to Single Side Drain
System
After looking at the 2006 Niagara, I decided i liked the
new way they connected the front plumbing to the rear of the pop up.
As I already had the main line running under the pop up I just needed to
connect the front sink drain to it.
 |
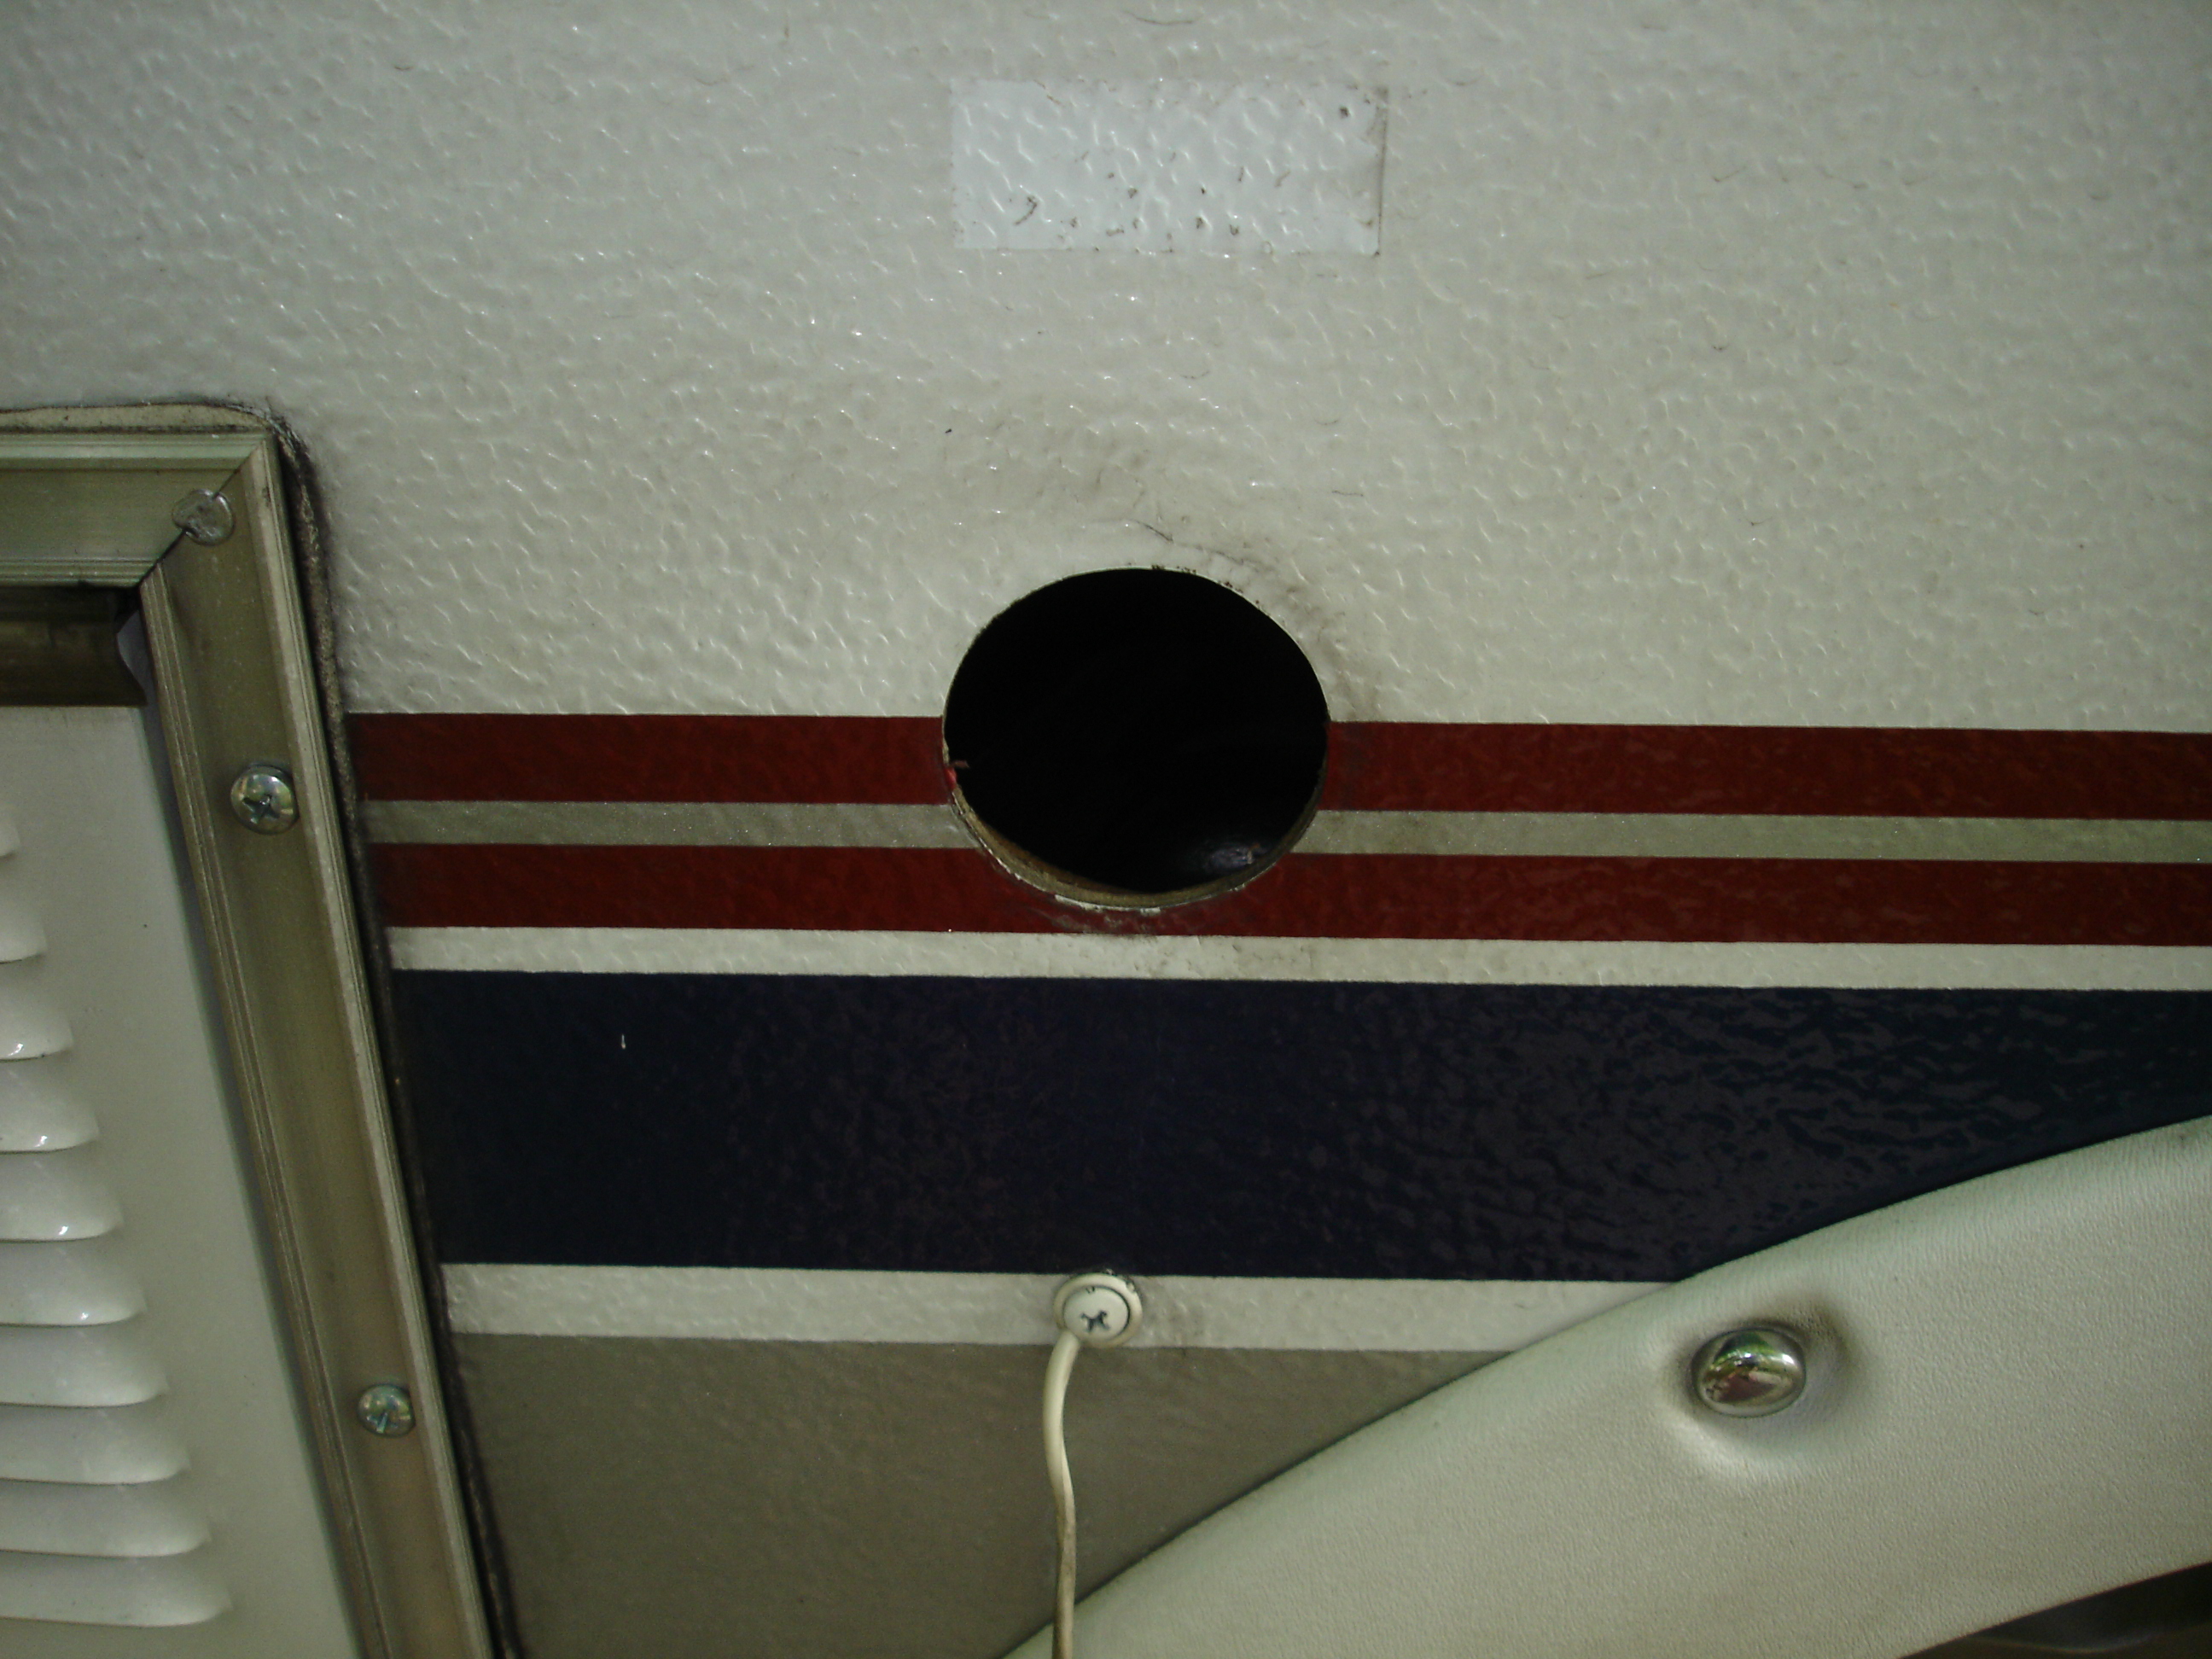
My first step was to cut the pipe under
the sink and remove the drain line going out of the pop up. If
you don't have plans for this space, you can just leave the pipe
sticking out with the cap in place. |
 |
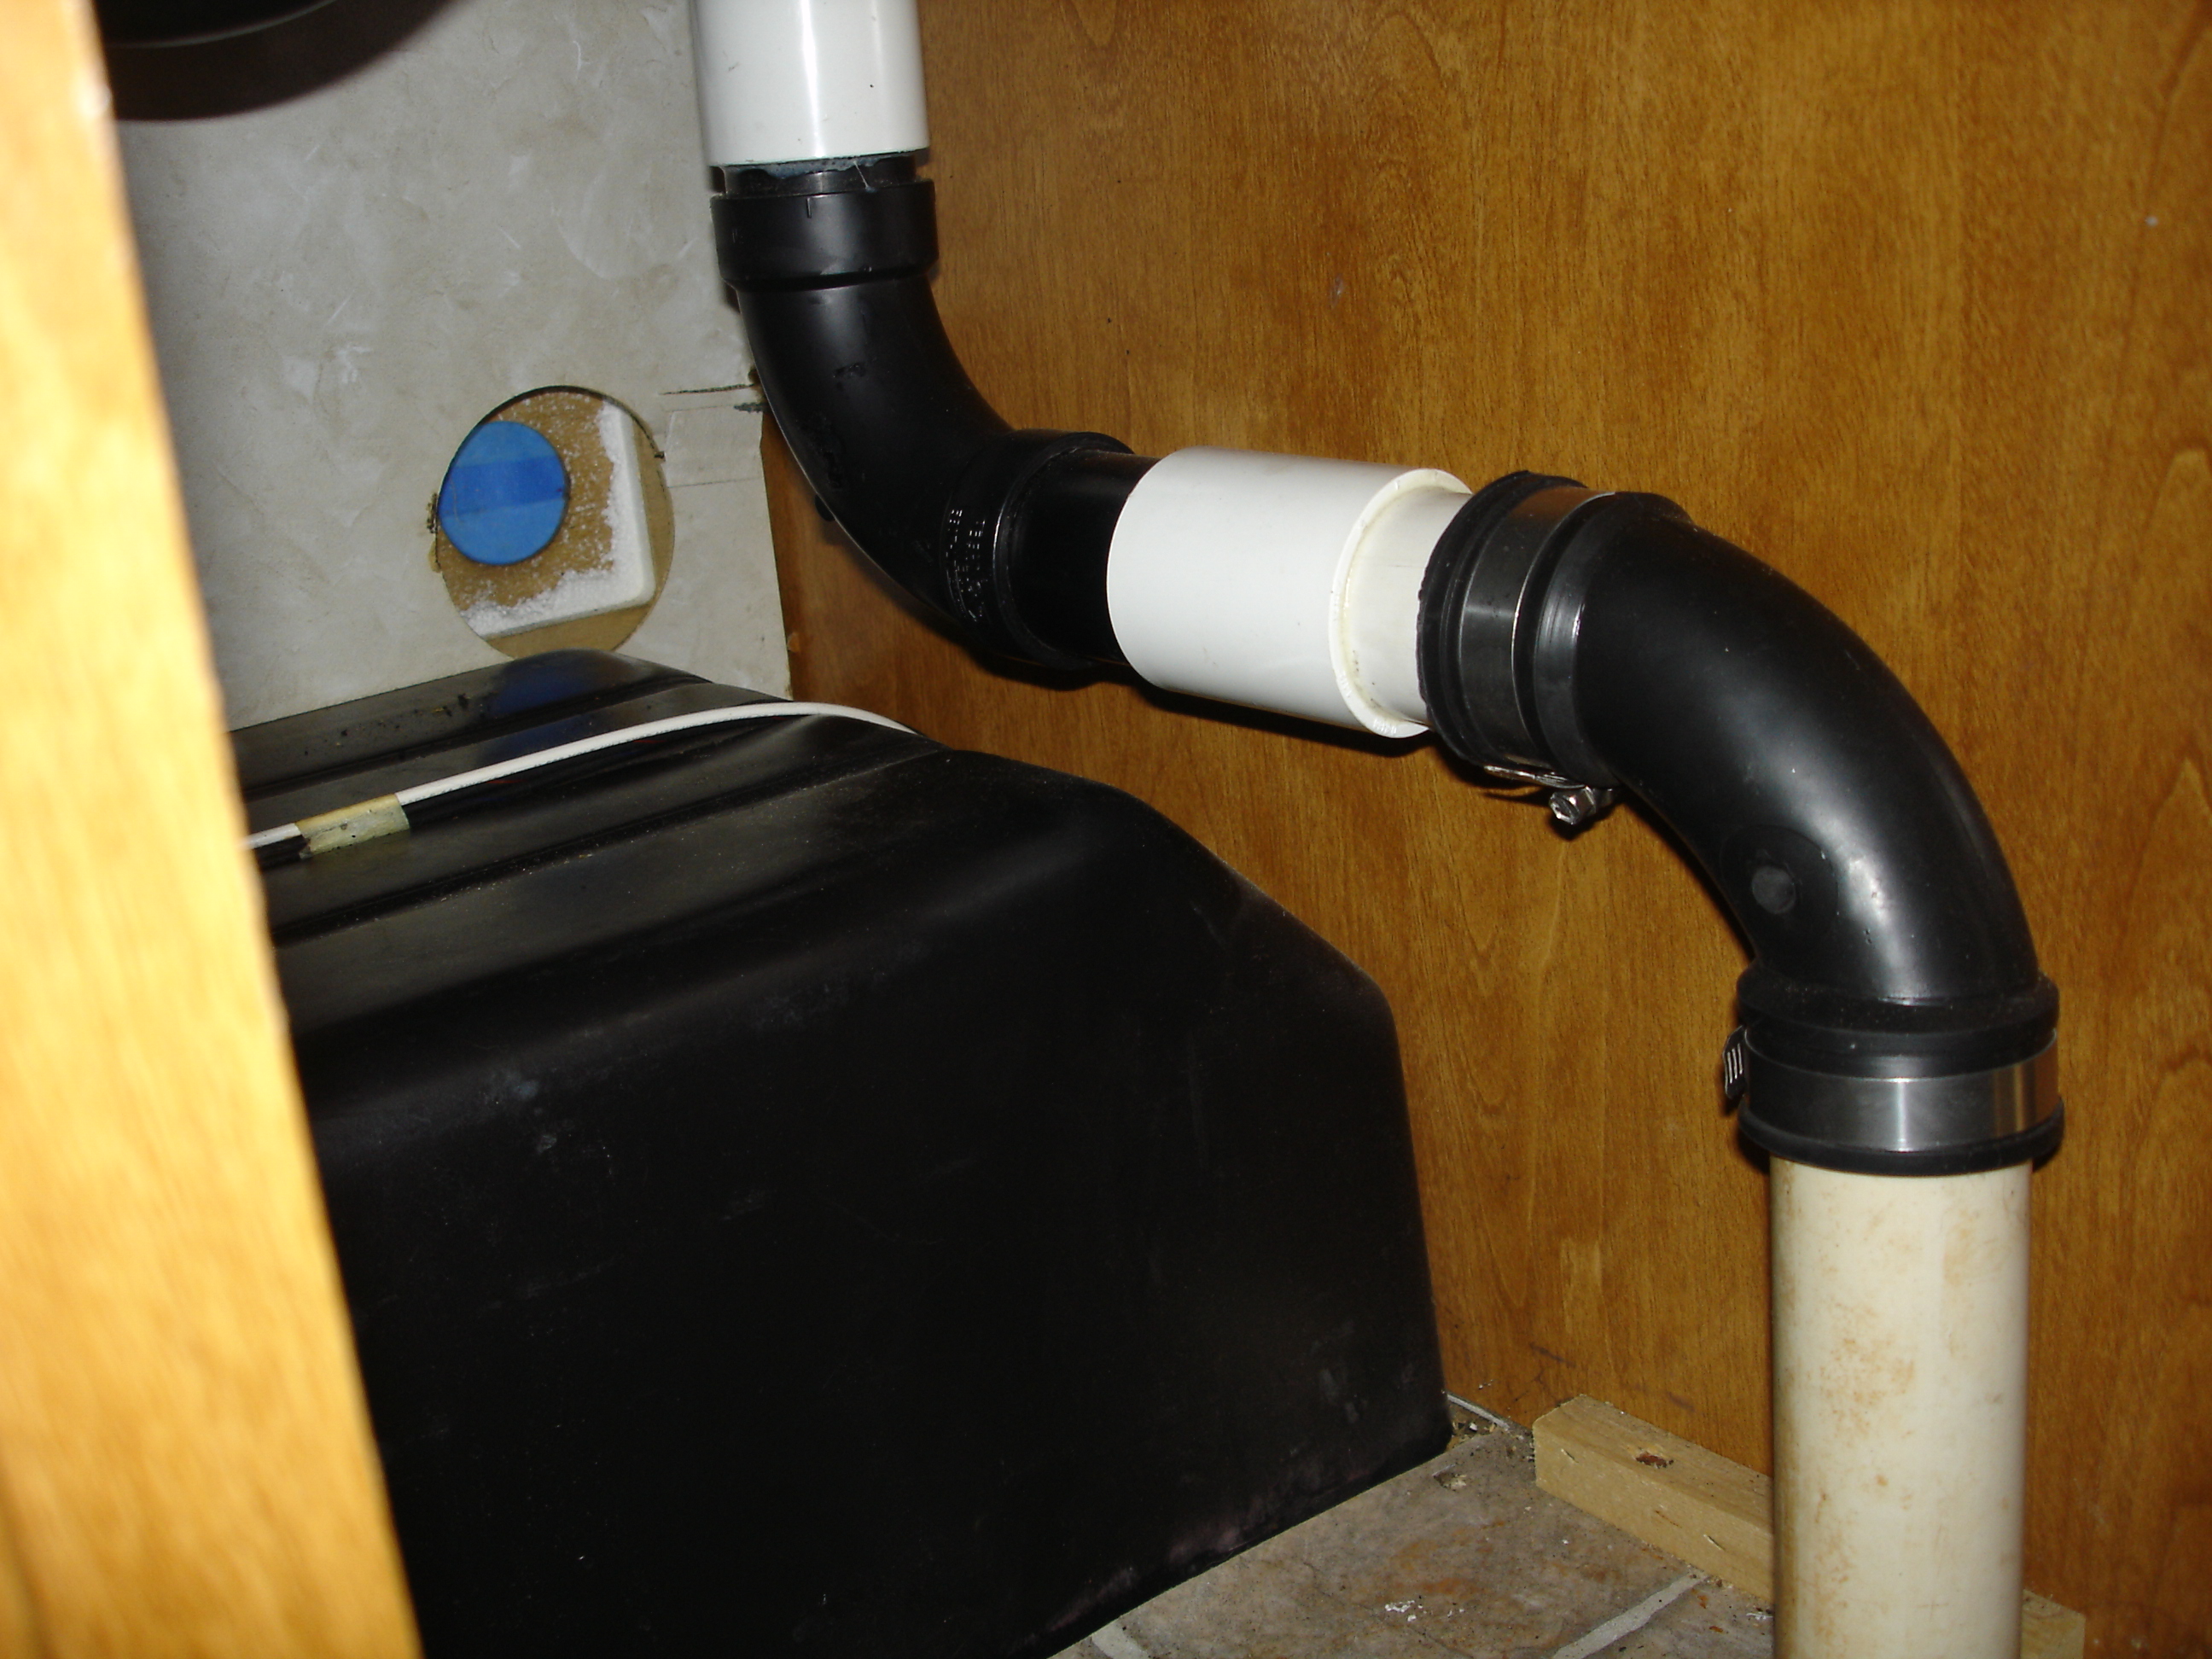
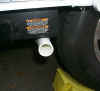
I selected a pot inside of the wheel
well to drill a hole through the floor for the pipe to exit down
through the floor. Be careful to select a spot that will not
conflict with all the "stuff" under your pop up.
This includes frame rails, lifter cables, gas lines and stuff like
that. After you have the hole it is a simple process using a
couple of PVC elbows to redirect the drain down through the
floor. You will note that the elbow to the right in my photo
is not PVC, but a rubber one. This allowed me to more easily
connect the two runs of pipe. |
 |
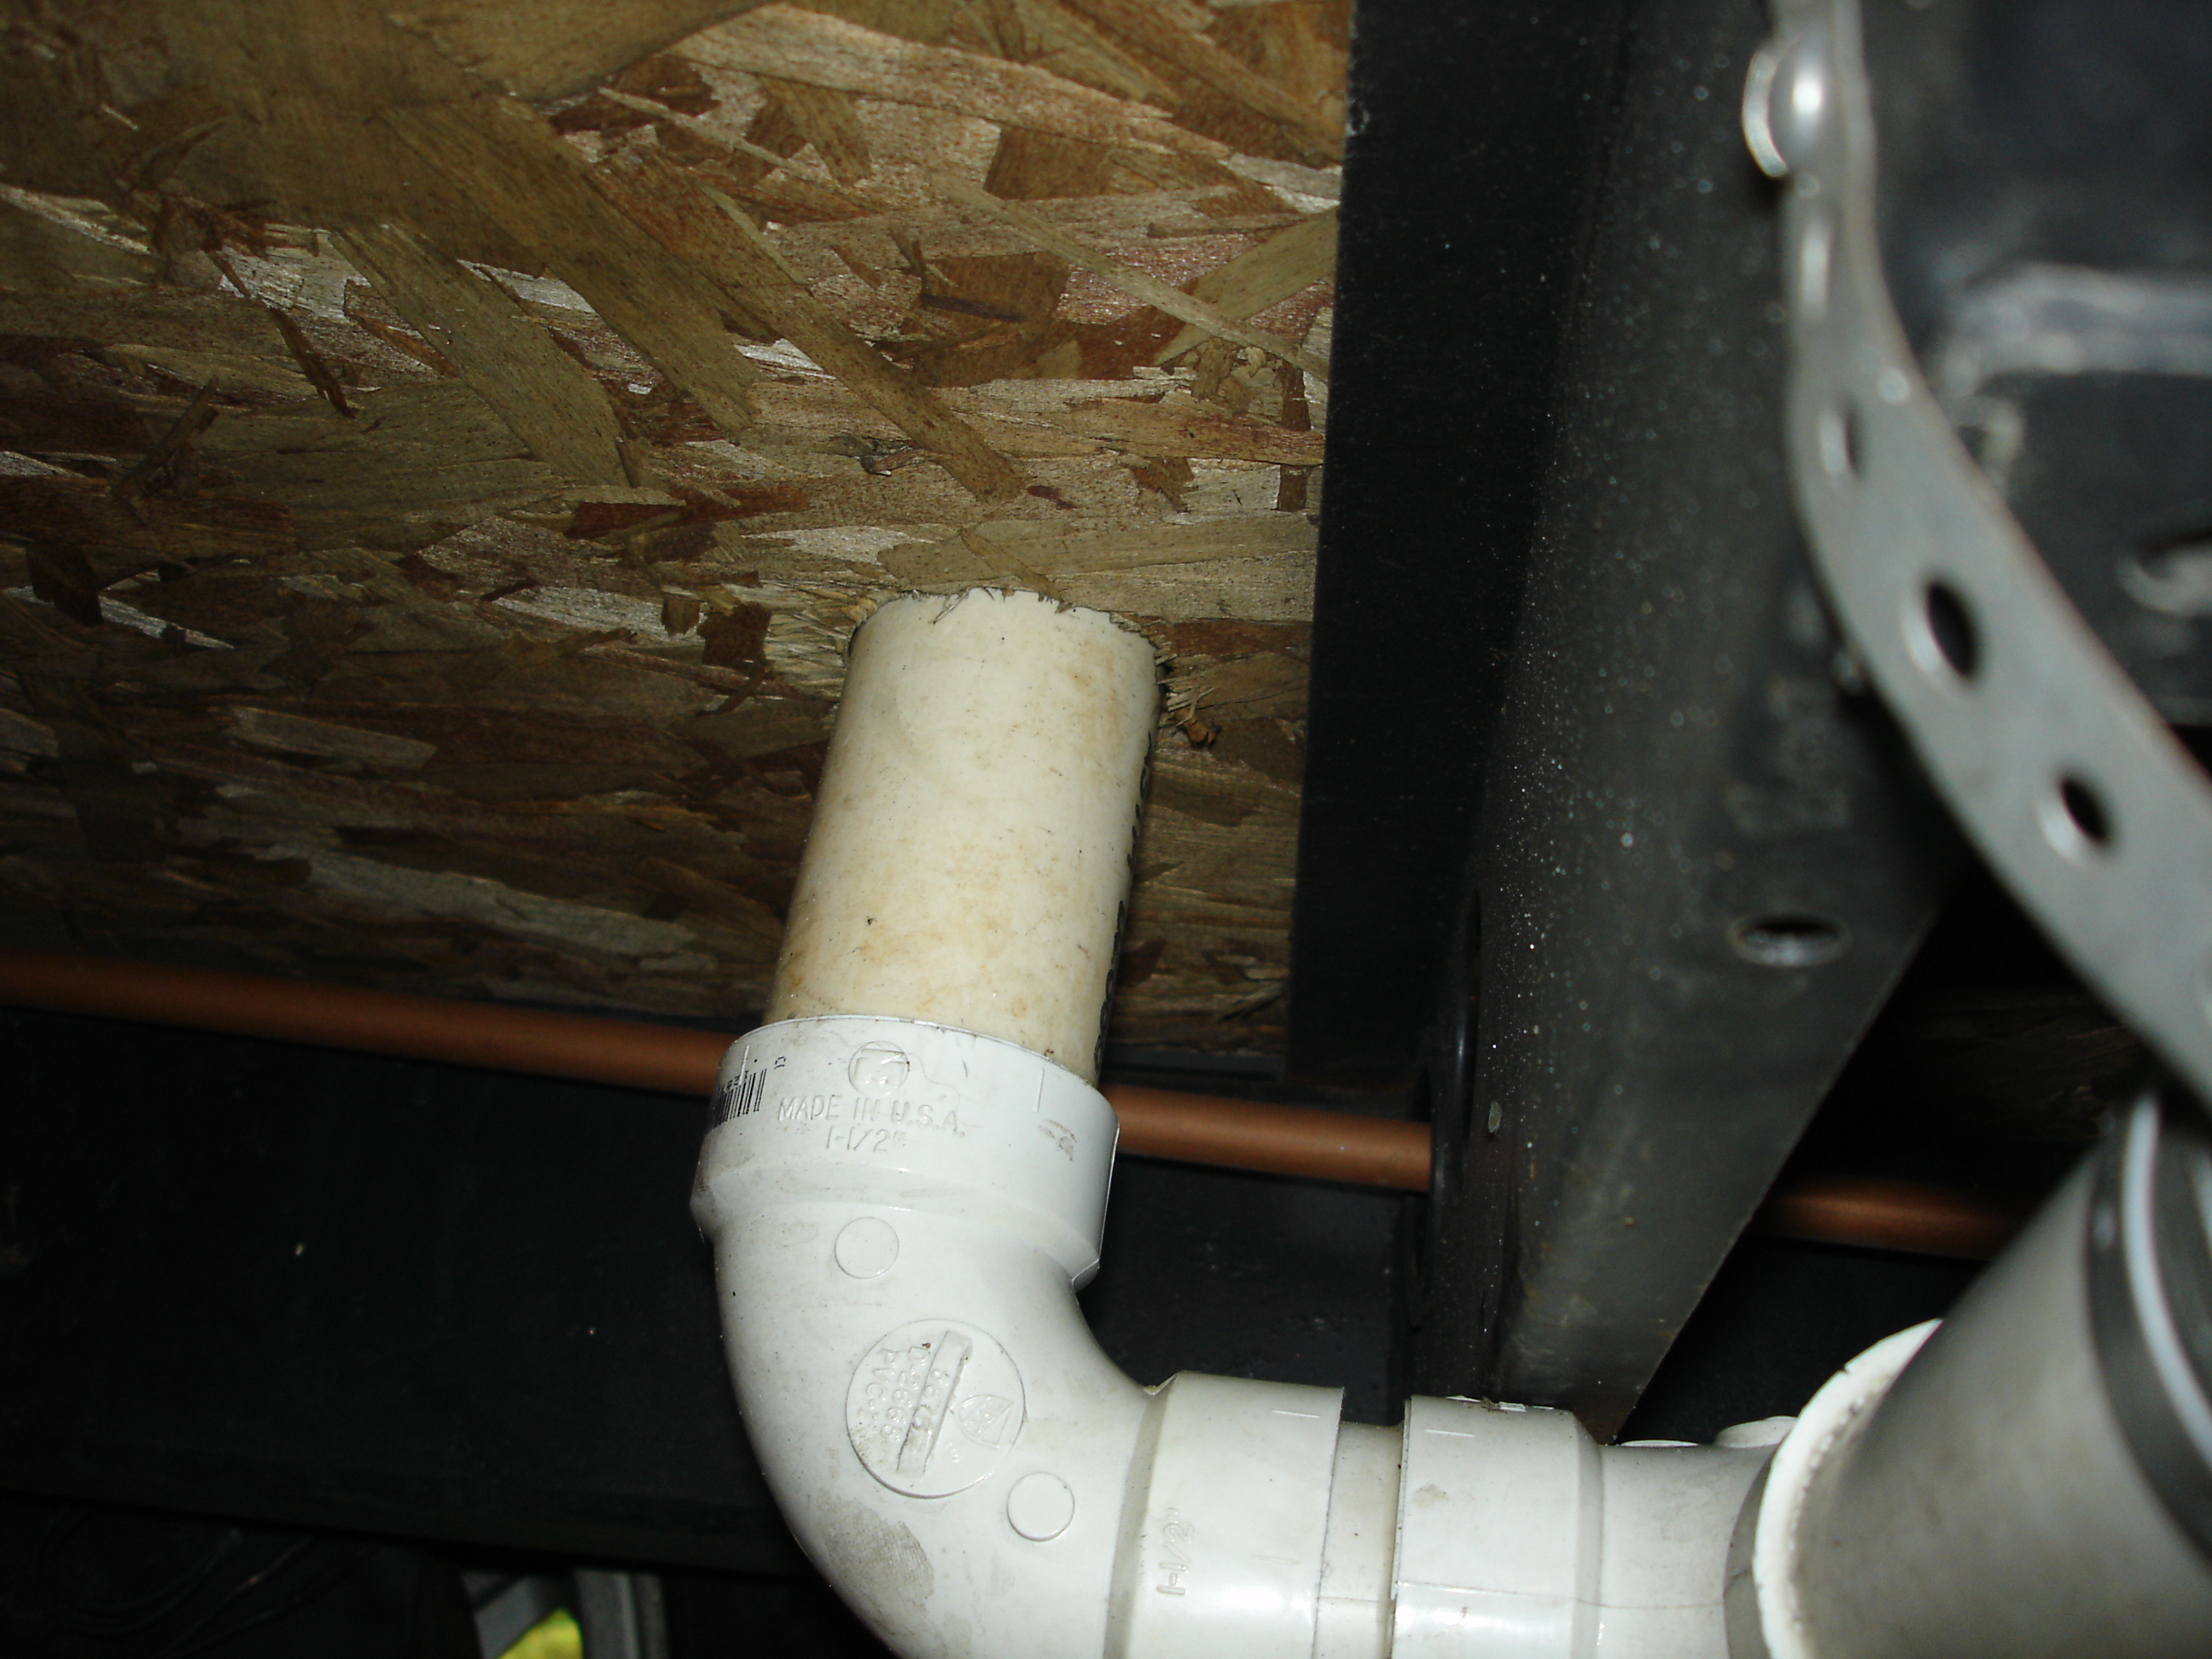
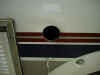
Under the pop up I cut the main line
running side to side and joined it to the pipe sticking through the
floor with a couple of elbows. |
| |
|
Final Thoughts
I think I am going to enjoy this modification. While it may seem
a bit complicated it will make the dual drain problem less of a hassle.
The only ongoing problem I see is that I now have several sections of
drain pipe to worry about loosing. Additionally, now that the front
is connected all the time it is one less thing to loose or set up.
Additionally I have been asked why did I avoid a permanent setup by
using flex-pipe instead of glued PVC? The main reasons were
availability of parts and width (they tie together). Coming off the
stock threaded drain I used a 1 1/2" straight threaded connector
which then transitions to a "street" 90 degree. These two parts
together are around 5 inches times two sides makes me almost a foot wider.
I'm just not comfortable making my PU that much wider, just something else
to worry about while towing. Now, I could have eliminated the straight 1
1/2" threaded connector buy replacing it with a 90 degree that is
threaded. But, a threaded 90 is not widely available (i.e. a supply house
part) and threading it on the existing threads sticking out of the side of
the pop up does not guarantee that it would be facing in the correct
direction when it was snug. I can put my system together in less
than 5 minutes, so I'm happy with it.
Now, what would I have done differently? I may have selected a
different flex pipe other than the rigid sump pump hose. While it has
several features I like (i.e. it is fairly rigid and has a diameter that
will allow water to flow easily) it was just a hair too small to connect
together the way I did it. The 1" pipe I tried to slide it over
is just a little too big so I had to force it together. A little
heat from a hair dryer softened it up to help get the sections together.
|