|
Detachable Power Cable
Most pop up campers I have seen come equipped with a
"pull out" 30 amp power cable. This has bothered me from the
first day I owned my pop up because you need to keep the majority of the storage
area under one bench seats clear of all storage because this is where the shore
power cable is stored away. It is very easy for a small item to fall into
the coiled cable and "stop up the works" when you try to pull out the
cable through the "mouse hole" on the side of your camper.
Something I never thought about was theft. I received the following
e-mail:
|
Our campground
storage area was invaded with copper wire thieves. All the land lines were
pulled out of the mouse holes and cut off. I wasn't sure what I could do
until I read your article. I will be installing the kit in our camper.
Thanks again, Michael New Richmond, Ohio |
Well, I guess that says it all! In this day in age we need to worry about
having our shore cords stolen...
While the parts used in this conversion are standard marine
(boat) application parts and are readily available at boating stores I decided
to buy a "kit" from Camping
World. The cost savings between the individual parts and the kit were
minimal when you factor in my Presidents Club 10% discount and a coupon Camping
World sent.
The kit consists of a weatherproof 30 amp power inlet which is
attached to the side of the camper and conversion parts to turn the 30 amp cable
which is attached to your converter into a removable cable which plugs into the
power inlet.
Now, when I traded in the 2001 Santa
Fe this was one of the things I wanted to keep, so I removed it. When
I went to reinstall it in the new 2005 Niagara I
discovered that the adaptor ring had rusted badly. Now as I discuss later
on this page this ring is not available as an individual part, only as part of
the full RV kit so I was kind of bummed out. I sent an e-mail to Marinco
and within a day I had a reply that they were sending me a new ring free of
charge. I must say, great customer service. I would highly recommend this
mod for anyone who thinks it may help them out.
went to reinstall it in the new 2005 Niagara I
discovered that the adaptor ring had rusted badly. Now as I discuss later
on this page this ring is not available as an individual part, only as part of
the full RV kit so I was kind of bummed out. I sent an e-mail to Marinco
and within a day I had a reply that they were sending me a new ring free of
charge. I must say, great customer service. I would highly recommend this
mod for anyone who thinks it may help them out.
I have now installed this modification on opur new Aliner and Our Coachmen trailer, purchasing the kits from Amazon.
All photos are thumbnails,
click to see an enlarged version
 As
with most of my projects, I decided that I needed to "improve" the
kit I purchased. The instructions in the kit wanted you to cut a 2 to
3 foot section out of your plug cable to run between the RV power converter
and the new plug installed on the side of the camper. I purchased a 4
foot section of #10 romex for this connection. This will give me a
longer plug cord. Note: To clearly show which steps are part of my
optional addition to the plans I have changed the background color of
those steps to blue. As
with most of my projects, I decided that I needed to "improve" the
kit I purchased. The instructions in the kit wanted you to cut a 2 to
3 foot section out of your plug cable to run between the RV power converter
and the new plug installed on the side of the camper. I purchased a 4
foot section of #10 romex for this connection. This will give me a
longer plug cord. Note: To clearly show which steps are part of my
optional addition to the plans I have changed the background color of
those steps to blue. |
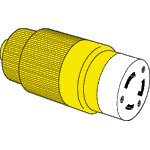
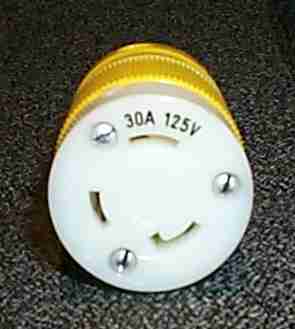
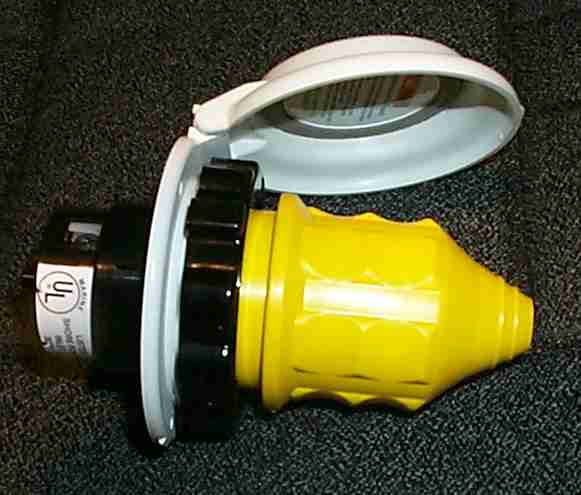
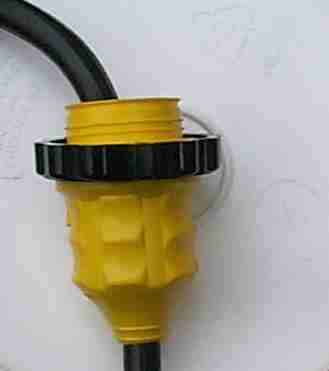
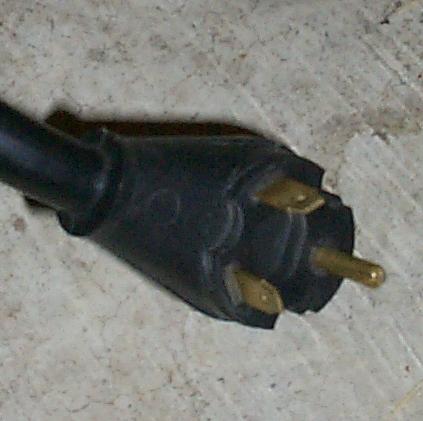
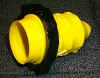
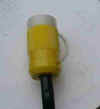
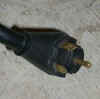
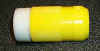 Included
in the kit is a plug end that will be placed on the end of the cord once
it is disconnected form the RV converter. Included
in the kit is a plug end that will be placed on the end of the cord once
it is disconnected form the RV converter.
|
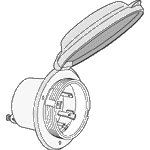
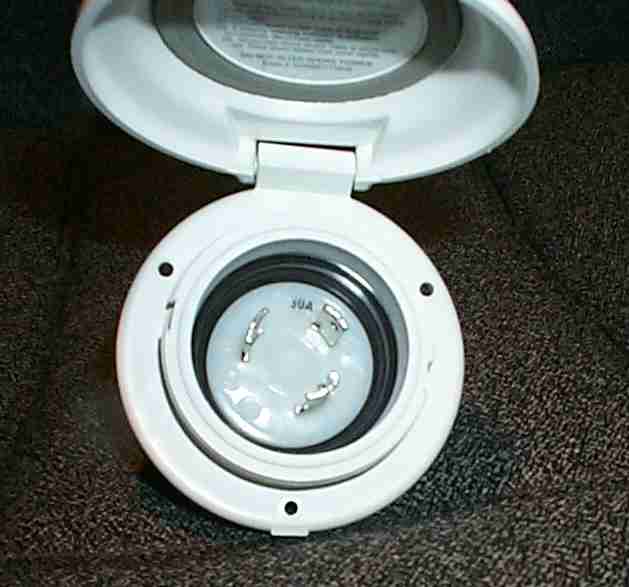
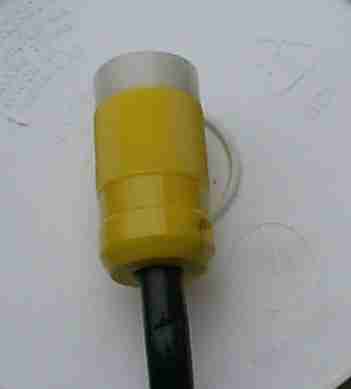
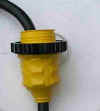
  The
socket to the left will be installed in the side of the camper and
connected to the RV converter with the romex shown above. The
weatherproof cover to the right will be installed on the plug end above to
keep rain water out during use. The
socket to the left will be installed in the side of the camper and
connected to the RV converter with the romex shown above. The
weatherproof cover to the right will be installed on the plug end above to
keep rain water out during use.
|
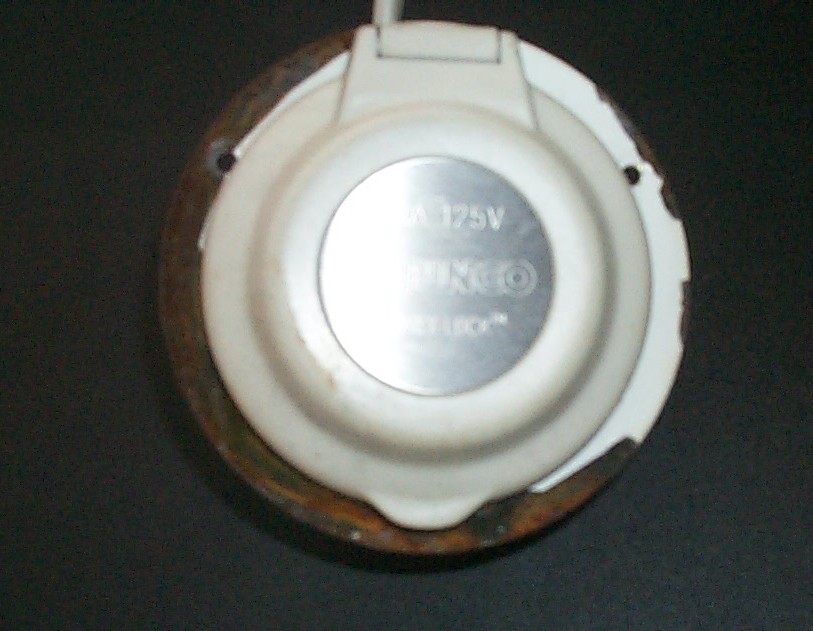
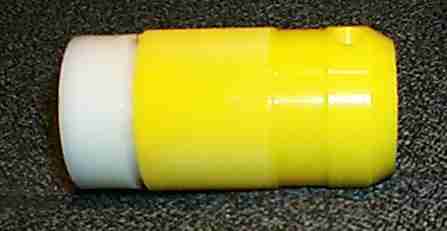
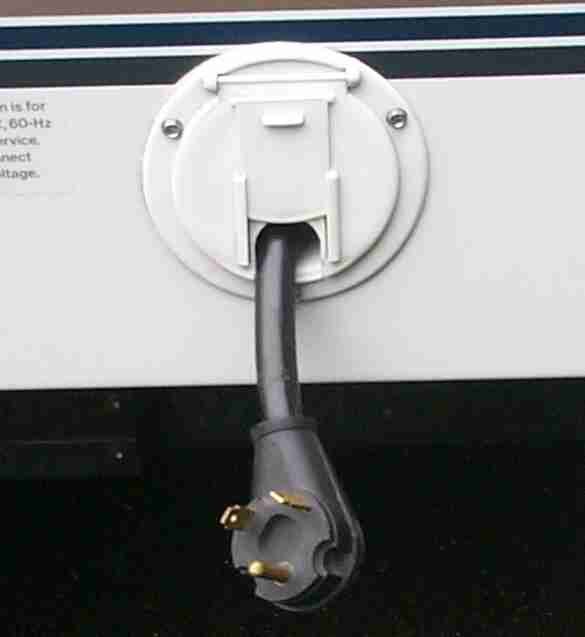
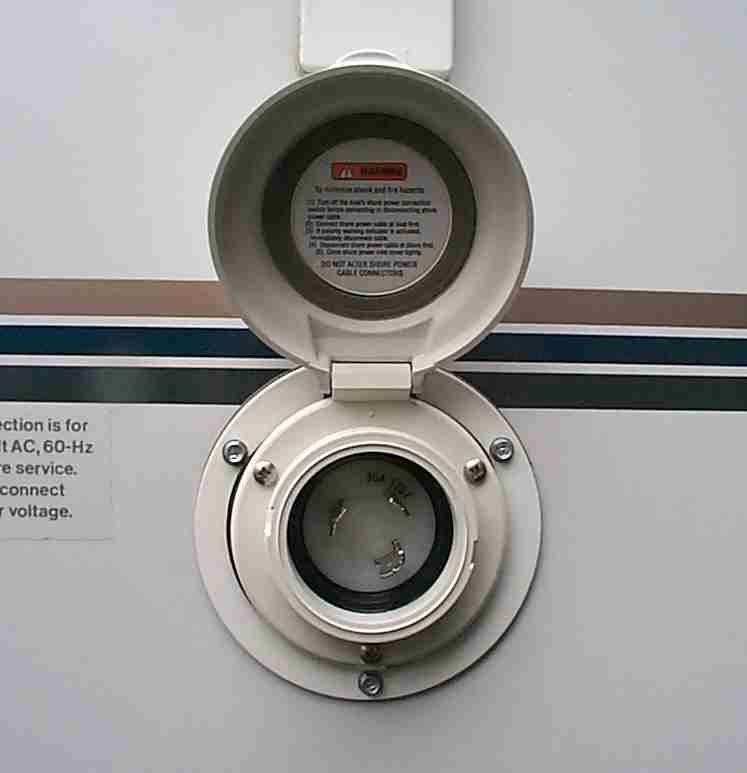
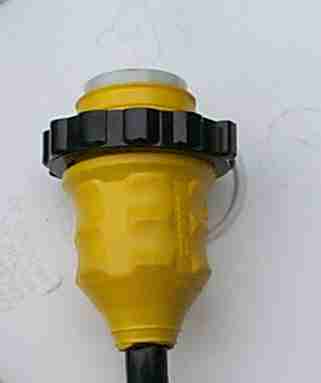
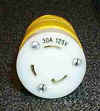
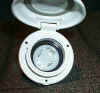
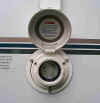
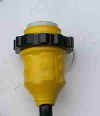
 The
photo to the right shows the weatherproof cover plugged into the
socket. The plug end is "keyed" so that it can only be
inserted one way, and once it is inserted it turns 1/4 turn to keep it
from accidentally falling out. The weatherproof cover has a lock ring
which locks the two parts together The
photo to the right shows the weatherproof cover plugged into the
socket. The plug end is "keyed" so that it can only be
inserted one way, and once it is inserted it turns 1/4 turn to keep it
from accidentally falling out. The weatherproof cover has a lock ring
which locks the two parts together |
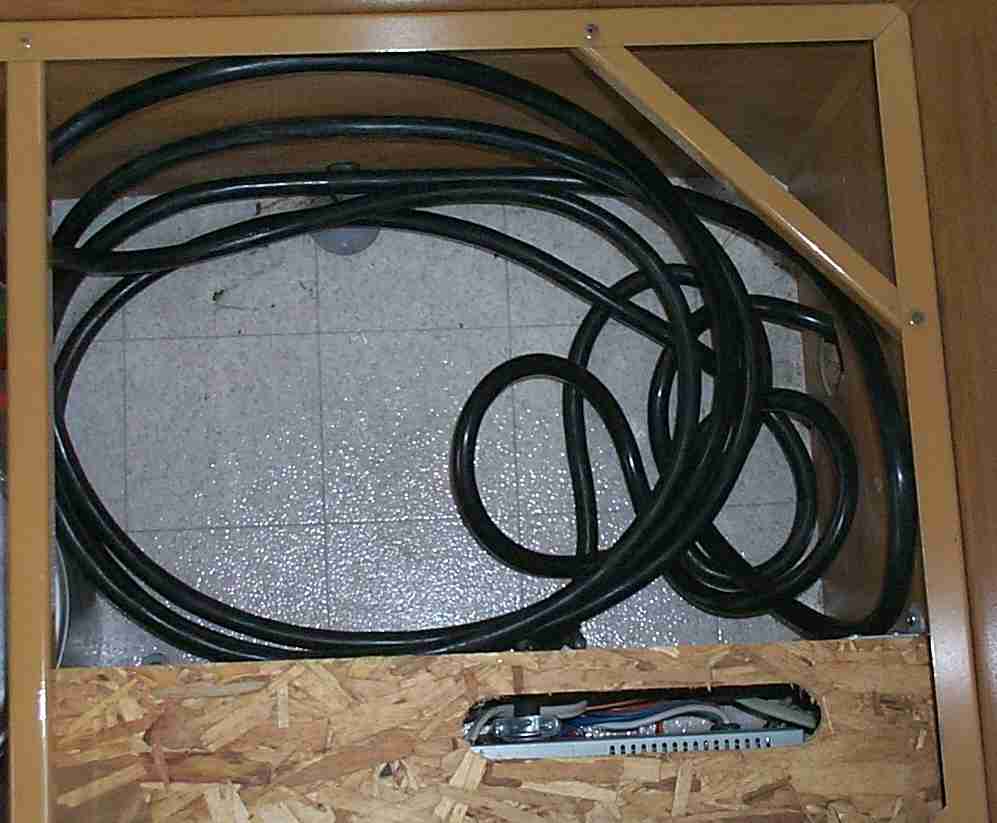
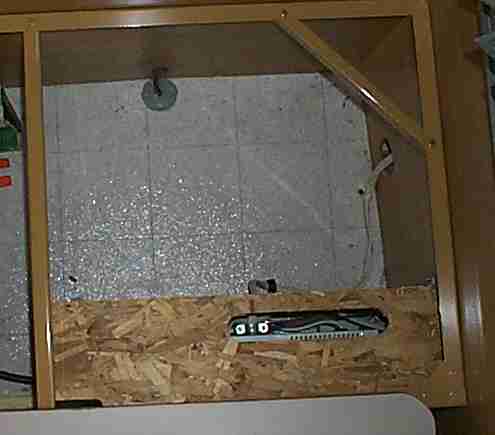
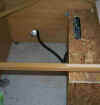
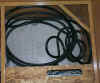 Under
one of your bench seats probably looks a little like the photo to the
left. When you pull it out or push it in it probably takes 2 people
to do it (1 inside and 1 outside). Under
one of your bench seats probably looks a little like the photo to the
left. When you pull it out or push it in it probably takes 2 people
to do it (1 inside and 1 outside). |
 To
begin this project pull your power cord entirely out of the mousehole. To
begin this project pull your power cord entirely out of the mousehole. |
 This
is where the entirely optional part of my project begins. Following
the directions provided with the kit you can just cut the original shore
power cable to length to stick out the mousehole. For some pop ups, the
converter is not readily assessable and you should not consider the use of
romex like I did. Move
inside and remove the wooden cover from over the converter. Note
some manufacturers may not cover it in this manner. You need to get
to the converter wherever it is located. This
is where the entirely optional part of my project begins. Following
the directions provided with the kit you can just cut the original shore
power cable to length to stick out the mousehole. For some pop ups, the
converter is not readily assessable and you should not consider the use of
romex like I did. Move
inside and remove the wooden cover from over the converter. Note
some manufacturers may not cover it in this manner. You need to get
to the converter wherever it is located. |
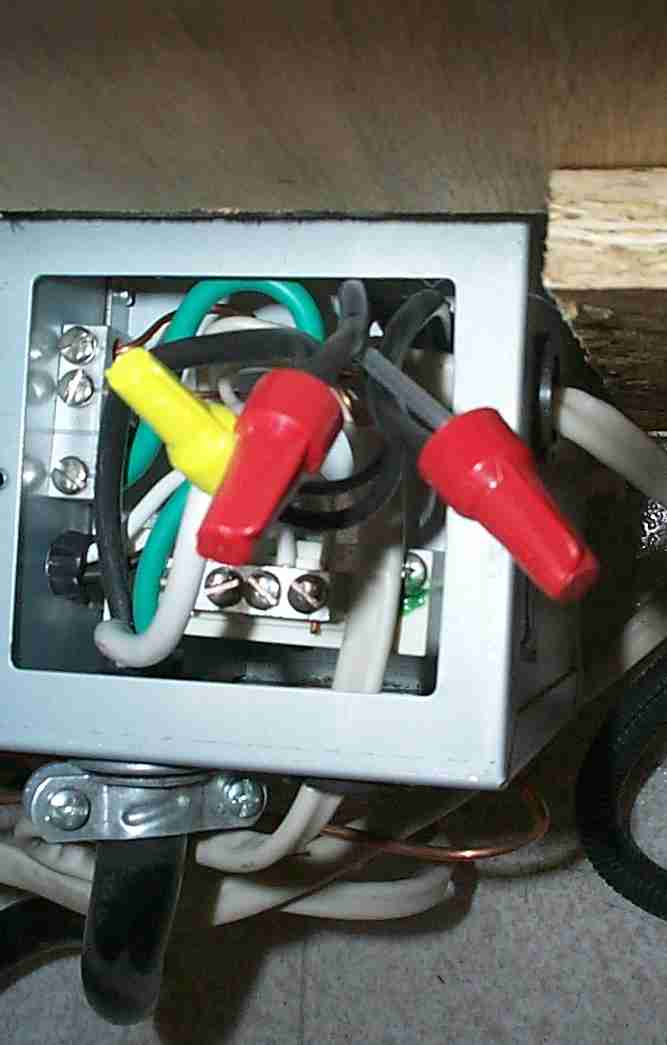
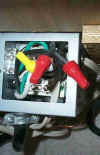 Look
at where the wires enter the converter. There should be an access
panel in this area. Open up the converter access panel and note
where the 3 wires from the shore power cord are attached. Normally
these wires are green (ground), white (neutral) and black (power) but may
be other colors. Disconnect these wires and remove the shore power cord. Look
at where the wires enter the converter. There should be an access
panel in this area. Open up the converter access panel and note
where the 3 wires from the shore power cord are attached. Normally
these wires are green (ground), white (neutral) and black (power) but may
be other colors. Disconnect these wires and remove the shore power cord. |
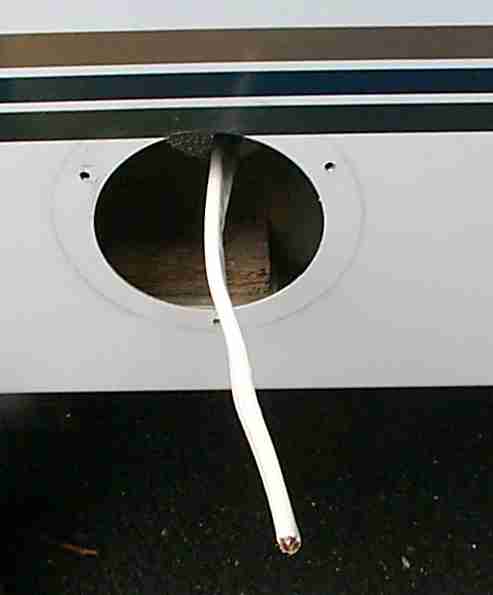
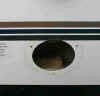 After
removing the cord, remove the plastic mousehole cover and the side of your
pop up should now look like the photo to the left. Do not throw away
the three screws that held it in place. You will need them to attach
the plug later. After
removing the cord, remove the plastic mousehole cover and the side of your
pop up should now look like the photo to the left. Do not throw away
the three screws that held it in place. You will need them to attach
the plug later. |
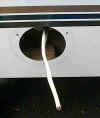 Run
the romex you purchased (or cutting a portion off the end of your power
cord if you follow the written directions) between the outside of the pop
up and the converter. While I started wiring at the converter and
worked to the outside, I think it would be easier if you wired the plug on
the side of the pop up first and then wired it to the converter. Run
the romex you purchased (or cutting a portion off the end of your power
cord if you follow the written directions) between the outside of the pop
up and the converter. While I started wiring at the converter and
worked to the outside, I think it would be easier if you wired the plug on
the side of the pop up first and then wired it to the converter. |
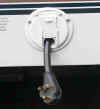
 Here
is what the new plug looks like installed on the side of the pop up.
If you look closely, there is an adaptor ring between the plug housing and
the side of the pop up. This adaptor is included with the kit.
Had I purchased the parts individually I may have been hard pressed to
find this ring on my own. Here
is what the new plug looks like installed on the side of the pop up.
If you look closely, there is an adaptor ring between the plug housing and
the side of the pop up. This adaptor is included with the kit.
Had I purchased the parts individually I may have been hard pressed to
find this ring on my own. |
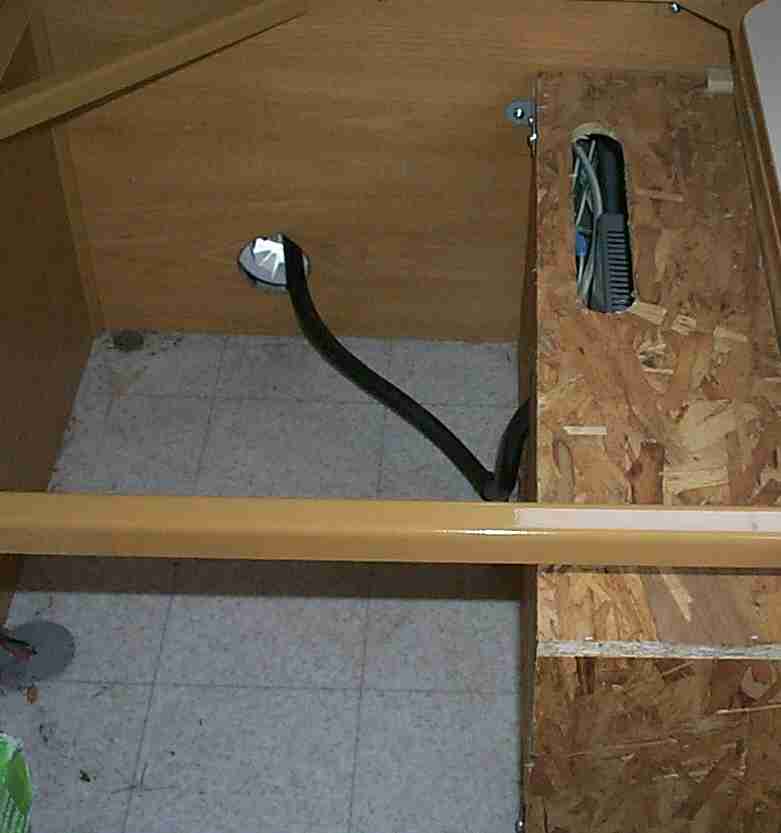
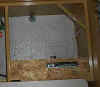 The
photo to the left shows what it looks like under the rear bench now.
Note I followed the contour of the converter and the wall with the romex.
You can also see all of the space I have now recovered for usable
storage. Do not store anything in this
area which may cut or damage the wire, The
photo to the left shows what it looks like under the rear bench now.
Note I followed the contour of the converter and the wall with the romex.
You can also see all of the space I have now recovered for usable
storage. Do not store anything in this
area which may cut or damage the wire, |
 Now
it is time to wire up the shore cord. Before you do anything, slide
the weatherproof cover over the cable. If you forget this step you
will be taking everything apart to add it later. Don't ask how I know this Now
it is time to wire up the shore cord. Before you do anything, slide
the weatherproof cover over the cable. If you forget this step you
will be taking everything apart to add it later. Don't ask how I know this |
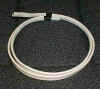
 You
can now wire the supplied end onto your existing cable. You may need
to trim down the wires to fit them inside this connector. You
can now wire the supplied end onto your existing cable. You may need
to trim down the wires to fit them inside this connector. |
  Slide
the weatherproof cover down the cable and cover the plug end. You
should now have a cable with the factory end which will plug into the park
power pole (photo to right) and the new end you have added which will plug
into the side of the pop up. Slide
the weatherproof cover down the cable and cover the plug end. You
should now have a cable with the factory end which will plug into the park
power pole (photo to right) and the new end you have added which will plug
into the side of the pop up. |

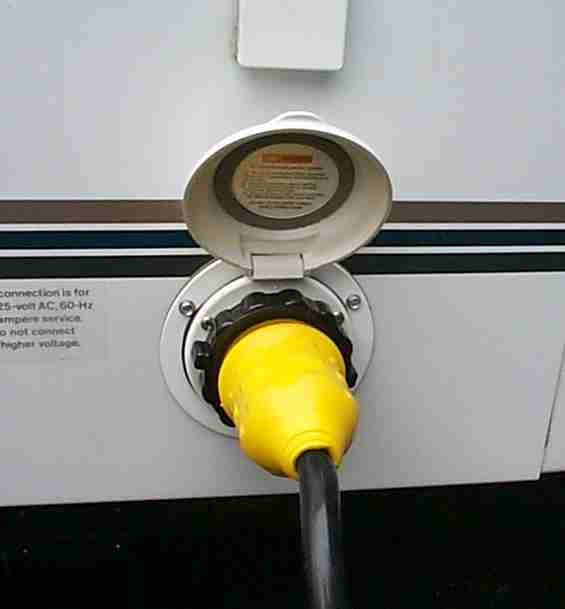
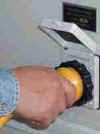
The
photo to the left shows how it looks in use.
When you are done be sure to check your work with a meter and polarity
tester. |
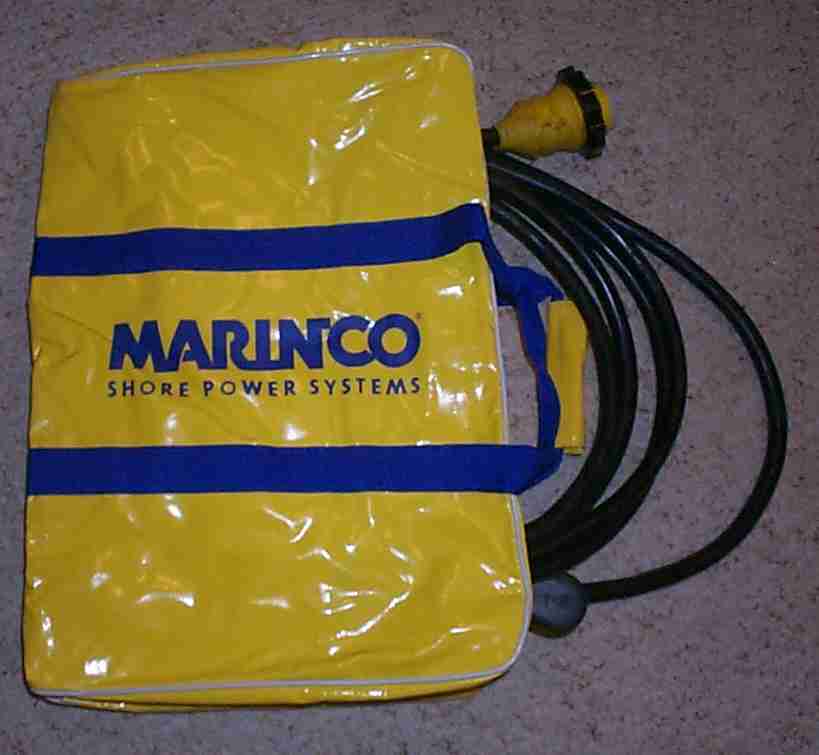
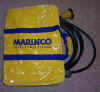 The
only problem I had with the detachable cord was what to do with it.
Well, I discovered Marinco
has a tote bag to carry their cords in. The
only problem I had with the detachable cord was what to do with it.
Well, I discovered Marinco
has a tote bag to carry their cords in.
|
I was surprised that the power cable weighs in at over 10
pounds! Now when we are going dry camping we will no longer need to haul
it around. If you have a checklist of parts, remember to add this to
your list so you don't forget it.
The project took only an hour or so to complete once I had all
the parts on hand. Before attempting to complete this project you should
be comfortable working with electric. While it is not on the scale of
rewiring you whole house, it is a little more than changing a light bulb.
Costs for this included:
$72.00 for the Marinco kit
$1.20 for the #10 romex
Comparing the "kit" price to the 3 major parts
included in the kit:
1. 30 amp socket for the side of the PU $58.00
2. 30 amp plug for the end of the cable $26.00
Weatherproof cover for the end of the cable $17.00
I could not find the adapter ring that goes around the
socket to fill the larger hole in the side of the pop up. Apparently Marinco
only offers this as part of the RV kit. The individual parts can be
found at any large marine store like West Marine or BoatUS.
Revised: June 24, 2019
|