|
Home
 Our
Camping Experience Our
Camping Experience
FAQ
Page
Guest
Book
Natasha Pages:
About
Natasha
Natasha
Pictures
How
Could You?
Doggie
Dictionary
Camping
With Your Dog
Camp Site Pages:
Our
Trips
Fort
Wilderness
DC
Camping
Camper Pages:
Our
Camper
Tow
Vehicle
Site
Statistics
Modification & Service:
Detachable
Power Cable
Modified
Drawers
Mirror
Single
Drain System
Drill
Lift System
LED
Light System
Accumulator
Tank
Florescent
Light
Bike
Rack
Outside
Shower
Batteries
in a PU
Bed
End Tray
Battery
Charge Cable
Stove
Counter
AC
Brace
WH
Wind Guard
RV
Plug @ Home
Awning
Base
12v
Power Adaptor
Battery
Meter
Water
Level Indicator
Tongue
Jack Service
Our
Bunk
Information:
Camping
With Your Dog
Camping
Checklist
Dry
Camping
Pop
Up Brakes
Break
Away Switch
Campsite
Safety
Towing
& Hitch Info
Sway
Information
Gray
Water
Porta
Potti
RV
Air Conditioning
Pop
Up Tires
Changing
a Flat Tire
Pop
Up Refrigerator
Camp
Site Power
Trailer
Dolly
Folding
Camp Table
Awning
Base
Level
Your PopUp
Winterize
Your PopUp
Spring
Set Up
Camp
Cooking Accessories
Buying
a Used PopUp
Message
Board Shorthand
Camping Links:
PopUpTimes
Camping
Links
Camping
Club Links
Manufacturer
Links
GSD Links:
MidAtlantic
GS Rescue
GS
Rescue of LA
Virginia
GS Rescue
Flying
Dog Press
|
Batteries on your Pop Up
Most pop up campers come equipped with a single 12v group 24
battery. In order to increase your :bank" of batteries you
have two choices:
- Add a second 12v battery to the original one
- Change out your battery to twin golf cart batteries
Both options are discussed below.
Changing a Single 12v Battery to Twin
6v Golf Cart Batteries
Our 2005
Niagara came equipped with a single 12v group 24 deep cycle battery.
We wanted to be able to have extended time dry camping
and knew that this single battery was not going to supply the juice we
needed. Rather than adding a second battery as we
did in our previous 2001 Santa Fe we decided to convert from a single 12v deep
cycle battery to two 6v golf cart batteries. Don't think that this page is
going to be all the information you need to know about batteries, I am only
going to scratch the surface. For more information I suggest reading "The
12volt Side of Life" by Mark S. Nemeth.
Lead acid batteries are generally classified by application
(what they are used for) and by construction (how they are made). The most
common application is automotive in which the battery is used for starting and
lighting. Deep cycle is another common application and is usually broken down
into specific applications such as RV, golf cart, renewable energy, and marine.
The major difference between the two application (automotive/deep cycle) is that
a deep cycle battery has the ability to be deeply discharged and charged many
times during its life. An automotive battery cannot withstand more than a few
deep discharges before failure.
First you need to understand that 12v DC deep cycle batteries
are designated by their "group", meaning the physical size of the
case. The common sizes you will see in RVs from smallest to largest are
group 24, group 27 and group 31.
| Battery |
A/H Rating |
Weight (lbs) |
Footprint |
Sq Inches |
| Group 24 |
85 |
44 |
11 X 7 |
77 |
| Group 27 |
105 |
50 |
13 X 7 |
91 |
| Group 31 |
130 |
67 |
13 X 7 |
91 |
| Twin 6v GC |
225 |
124 |
10" X 14" |
140 |
| |
|
|
|
|
As you can see from the table
above, adding a second 12v battery would still work but it would take up
valuable "real estate" on the "A" frame of the trailer that I
don't have to spare.
An additional consideration is
that golf cart batteries are more of a commercial grade product, while 12 deep
cycle batteries are more of a consumer grade product. What does this mean?
The golf cart batteries are built to a higher standard and can stand up to more
abuse than it's 12v cousin.
All photos are thumbnails,
click to see an enlarged version
|
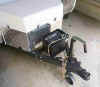 |
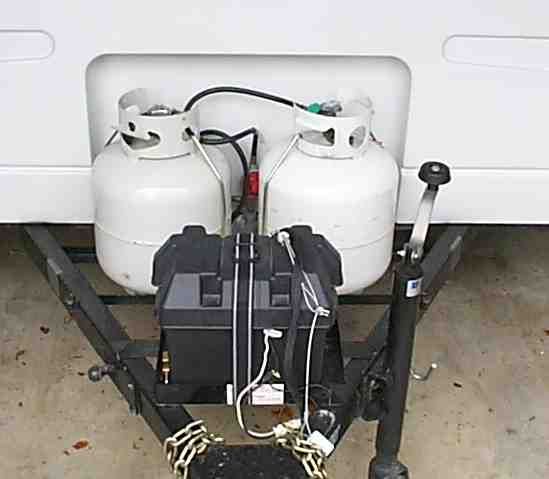
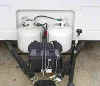
Here is what I started
with, a single group 24 deep cycle battery in a standard battery
box. Behind the battery box is the LP gas tank cover. Under
the cover are twin 20lb tanks which is a change for 2005 on the
Niagara. In 2004 it cam equipped with a single 30lb tank. |
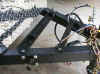 |
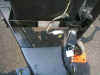
Removing the battery box
you can see the factory battery tray, which in my case was nothing more
than two steel "L" brackets pop riveted to the "A"
frame. After a couple of minutes with a measuring tape I decided
that all I needed to do was move the front "L" bracket forward
about two inches. This consisted of drilling out the rivets that
held it in place and drilling two new holes in the "A"
frame. Pop rivet it back in place and you are just about done.
The only other thing you need to do is move the battery stops which are on
the rear rail. These need to be moved a little farther apart to make
room for the width of the two batteries and boxes. Remember to take the
size of the battery boxes into consideration. |
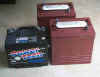 |
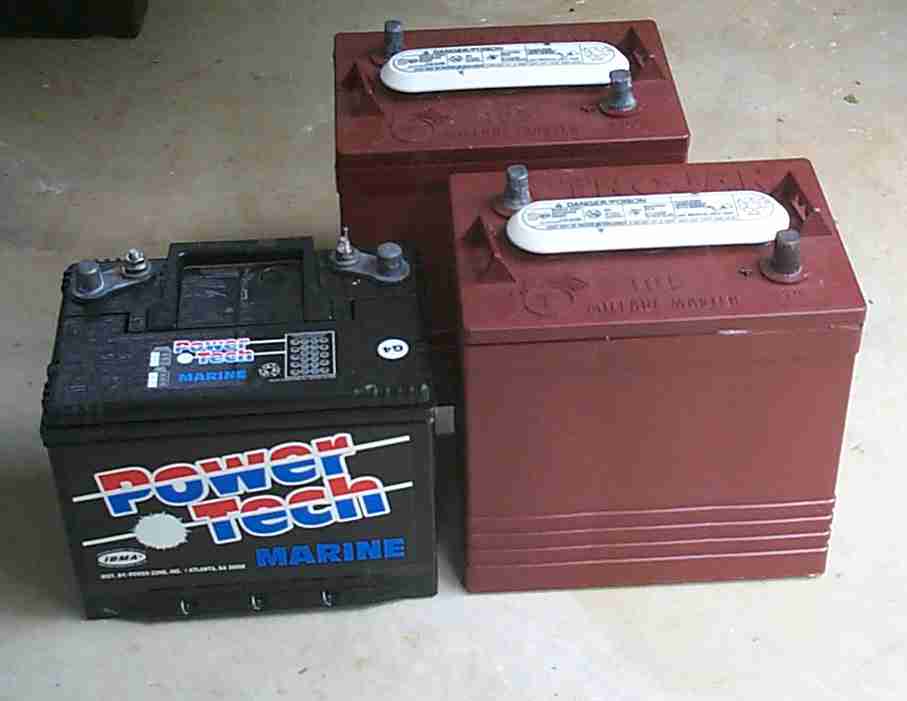
Here you see the original
group 24 battery as well as the two golf cart batteries. I selected Trojan
T-105 batteries due to great reviews I have read on the web.
Note that they are just a little taller than the original battery.
If you plan to try this mod, make sure that the extra height will not
interfere with your tongue jack. |
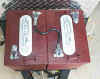 |
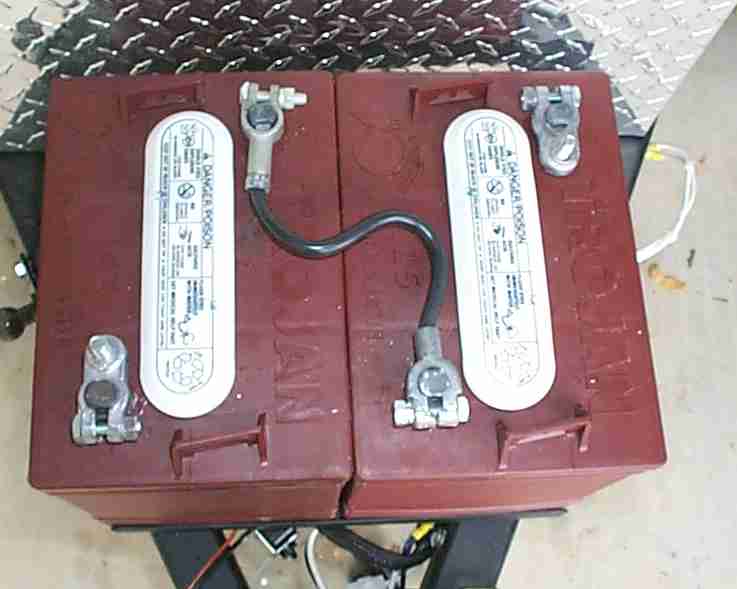
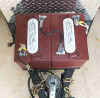
After moving the
"L" bracket forward I "dry fit" the batteries into the
redesigned tray. I was lucky that the front "L" bracket
was exactly the width of the two batteries. Note that the two batteries
are electrically tied together in "series", meaning the positive
terminal of the first battery is tied to the negative terminal of the
second battery. The two terminals you see here with no wires on them
are now the Positive and negative that you will connect to the pop up
electrical system. |
 |
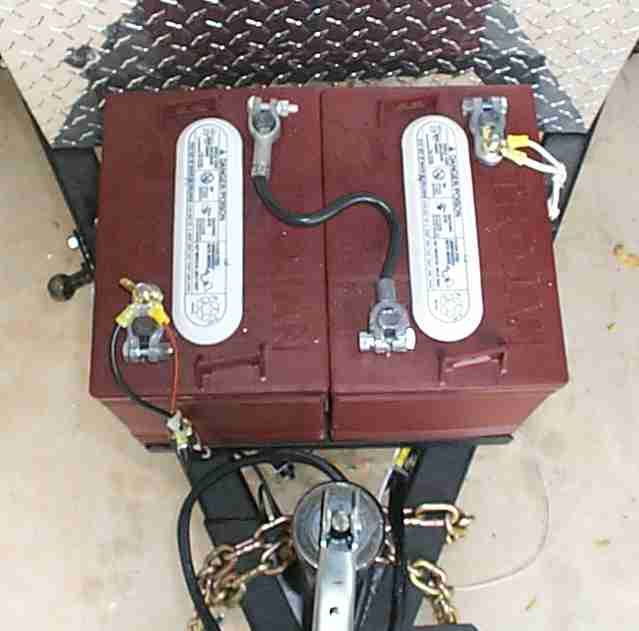
Here you see the final
product. Two 6v Trojan T-105 batteries in series providing 12v Dc to
the pop up. |
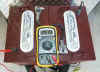 |
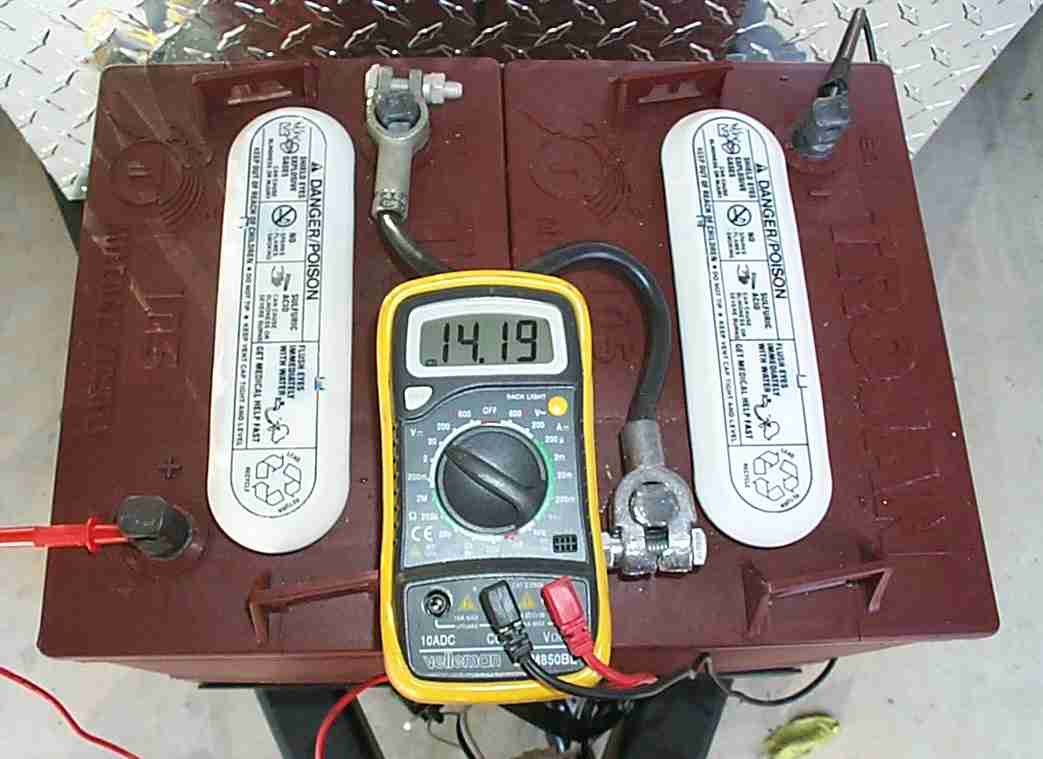
Rather than re-type a bunch
of information about battery maintenance, I suggest you read up on
it. Check out the Trojan
Battery Tech Support pages for more information. Here you see
the voltage right after I charged the batteries. If you are going to
use a meter to determine the state of charge, remember the batteries need
to "rest" (no charging/discharging) for a few hours before you
check the voltage. |
|
Now, should you decide to make this change understand that you
may need a new charger. As soon as I was done I hooked up my Guest 6a
charger (see it below) to top them off. After about an hour, OK maybe 2
the charger was HOT. Not so hot as to keep me from holding it, but much hotter
than I remember. Looking at the Specs on the back it is rated to charge a 125
A/H battery. Well..... the new batteries clock in at around 225 A/H
Now, the chart below is from the Trojan
Battery web page. As you can see, in my application fully charged batteries
should register 12.73 - 12.74v DC.
State
of charge as related to specific gravity and
open circuit voltage
|
Percentage
of Charge
|
Specific
Gravity Corrected to
80o F
|
Open-Circuit
Voltage
|
|
6V
|
12V
|
24V
|
36V
|
48V
|
|
100
|
1.277
|
6.37
|
12.73
|
25.46
|
38.20
|
50.93
|
|
90
|
1.258
|
6.31
|
12.62
|
25.24
|
37.85
|
50.47
|
|
80
|
1.238
|
6.25
|
12.50
|
25.00
|
37.49
|
49.99
|
|
70
|
1.217
|
6.19
|
12.37
|
24.74
|
37.12
|
49.49
|
|
60
|
1.195
|
6.12
|
12.24
|
24.48
|
36.72
|
48.96
|
|
50
|
1.172
|
6.05
|
12.10
|
24.20
|
36.31
|
48.41
|
|
40
|
1.148
|
5.98
|
11.96
|
23.92
|
35.87
|
47.83
|
|
30
|
1.124
|
5.91
|
11.81
|
23.63
|
35.44
|
47.26
|
|
20
|
1.098
|
5.83
|
11.66
|
23.32
|
34.97
|
46.63
|
|
10
|
1.073
|
5.75
|
11.51
|
23.02
|
34.52
|
46.03
|
Now, on my first real test of the batteries I went
camping for five nights at a "dry" campground. I used the
batteries for lights, water pump, fans and the furnace for about 1 hour a
day. Here are my readings:
| Day |
Voltage v DC |
Comments |
| Wednesday (begin) |
12.47 |
Apparently I started with less than 100% |
| Thursday |
12.40 |
78% |
| Friday |
12.36 |
73% |
| Saturday |
12.33 |
71% |
| Sunday |
12.20 |
60% |
| Monday (end) |
12.13 |
55% |
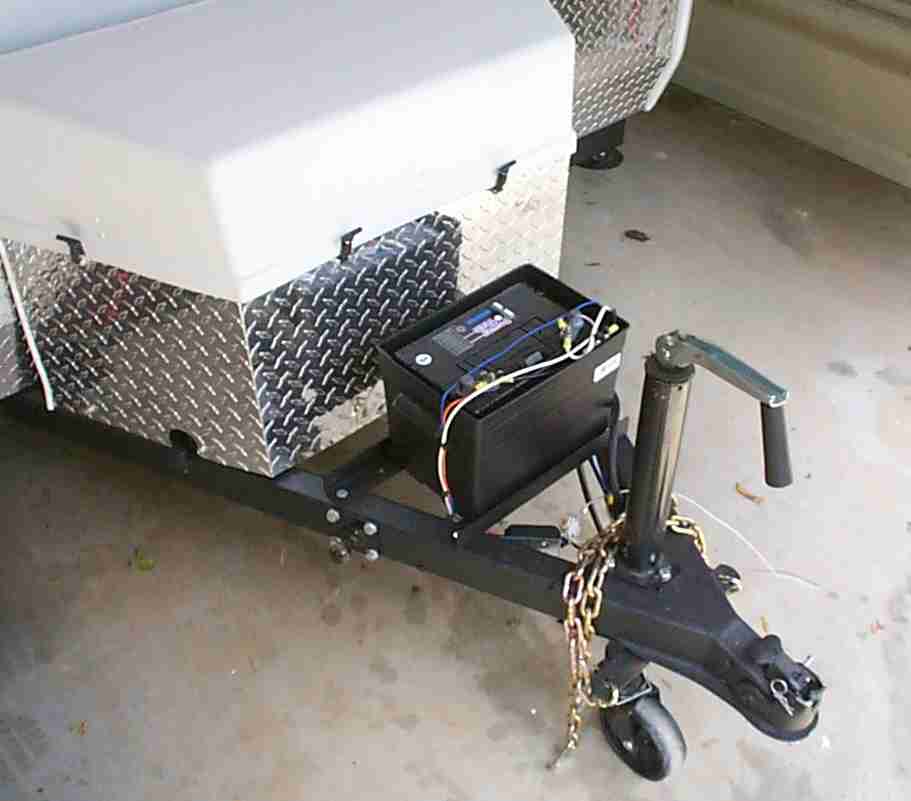
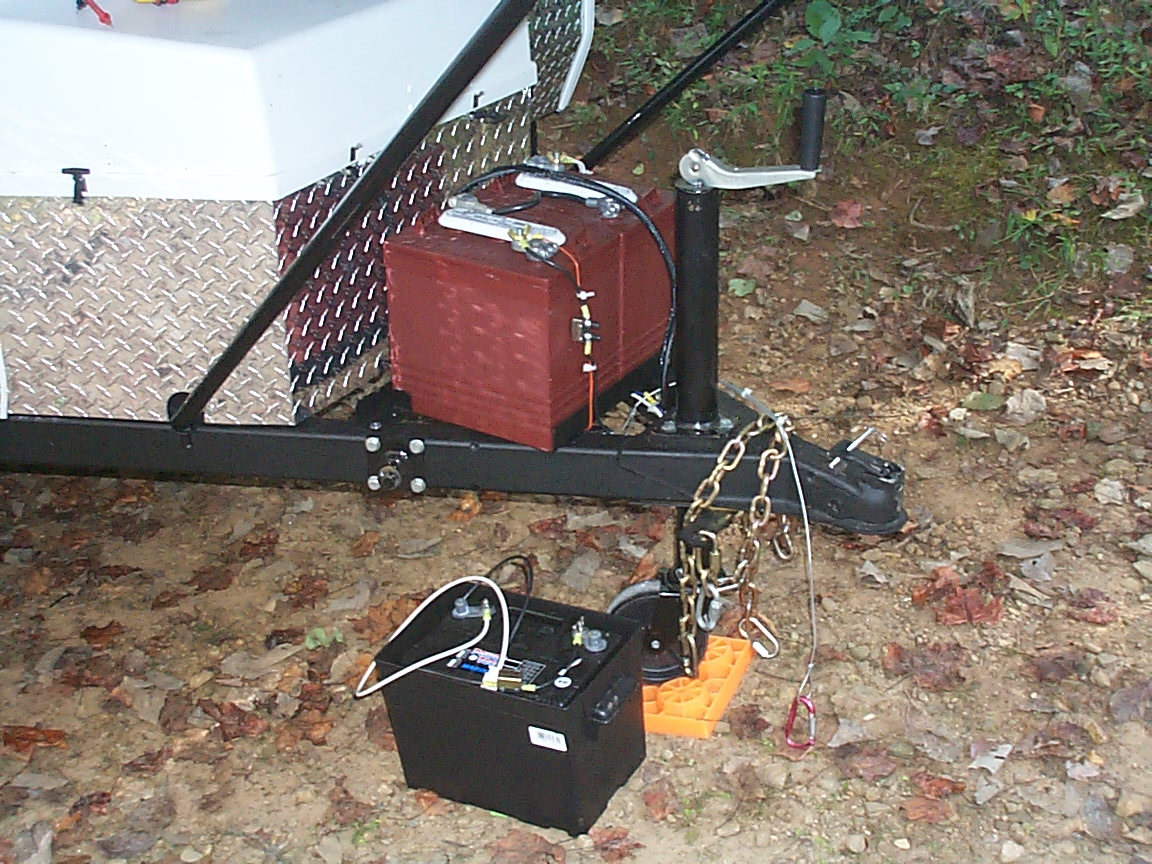
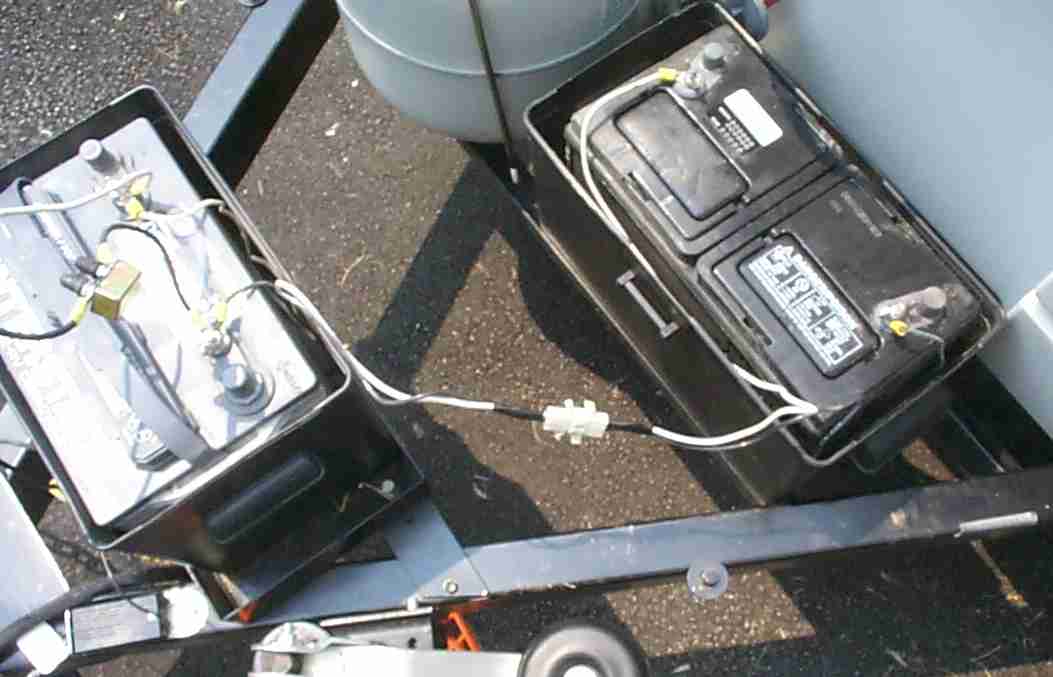
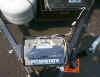
Here you see the golf cart batteries "in use".
On the ground next to them is the 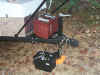 original
group 24 deep cycle that came with the pop up. Look close on top of the
group 24, for about $10 Peco Campers sells a wiring pigtail that has the
Fleetwood connector, a circuit breaker, about 2 feet of wire and the connectors
to connect to the battery terminals. Now when we are dry camping for more
than a couple of days I bring this battery as a "backup". Wit
the new wire connected to this battery it is very easy to disconnect the golf
cart batteries and connect this battery. original
group 24 deep cycle that came with the pop up. Look close on top of the
group 24, for about $10 Peco Campers sells a wiring pigtail that has the
Fleetwood connector, a circuit breaker, about 2 feet of wire and the connectors
to connect to the battery terminals. Now when we are dry camping for more
than a couple of days I bring this battery as a "backup". Wit
the new wire connected to this battery it is very easy to disconnect the golf
cart batteries and connect this battery.
Battery boxes for the T-105s can be a pain in the ....
Marine stores sell several boxes for two T-105 batteries, but
they are over $100 each. After exhaustive searching I found that the
standard plastic battery box has a cousin that will fit the T-105. This box
will only hold a single battery, but two boxes for less than $30 (OK, plus
shipping) is my cup of tea.
Product
# 13228 GC-2 Battery Box
Note, everything below this point deals with two 12v
batteries!
************************************
Adding a Second 12v Battery When You
Already Have One
You can add a second battery to
your Pop-Up (if it already has one) easily. Adding a second battery,
depending on the size can more than double the "dry camping" time you
have available to you. While it is nice to have two exactly matched
batteries (series, age & condition) it is not necessary.
All photos are thumbnails,
click to see an enlarged version
|
|
|
In this photo, the white "quick connect" (center
of the picture) is where the battery (batteries would connect to the
Pop-Up 12v electrical system |
|
|
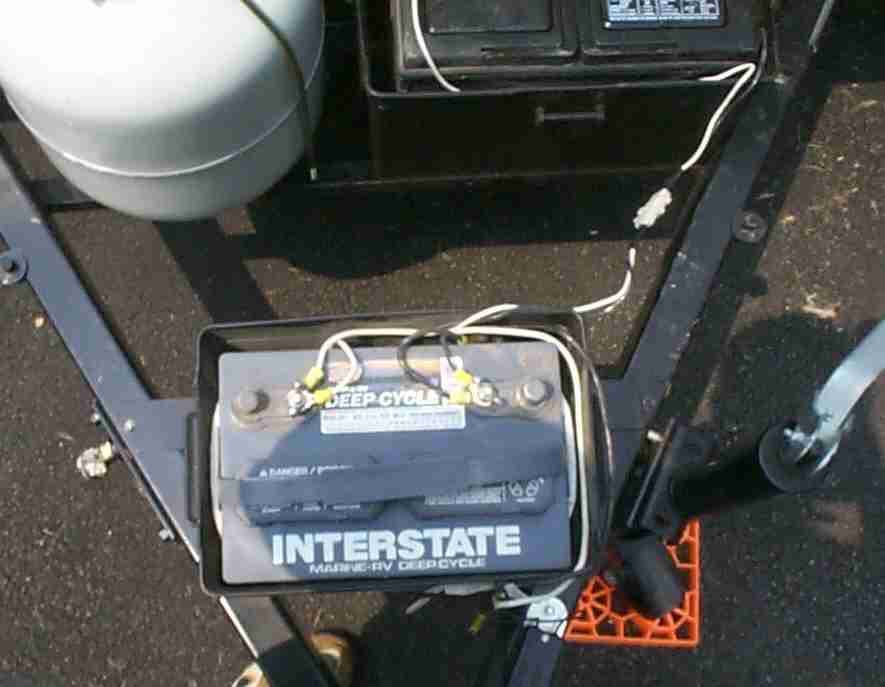
In this photo, we are looking down at the
"original" group 24 battery that came with our Coleman Santa
Fe. The stock battery tray is installed at the point of the a-frame
of the tongue, right over the point the electrical wiring exits the side
of the frame member. |
|
|
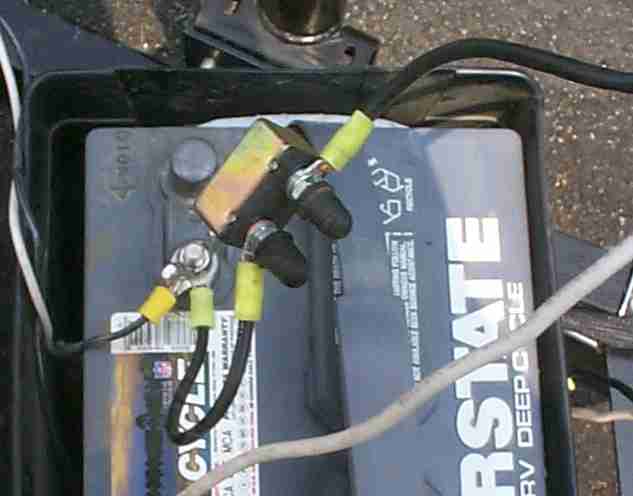
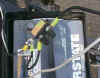
A close up photo shows the 12 breaker installed between
the batteries and the trailer electrical system. Always install a
fuse or breaker as close to the batteries as possible to avoid damaging
your electrical wiring and/or starting a fire if problems should arise. |
|

|
This second overhead shot shows the original battery (on
the left) connected to the new group 27 battery (on the right). I
installed a new battery box on the LP Gas tray, having had to move the
tank over about 2 inches. Note the quick disconnect installed
on the wires between the two batteries. If you use such a device,
make sure that when disconnected, there are no bare posts or connectors to
short out. |
|
|
Wiring between two 12v DC batteries is simple, positive to
positive; negative to negative. This wiring is called
parallel. Do NOT connect in series
unless you are using 6v DC batteries.. |
|
|
I connected
my batteries together with #12 stranded copper wire.
I
violate the rule on mis-matched batteries. I carry both a group 24 and a
group 27, but only when dry camping. The only way one battery will try
to charge the other is if you connect a discharged battery
to a charged battery. Just like water seeking
it's level, the charged battery will try to charge the weaker one.
I have read
almost every battery web site I can find. The only caution about mis-matched
batteries I could find dealt with charging them. If you charge them
connected together, either the group 27 will not fully charge or the
group 24 will over charge. For this reason I charge them individually
(not connected together) with a quality charger in the garage before and
after every trip. With both at 12.7 volts, connecting them together will
not cause a mis-match.
The trickle
charge from the tow vehicle is so little I don't worry about it.
When camping
at sites with electric, I only connect one battery.
Simple Rules
1. NEVER connect a discharged battery to a charged one.
2. Charge each battery individually using a quality charger, not
your pop up converter before your dry camping trip. See the box
below for a description of the charger I use.
3. Connect the batteries together in parallel while fully charged
and use them together as a "single battery".
4. Charge each battery individually using a quality charger, not
your pop up converter after your dry camping trip. Never store a
battery in a discharged state.
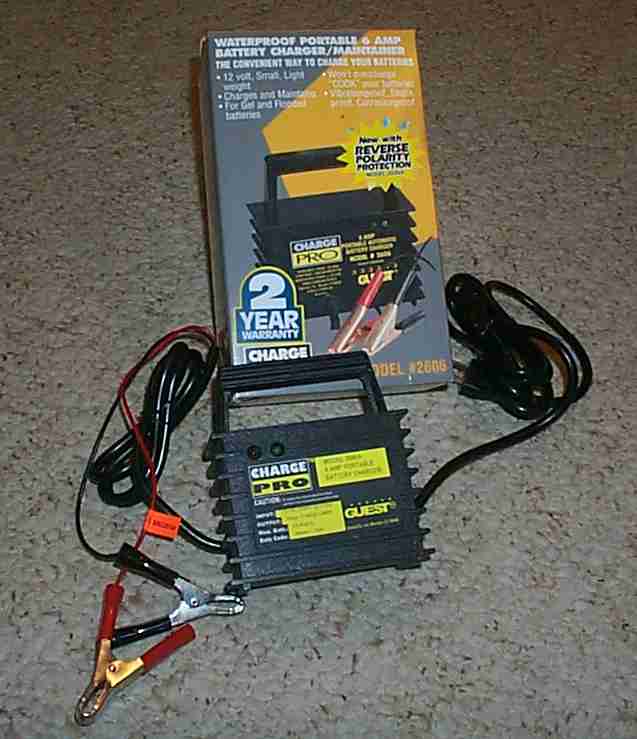
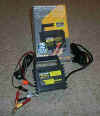 You want to use a quality 3 stage charger to both charge and
maintain your battery (ies). I have a Guest 6 amp 3
stage portable charger (model 2606A) which is designed
for charging, maintenance and storage.
You want to use a quality 3 stage charger to both charge and
maintain your battery (ies). I have a Guest 6 amp 3
stage portable charger (model 2606A) which is designed
for charging, maintenance and storage. |
As I seldom run
the batteries too far down, I only needed the 6 amp charger
but a 10 amp is available as model 2612ASome of the nice
features of this charger are:
- It is totally waterproof, so no worries if you need to
charge in the driveway and a sudden rainstorm comes up.
- It is reverse polarity protected in case you hook it up
backwards
You can check out this charger and other products at the Marinco/Guest
Webpage
|
Caution
As most Pop Up
manufacturers place both the LP Gas tank and the 12v battery in
proximity to each other on the trailer tongue care should be used in any
situation in which the battery may "spark". This could
include connecting/disconnecting the battery wires as well as connecting
an external battery charging source. If there is any chance of LP
Gas vapor (did you just change the tank and some gas vented?) being
present DO NOT do anything that may cause a spark until the gas
has had time to dissipate.
The main reason for the quick connect between the batteries is
to allow removal of 1 battery and installation of a second LP gas tank for
fall/winter camping.
If need be, you can
charge the batteries while dry camping. Take a look at my charge
cable page.
|
Revised: July 30, 2006
|