|
Home
 Our
Camping Experience Our
Camping Experience
FAQ
Page
Guest
Book
Natasha Pages:
About
Natasha
Natasha
Pictures
How
Could You?
Doggie
Dictionary
Camping
With Your Dog
Camp Site Pages:
Our
Trips
Fort
Wilderness
DC
Camping
Camper Pages:
Our
Camper
Tow
Vehicle
Site
Statistics
Modification & Service:
Detachable
Power Cable
Modified
Drawers
Mirror
Single
Drain System
Drill
Lift System
LED
Light System
Accumulator
Tank
Florescent
Light
Bike
Rack
Outside
Shower
Batteries
in a PU
Bed
End Tray
Battery
Charge Cable
Stove
Counter
AC
Brace
WH
Wind Guard
RV
Plug @ Home
Awning
Base
12v
Power Adaptor
Battery
Meter
Water
Level Indicator
Tongue
Jack Service
Our
Bunk
Information:
Camping
With Your Dog
Camping
Checklist
Dry
Camping
Pop
Up Brakes
Break
Away Switch
Campsite
Safety
Towing
& Hitch Info
Sway
Information
Gray
Water
Porta
Potti
RV
Air Conditioning
Pop
Up Tires
Changing
a Flat Tire
Pop
Up Refrigerator
Camp
Site Power
Trailer
Dolly
Folding
Camp Table
Awning
Base
Level
Your PopUp
Winterize
Your PopUp
Spring
Set Up
Camp
Cooking Accessories
Buying
a Used PopUp
Message
Board Shorthand
Camping Links:
PopUpTimes
Camping
Links
Camping
Club Links
Manufacturer
Links
GSD Links:
MidAtlantic
GS Rescue
GS
Rescue of LA
Virginia
GS Rescue
Flying
Dog Press
|
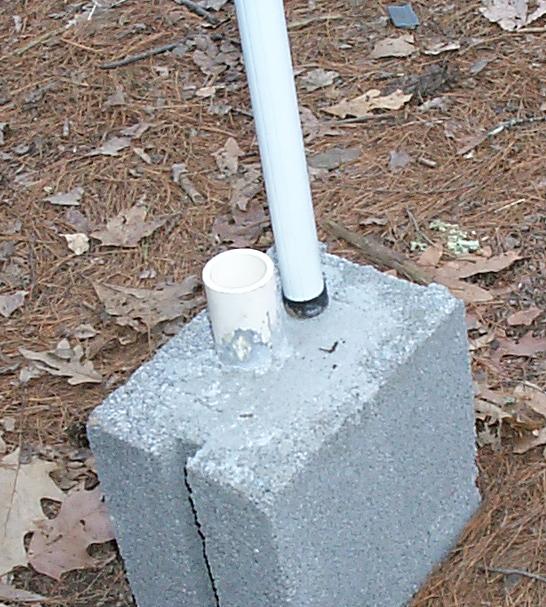
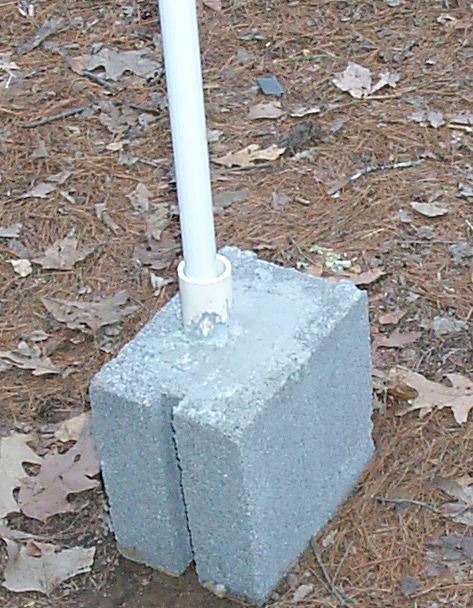
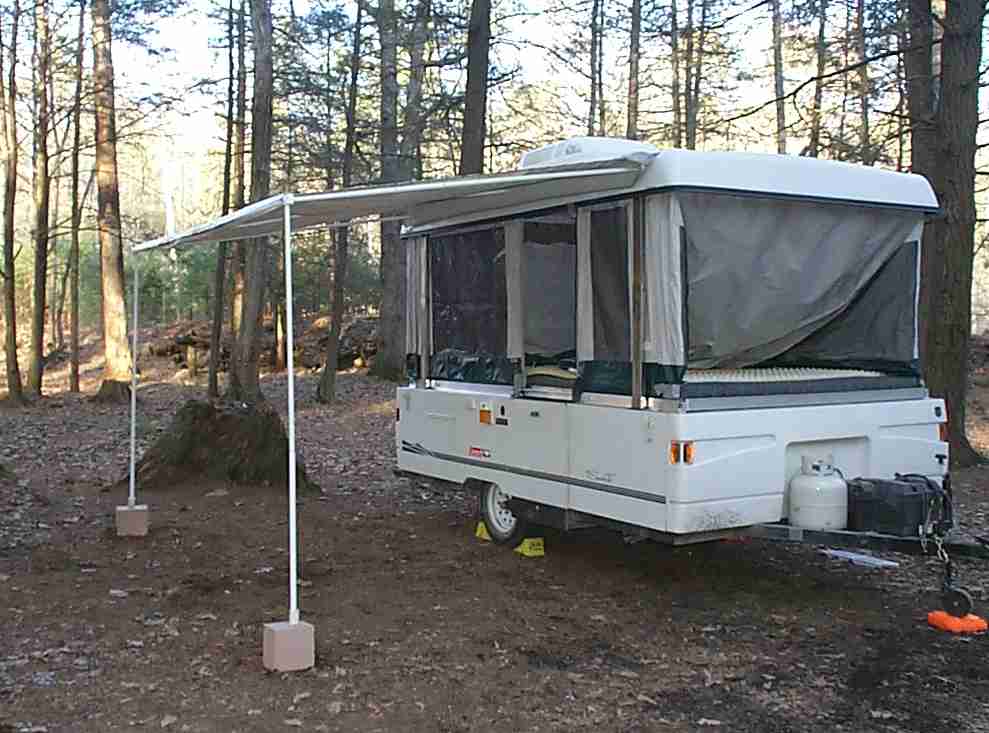
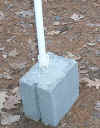
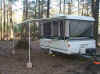
I
found it hard to set up the awning alone, so I devised these awning bases.
I started with 1 concrete building block and divided it in half (be sure the
block has 3 cells). Into the open cell I placed a short piece of PVC
pipe that the the awning support pole would fit into, then filling the cell
with cement.
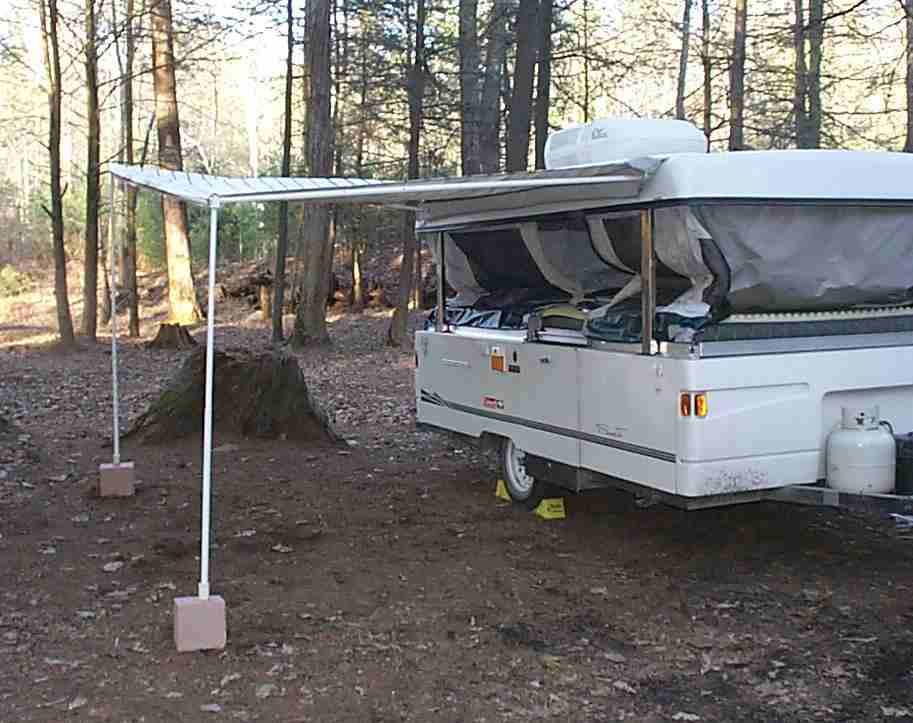
Now,
set up is easy! Crank the top up half way, unzip the awning and unroll.
Set each awning leg in the base and then set the 3 bars from the camper top to
the outside awning edge. Adjust the bases to have the poles upright,
then finish cranking up the camper top.
All photos are thumbnails,
click to see an enlarged version
|
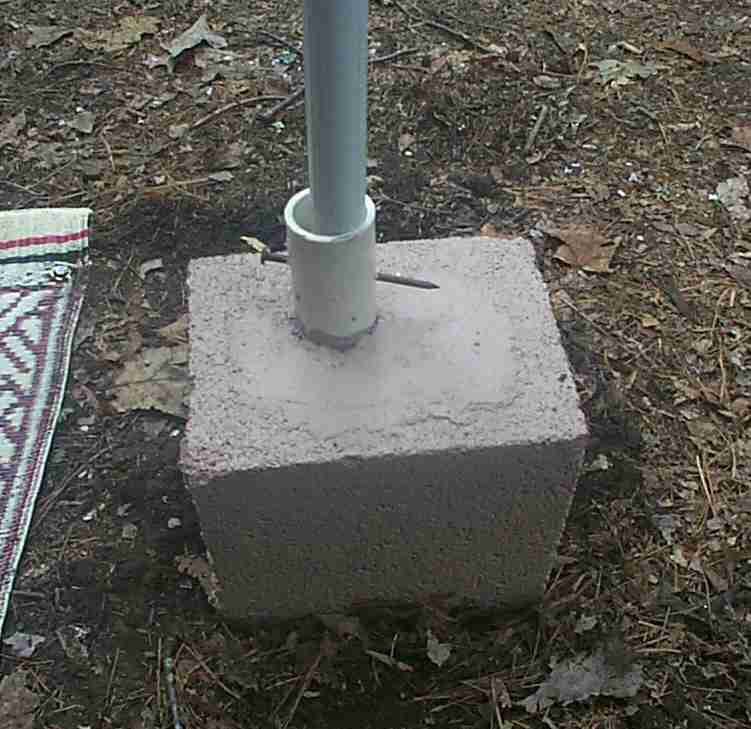
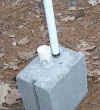  Here are the original bases, without paint. Here are the original bases, without paint.
See the box on the bottom of the page for my new bases
|

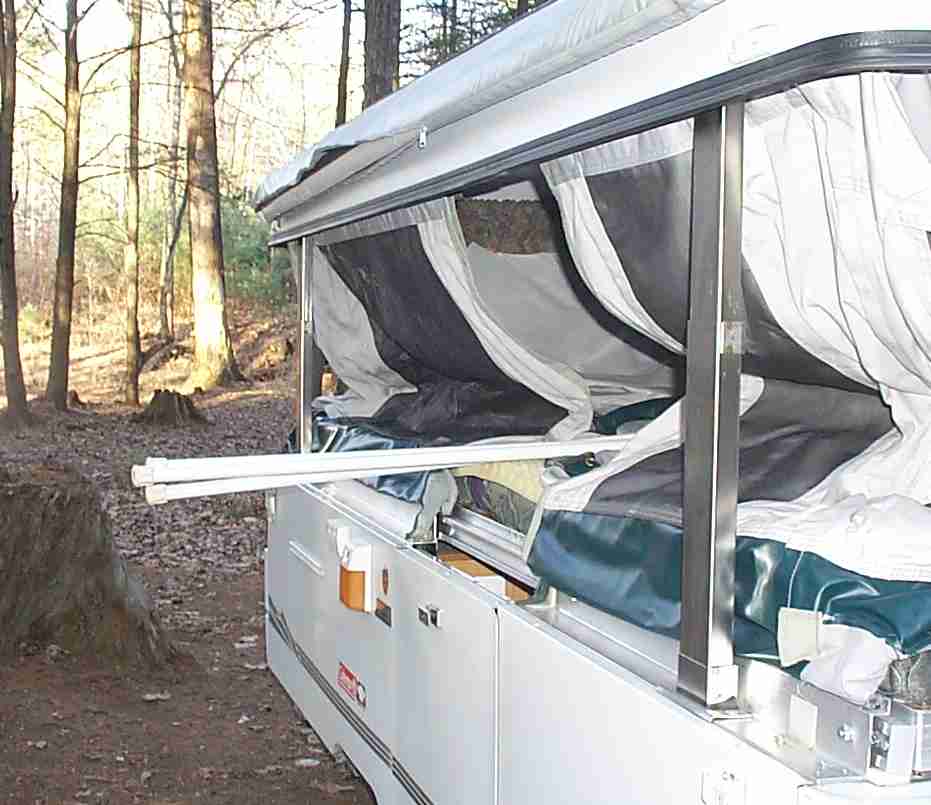
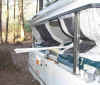
The first step is to unzip the awning bag half way and remove the
poles. Set out the awning bases at the approximate location they
will be used.
|
Crank the top up half way, or as high as you can comfortably wok on the
bag/awning. For ease of use, I place the awning poles on the bunk
where I can grab them easily.
|
|
Now you can unzip the awning bag the rest of the way and
unroll the awning. Drop the legs into the bases and grab one of the
awning poles from the pop up bunk. Place this pole in the middle
position (you will need to keep holding the outer awning frame as the
bases can't support it at this point). Once the middle stand off
pole is in place the awning will now support itself. |
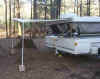
Insert the other stand off poles, then crank the pop up roof up.
Your awning is now set up. Just remember that if rain is even a
possibility lower one side of the awning to allow water to run off. |
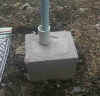
To keep the awning from rising during periods of high wind without the
use of ropes, I drilled the base and the pole and insert a pin. Now
wind would need to lift the block along with the leg.
|
|
To cut the block in half, SLOWLY chip along the intended break point with a chisel or block hammer.
It takes a few minutes to get it started but it will finally break along the line you are scoring. Don't
rush it or try to do it in one shot.
For transport they ride just inside our stepper door, on top of the rubber Coleman floor
mat.
Both the block and cement are available at Home Depot. Go to the building materials isle (around the lumber) and
ask for small bags of cement. The small bags are used for patching jobs, but work well for this.
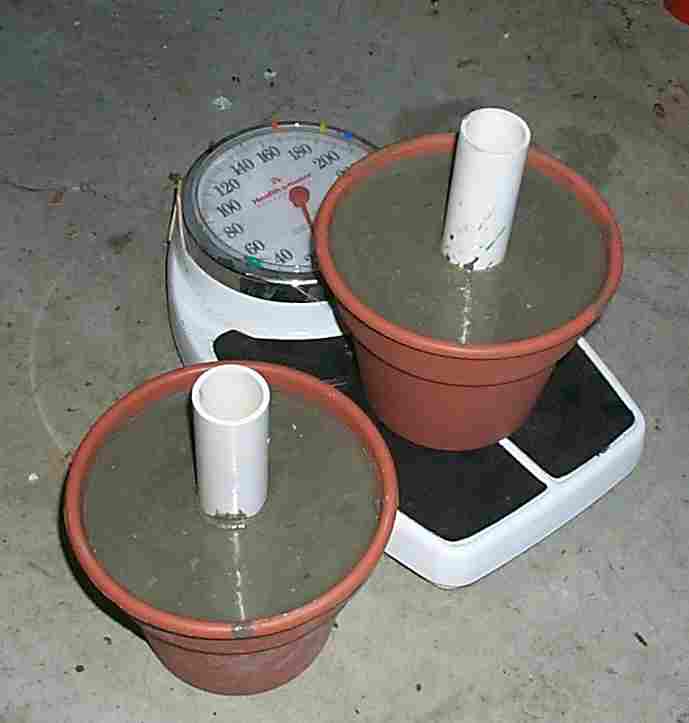
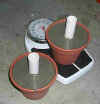 After
posting this page, several people also built bases and modified the
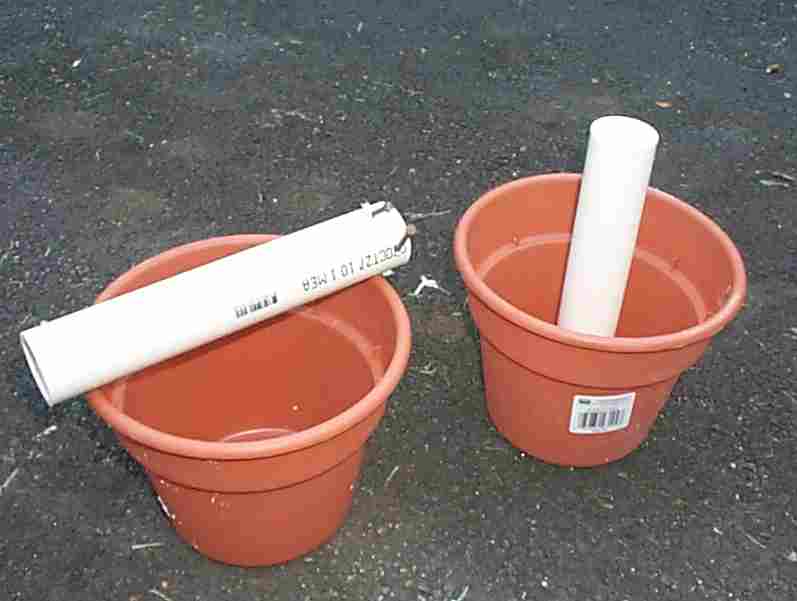
original design. One that I really liked was to use small flower
post instead of cement blocks. These look a lot nicer and are easier
on the toes if you kick them. An additional advantage is the flower pots
filled with cement are a little lighter, saving me about 8 pounds for the
pair. To the lef t
you see the finished product as the cement is drying. To the right
the flower pots and the PVC I used. Note the piece of PVC on top of
the left pot. I drilled the bottom of the PVC and placed 2 nails
through each one to give the concrete something to grab on to. t
you see the finished product as the cement is drying. To the right
the flower pots and the PVC I used. Note the piece of PVC on top of
the left pot. I drilled the bottom of the PVC and placed 2 nails
through each one to give the concrete something to grab on to.
|

|
Revised: May 08, 2007
|