|
Home
 Our
Camping Experience Our
Camping Experience
FAQ
Page
Guest
Book
Natasha Pages:
About
Natasha
Natasha
Pictures
How
Could You?
Doggie
Dictionary
Camping
With Your Dog
Camp Site Pages:
Our
Trips
Fort
Wilderness
DC
Camping
Camper Pages:
Our
Camper
Tow
Vehicle
Site
Statistics
Modification & Service:
Detachable
Power Cable
Modified
Drawers
Mirror
Single
Drain System
Drill
Lift System
LED
Light System
Accumulator
Tank
Florescent
Light
Bike
Rack
Outside
Shower
Batteries
in a PU
Bed
End Tray
Battery
Charge Cable
Stove
Counter
AC
Brace
WH
Wind Guard
RV
Plug @ Home
Awning
Base
12v
Power Adaptor
Battery
Meter
Water
Level Indicator
Tongue
Jack Service
Our
Bunk
Information:
Camping
With Your Dog
Camping
Checklist
Dry
Camping
Pop
Up Brakes
Break
Away Switch
Campsite
Safety
Towing
& Hitch Info
Sway
Information
Gray
Water
Porta
Potti
RV
Air Conditioning
Pop
Up Tires
Changing
a Flat Tire
Pop
Up Refrigerator
Camp
Site Power
Trailer
Dolly
Folding
Camp Table
Awning
Base
Level
Your PopUp
Winterize
Your PopUp
Spring
Set Up
Camp
Cooking Accessories
Buying
a Used PopUp
Message
Board Shorthand
Camping Links:
PopUpTimes
Camping
Links
Camping
Club Links
Manufacturer
Links
GSD Links:
MidAtlantic
GS Rescue
GS
Rescue of LA
Virginia
GS Rescue
Flying
Dog Press
|
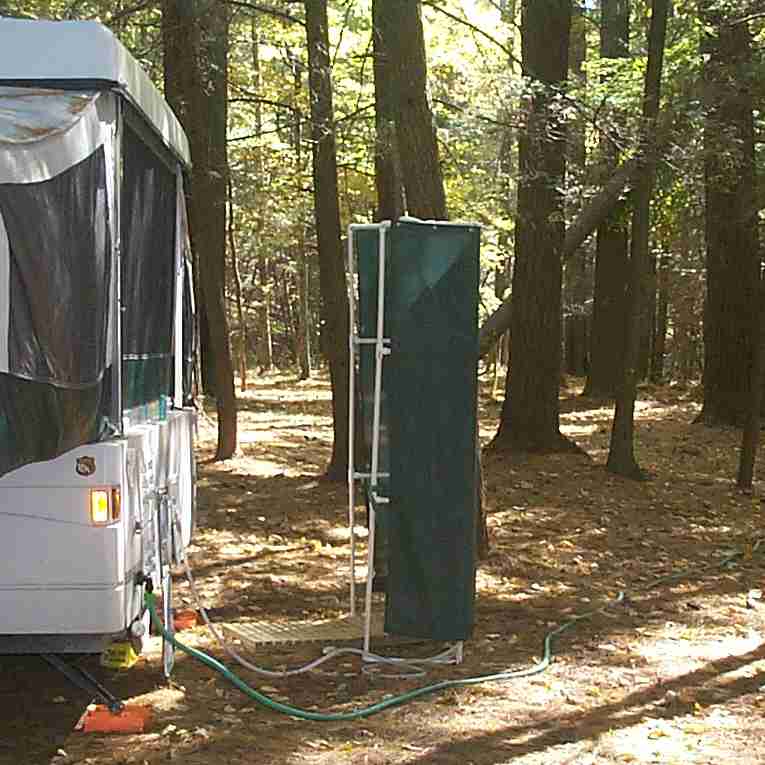
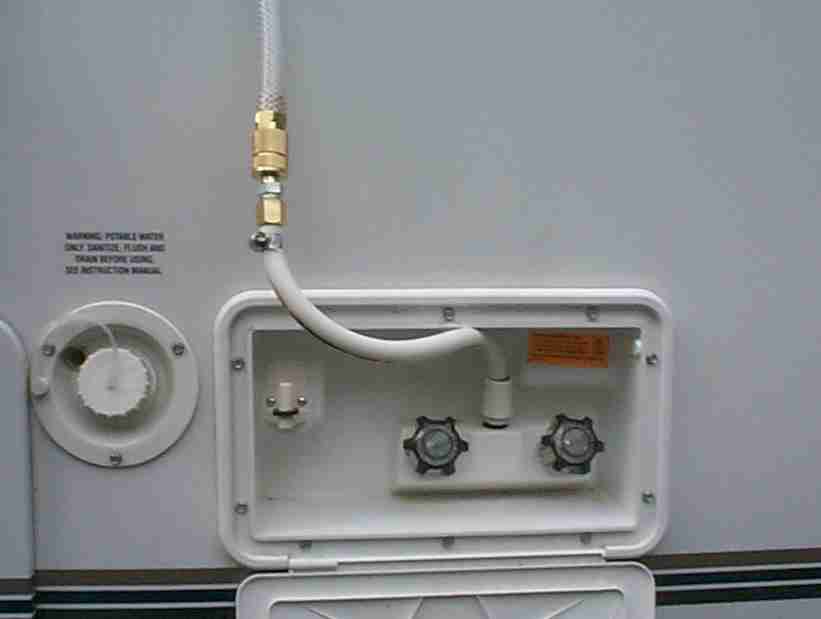
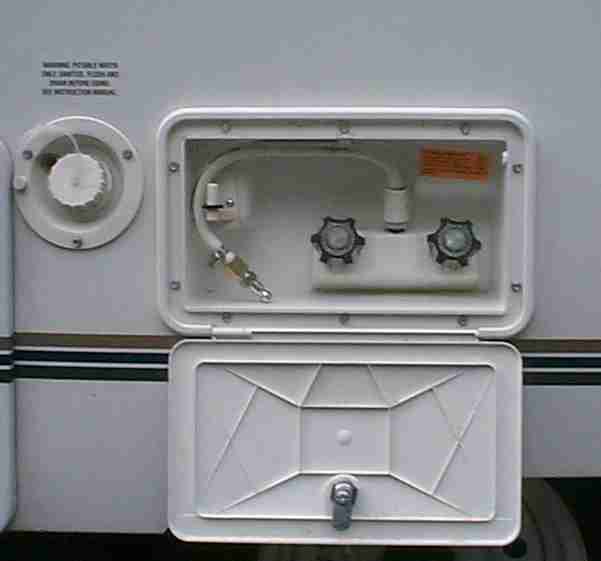
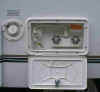
Our Outside Shower
All photos are thumbnails,
click to see an enlarged version
. Now, we used this set up a lot more when we had the Santa
Fe, but I have the Niagara set up to use it the
same way. This provides us with a curtain for some privacy, a shower stand
as well as an extended shower hose, We only use this set up when primitive camping and no
shower facilities are available. Even with the curtain I am afraid of what
folks would think of me if I used it in a campground. As we do not use a water capture system
for this shower we make sure of several things:
1. All running water will not cause erosion of soil.
2. Biodegradable soap is used.
No water runoff will go near ANY
source of water (stream, pond etc.)
Any ideas on an easily transported water capture system
accepted!
The photo above shows our shower stand as we use it.
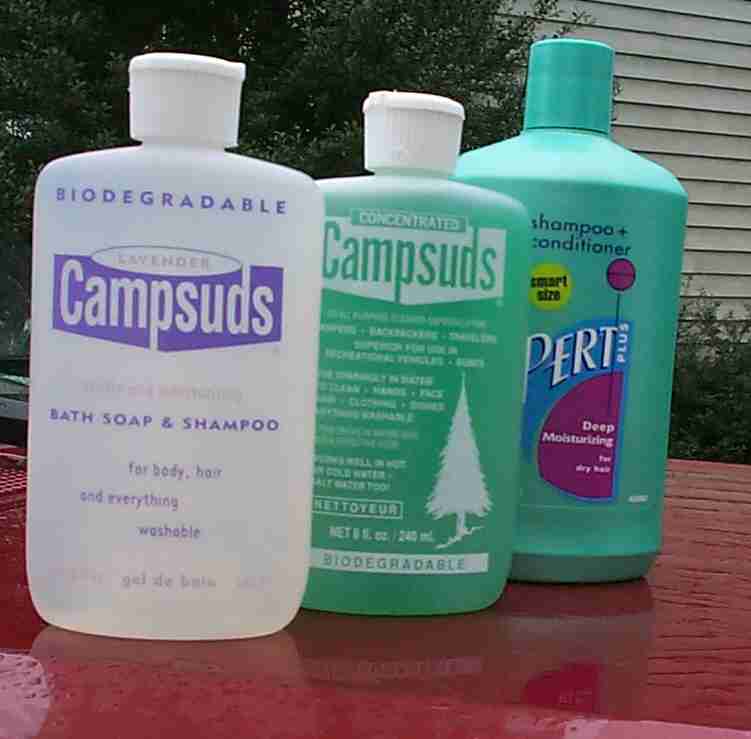
 Campsuds
now makes biodegradable bath soap/shampoo. In the photo to the
right, it is the left bottle. I found it at Galyan's,
but I am sure it available other places. In the middle is the
standard Campsuds and on the right, Pert - which is only used in bath
houses. See my Dry Camping page for
more information Campsuds
now makes biodegradable bath soap/shampoo. In the photo to the
right, it is the left bottle. I found it at Galyan's,
but I am sure it available other places. In the middle is the
standard Campsuds and on the right, Pert - which is only used in bath
houses. See my Dry Camping page for
more information |
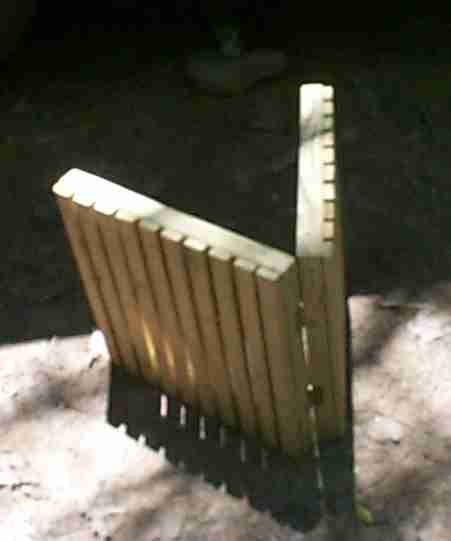
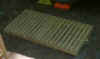
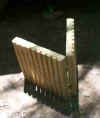
Shower Floor
The first thing we wanted was a place to stand, out of the
dirt
|
|
We saw a similar shower stand in a camping store for
around $75. While I admit it was nice, it was made of teak, I
thought pressure treated (PT) pine would work just as well. I made
two squares out of PT 2 X 4 pine. Over the top I secured PT 1 X 2
pine as a slat floor. |
|
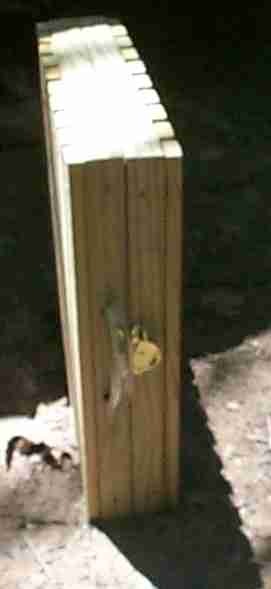
|
The two squares are secured together with brass
hinges, so the unit folds back on itself. This is the travel
position, and the 1 X 2 pine slats are to the outside. |
|

|
I installed a brass window hasp where the two parts
come together to secure them together for travel. I tried several
handles, but none seemed right. I finally settled on a rope handle
covered with a piece of PVC tubing I had left over from a previous
project. |
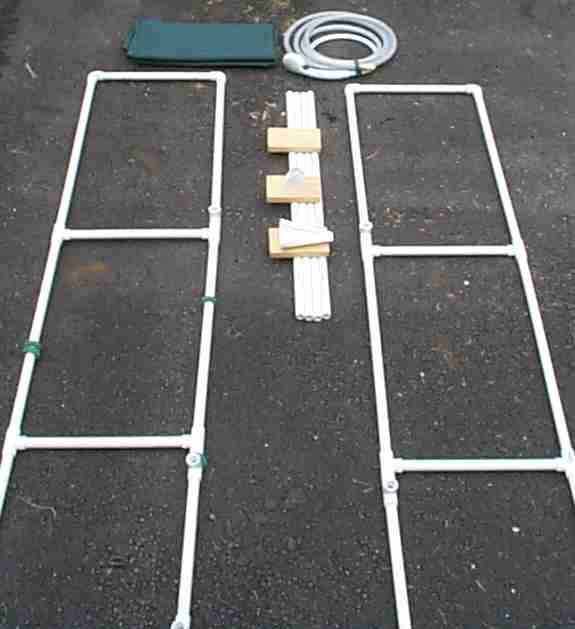
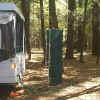
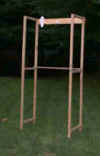
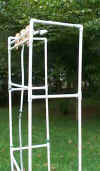
Privacy Screen
Even though we only use the shower when primitive camping, we
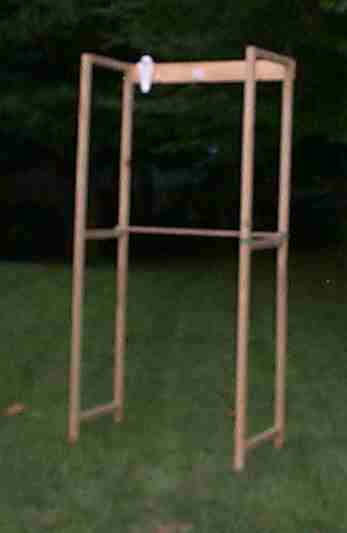
decided a privacy screen was in order. I made a prototype out of 2 X
2 PT pine. After using this for a few months I made the final unit out of
1/4" schedule 40 PVC pipe. I assembled two frames using PVC
pipe and PVC elbows and PVC "T" connectors. These two frames are
held together during use by 4 crossbars which are not glued in place, only
friction fit. The bottom of the frame legs have holes drilled in
them to allow it to be pegged to the ground with standard tent pegs if
necessary. The "privacy" part is provided by hanging a standard
shower curtain from the top. The two corners of the curtain are held in
place by wing nuts, and the back hangs on 2 screw heads. The screw heads
are smaller that the brass grommets on the curtain, so it can be removed for
travel.
|
|
The photo to the left shows the prototype made out of
2X2 PT lumber. |
|
|
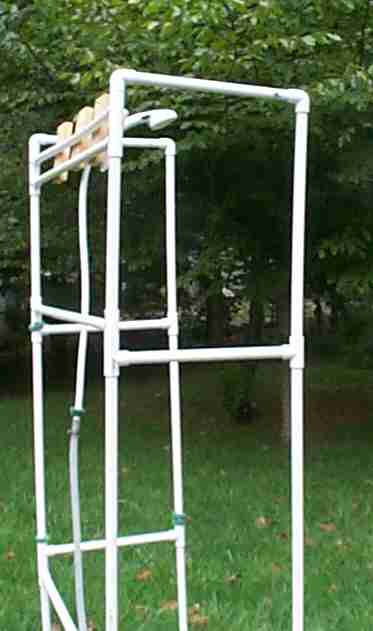
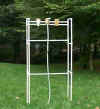
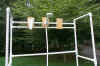
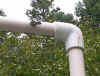
This photo shows the stand assembled, with the shower
hose hanging from the top. Note the two top crossbars are screwed
together with 3 1X3 pine boards. These serve 3 purposes:
1. They make the frame more rigid
2. They provide a place to attach the screws on the
back to hang the shower curtain.
3. They provide a place on the front to hang the
shower head and soap holder. |
|
|
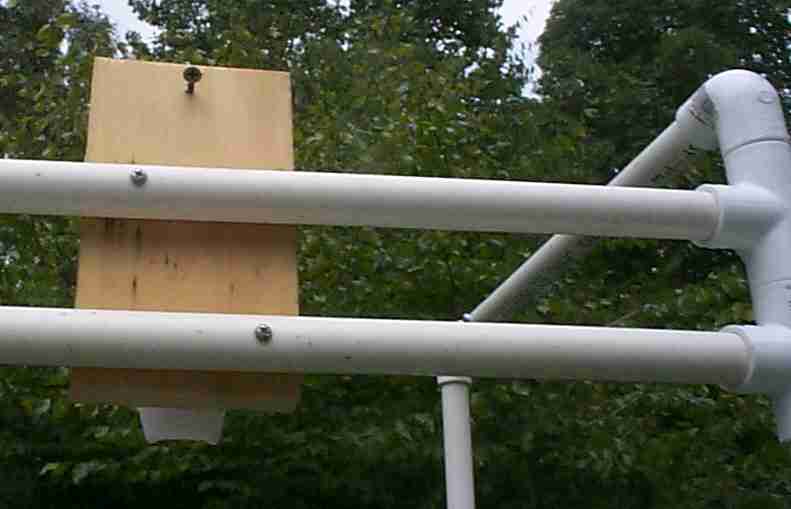
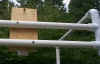
The photo on the left shows a close up of the top of
the stand, including the shower head and soap holder. The soap
holder is a standard item available at most RV stores. |
|
|
A side view of the stand shows the construction.
When constructing a stand you can make the dimensions of the
"boxes" created by the connection of the PVC pipes any size
you wish. Remember that the larger the box the more unstable the
stand becomes. |
|
|
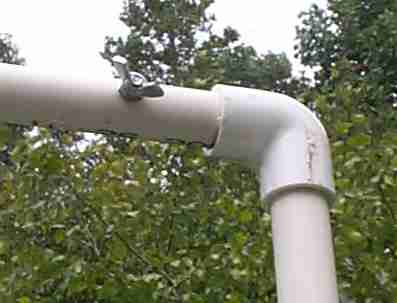
The photo on the left shows the wing nut which holds
the shower curtain. |
|
|
The photo to the right shows a close up of the rear
side of the top. Note the screw at the top on which the shower
curtain hangs. |
|
|
The photo to the left shows the stand taken apart for
travel. |
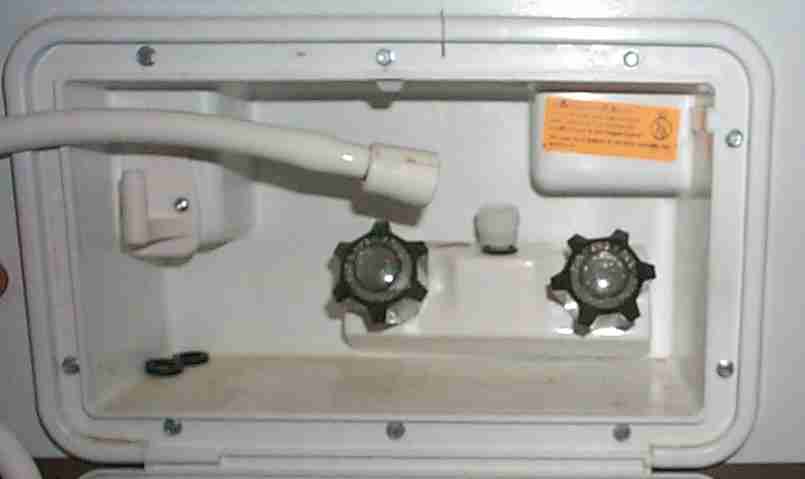
Shower Hose Extension and Quick
Disconnect
The standard 6 foot shower hose never seemed long enough to
use in any fashion other than hand held. I decided that it needed to be
longer, but after searching high and low (OK, I just checked Home Depot) I was
never able to find any standard hose longer than 6 feet. It seemed easy
enough. Cut the existing hose in half, insert an extension in the middle,
and there you go - a longer hose. This does seem to work well with one
drawback, it has to be removed for travel, but using the quick connect I added
it works fine. Remember, 21 feet of hose will not fit inside the little
outside shower compartment! You can make this hose any length you wish,
but remember you will probably want to be in proximity to the faucet to adjust
the water temperature.
|

|
Ok, Step 1 is to remove the stock shower hose form the
outside faucet. Don't worry, it's only hand tight! You
should now have the shower attached to a six foot white hose. |
|
|
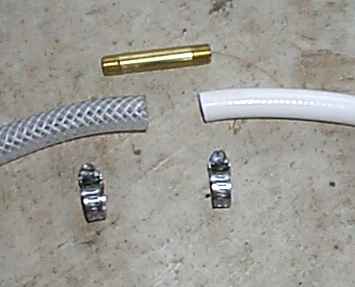
Step 2, using a cutting device (I used pruning sheers
from the garden), cut the stock six foot hose into two parts, one about
1 foot long and 1 about 5 feet long. You now have 2 hoses, with
one having the hand shower on the end of it. Using the parts you
should have purchased, you will now connect the 3/8" PVC tubing to
the part which has the hand shower attached.
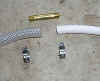
To the right, you will see all the parts needed for
this connection. Note that I used a copper nipple as the
connection device rather than a barbed connector because the inside
diameter of the 2 types of tubing are different. |
|

|
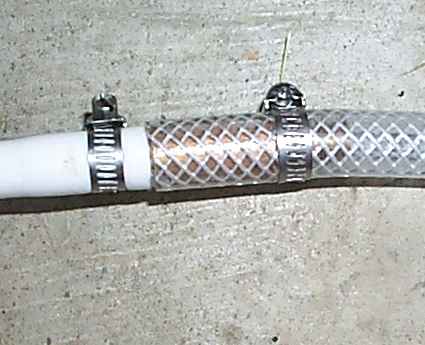
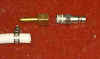
To the left you see the first completed connection. |
|
|
You will now need to connect the parts for the
"quick disconnect" into the other break in the hose. To
the right you see the parts for the "female" end of the quick
disconnect. I used an air line disconnect as it was the closest in
size to the water lines I was using. |
|
|
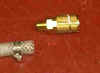
To the left you see the parts for the male end of the
quick disconnect. You will note I used a barbed adaptor to insert
into the hose, as the threaded end of the male connector to push into
the white stock hoes. |
|
|
Once all connections are made, reconnect the short
hose with the male end into the outside shower compartment. When
you need to use the shower, open the compartment and connect the two
pieces of hose together. |
|
|
Here is what it looks like when disconnected for
travel. No longer do you need to try to fit that hose and shower
head into the little compartment. |
Parts List for Shower Extension
Home Depot
1- 3" copper nipple $1.94ea
4- Stainless Steel Hose Clamps $0.44ea
1- Male end, air hose disconnect $2.97ea
1- Female end, air hose disconnect $3.95ea
1- Air hose barbed adaptor/connector $0.97ea
15 feet 3/8" reinforced PVC Tube @ $0.37 per ft.
Sorry, no parts list for the shower stand or privacy screen.
I made it out of standard 10 foot lengths of 1/4" PCV pipe, 1/4" PVC
elbows and 1/4" PVC "T" connectors. All of these are
available at Home Depot. Buy a bunch and return what you don't use (They
are great about that!). PVC and a little PVC cement (if you don't already
have a can of PVC cement, buy a small one as it goes a long way.

Revised: May 08, 2007
|