|
Home
 Our
Camping Experience Our
Camping Experience
FAQ
Page
Guest
Book
Natasha Pages:
About
Natasha
Natasha
Pictures
How
Could You?
Doggie
Dictionary
Camping
With Your Dog
Camp Site Pages:
Our
Trips
Fort
Wilderness
DC
Camping
Camper Pages:
Our
Camper
Tow
Vehicle
Site
Statistics
Modification & Service:
Detachable
Power Cable
Modified
Drawers
Mirror
Single
Drain System
Drill
Lift System
LED
Light System
Accumulator
Tank
Florescent
Light
Bike
Rack
Outside
Shower
Batteries
in a PU
Bed
End Tray
Battery
Charge Cable
Stove
Counter
AC
Brace
WH
Wind Guard
RV
Plug @ Home
Awning
Base
12v
Power Adaptor
Battery
Meter
Water
Level Indicator
Tongue
Jack Service
Our
Bunk
Information:
Camping
With Your Dog
Camping
Checklist
Dry
Camping
Pop
Up Brakes
Break
Away Switch
Campsite
Safety
Towing
& Hitch Info
Sway
Information
Gray
Water
Porta
Potti
RV
Air Conditioning
Pop
Up Tires
Changing
a Flat Tire
Pop
Up Refrigerator
Camp
Site Power
Trailer
Dolly
Folding
Camp Table
Awning
Base
Level
Your PopUp
Winterize
Your PopUp
Spring
Set Up
Camp
Cooking Accessories
Buying
a Used PopUp
Message
Board Shorthand
Camping Links:
PopUpTimes
Camping
Links
Camping
Club Links
Manufacturer
Links
GSD Links:
MidAtlantic
GS Rescue
GS
Rescue of LA
Virginia
GS Rescue
Flying
Dog Press
|
12 Volt Fluorescent Light Fixture
If you have visited many of my pages I am sure you are aware that the
majority of our camping consists of "Dry Camping",
where electrical power is at a premium. One of the biggest "power
hogs" in our Santa Fe is the two dual bulb incandescent light
fixtures. Without the ability to select one or both bulbs we were
constantly worried about turning off the lights as it consumes in the area of 3
amps!
The first time I saw the fluorescent fixture in the Pop
Up Time Web Store I was interested as it only uses 1 amp. Now, PUT doesn't
offer the lights anymore, but RV (read that as 12v DC) fluorescent fixtures are
available many places. Before you go running down to Lowes of Home Depot
remember that you need 12v DC fixtures, NOT 110v AC home fixtures. While
the bulbs may be the same the ballast does not work on 12v. before you
ask, the ballast is the part of the fixture that raises the source voltage to
the level need for the light to "start".
While many fixtures are available, be careful of deals that seem too good to
be true. Stick with major brands as they tend to last longer in the rough
use of the RV world. One of the major players in RV lighting is Thinline
and they are available in many stores.
Now, the one I purchased did not have the 1/4" female
12v Dc power socket that you find on most RV light fixtures, but I went ahead and purchased one, deciding that I could add a 1/4" female
12v Dc power socket myself.
These photos are thumbnails, click on a picture to
see a larger version
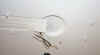
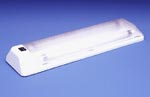 Here is the light I purchased.
It has 2 bright F8T5 lamps and only consumes 1 amp.
Here is the light I purchased.
It has 2 bright F8T5 lamps and only consumes 1 amp.
|
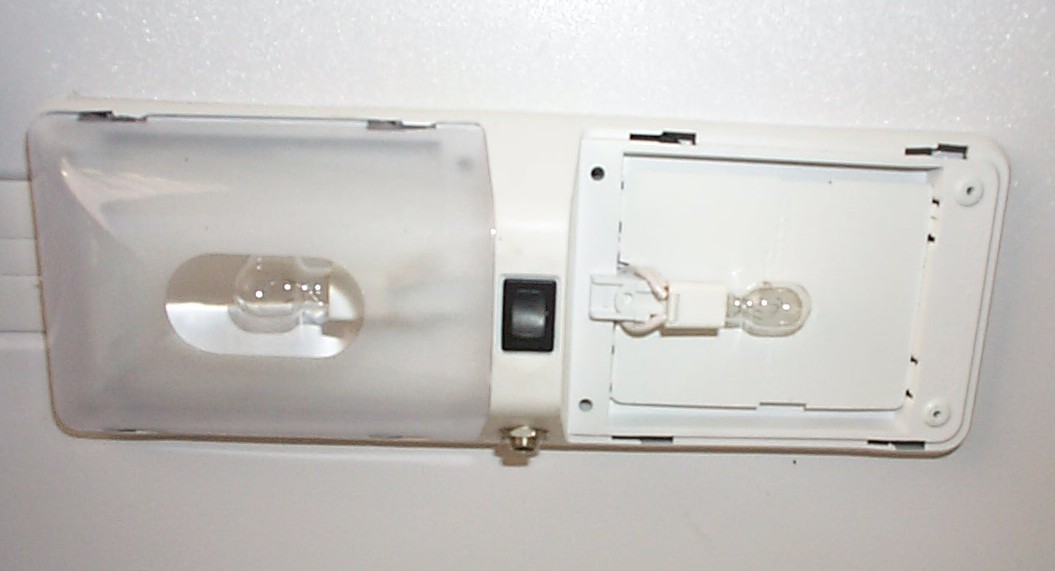
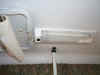
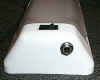 I
added the 1/4" female 12v Dc power socket to the side of the
fixture. Be aware that there is not a lot of room inside the fixture
to add things. It required that a metal plate in the fixture be
trimmed and the hole must be drilled in exactly the right spot.
Before you think I am really great at this, I must admit - I was lucky in
the spot I decided to drill. I also decided not to connect to the
electrical wiring inside the fixture. I attached wires that were of
sufficient length to connect directly to the camper power wires. I
added the 1/4" female 12v Dc power socket to the side of the
fixture. Be aware that there is not a lot of room inside the fixture
to add things. It required that a metal plate in the fixture be
trimmed and the hole must be drilled in exactly the right spot.
Before you think I am really great at this, I must admit - I was lucky in
the spot I decided to drill. I also decided not to connect to the
electrical wiring inside the fixture. I attached wires that were of
sufficient length to connect directly to the camper power wires.
|
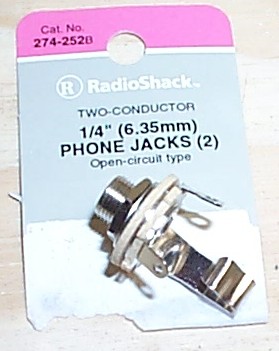
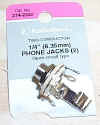 The
1/4" female 12v Dc power socket are actually nothing more than a
1/4" phono plug - you know the size a pair of headphones uses, only
mono not stereo. I got them at Radio Shack, part # 274-252B
less than $2.00 for the package of 2. The
1/4" female 12v Dc power socket are actually nothing more than a
1/4" phono plug - you know the size a pair of headphones uses, only
mono not stereo. I got them at Radio Shack, part # 274-252B
less than $2.00 for the package of 2.
|
 I
started the project by removing the stock light fixture. Coleman
lights are held in place by 4 rivets (one in each corner). In the
photo to the left you can see the two rivets on the right hand side in the
corners. Before yo begin any work, remove the power to this light fixture
by either pulling the fuse, or disconnecting the battery, assuming that
the converter is not plugged in. Using a drill bit slightly larger
than the hole in the middle of the rivet SLOWLY AND
CAREFULLY drill up into the rivet. When the drill reaches the level
of the flight fixture the head of the rivet should come off I
started the project by removing the stock light fixture. Coleman
lights are held in place by 4 rivets (one in each corner). In the
photo to the left you can see the two rivets on the right hand side in the
corners. Before yo begin any work, remove the power to this light fixture
by either pulling the fuse, or disconnecting the battery, assuming that
the converter is not plugged in. Using a drill bit slightly larger
than the hole in the middle of the rivet SLOWLY AND
CAREFULLY drill up into the rivet. When the drill reaches the level
of the flight fixture the head of the rivet should come off
|
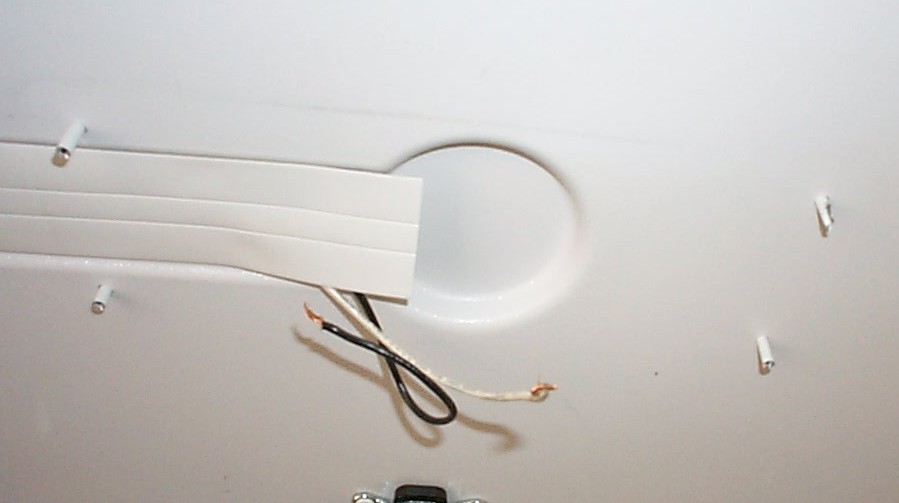
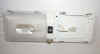
 Here
is the area of the ceiling where the fixture has been removed. Note
the four shafts sticking out of the roof. The is the remains of the
4 rivets which held the old fixture. I cut these off as close to the
inside of the roof as I could and then just pushed the remains up into the
ceiling. You may want to use a small thin rod to probe into this
opening to check the distance between the inner and outer roof
skins. Also note the 2 wires, if you
didn't disconnect the power like I advised above you have probably blown a
fuse at this point. Here
is the area of the ceiling where the fixture has been removed. Note
the four shafts sticking out of the roof. The is the remains of the
4 rivets which held the old fixture. I cut these off as close to the
inside of the roof as I could and then just pushed the remains up into the
ceiling. You may want to use a small thin rod to probe into this
opening to check the distance between the inner and outer roof
skins. Also note the 2 wires, if you
didn't disconnect the power like I advised above you have probably blown a
fuse at this point.
|
 To
install the new fixture, hold it up against the ceiling in the location of
the old one. You will note that the mounting holes for the new
fixture do not match the holes where the old fixture was - go
figure. Take into consideration any other things mounted to the roof
in this area. To the left you will see that my "Vanity
Mate" comes within one inch of the fixture, but does not
interfere. Check for interference before you drill. You will
need to drill 4 small pilot holes in the roof. I caution you to use
a short drill bit and short screws. If you probed the roof like I
suggested in the previous box, you should have a good idea of the length
screw you can use. Nothing would ruin your day more
than having a screw sticking out of the roof of your pop up. To
install the new fixture, hold it up against the ceiling in the location of
the old one. You will note that the mounting holes for the new
fixture do not match the holes where the old fixture was - go
figure. Take into consideration any other things mounted to the roof
in this area. To the left you will see that my "Vanity
Mate" comes within one inch of the fixture, but does not
interfere. Check for interference before you drill. You will
need to drill 4 small pilot holes in the roof. I caution you to use
a short drill bit and short screws. If you probed the roof like I
suggested in the previous box, you should have a good idea of the length
screw you can use. Nothing would ruin your day more
than having a screw sticking out of the roof of your pop up. |
So now, for less than $40 I have a new fluorescent fixture which consumes 1/3
of the power of the original fixture. To my untrained eye, and not using a light meter I would say it is about
equal in brightness to the stock Coleman light. It does give off a white
light while the stock light now appears a little "yellow" in comparison.
Tools needed drill/drill bits, 4 screws, screwdriver, electrical tape.

Revised: May 08, 2007
|