Home
Our Camping Experience

FAQ Page

Guest Book

Natasha Pages:
About Natasha
Natasha Pictures
How Could You?
Doggie Dictionary
Camping With Your Dog

Camp Site Pages:
Our Trips
Fort Wilderness
DC Camping

Camper Pages:
Our Camper
Tow Vehicle
Site Statistics

Modification & Service:
Detachable Power Cable
Modified Drawers
Mirror
Single Drain System
Drill Lift System
LED Light System
Accumulator Tank
Florescent Light
Bike Rack
Outside Shower
Batteries in a PU
Bed End Tray
Battery Charge Cable
Stove Counter
AC Brace
WH Wind Guard
RV Plug @ Home
Awning Base
12v Power Adaptor
Battery Meter
Water Level Indicator
Tongue Jack Service
Our Bunk

Information:
Camping With Your Dog
Camping Checklist
Dry Camping
Pop Up Brakes
Break Away Switch
Campsite Safety
Towing & Hitch Info
Sway Information
Gray Water
Porta Potti
RV Air Conditioning 
Pop Up Tires
Changing a Flat Tire
Pop Up Refrigerator
Camp Site Power
Trailer Dolly
Folding Camp Table
Awning Base
Level Your PopUp
Winterize Your PopUp
Spring Set Up
Camp Cooking Accessories
Buying a Used PopUp
Message Board Shorthand

Camping Links:
PopUpTimes
Camping Links
Camping Club Links
Manufacturer Links

GSD Links:
MidAtlantic GS Rescue
GS Rescue of LA
Virginia GS Rescue
Flying Dog Press


Installation of an Accumulator Tank

All photos are thumbnails, click on a picture to see a larger version

Many people complain about the noise made by the water pumps in popup up campers.  The noise actually comes from a combination of factors:

  • Water lines that are not properly secured which vibrate

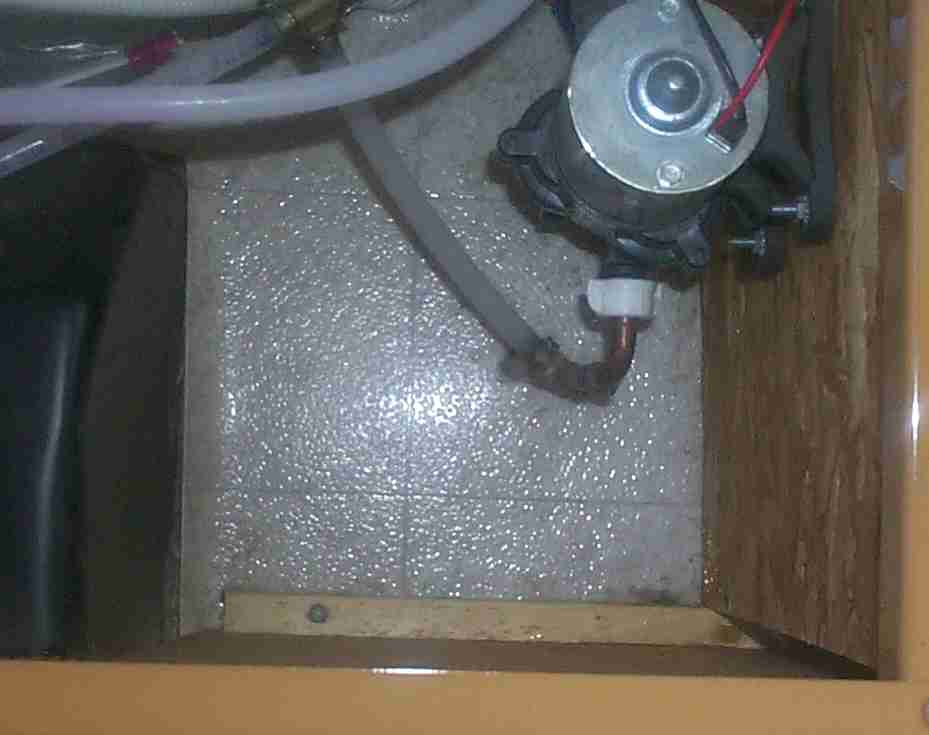
  • Water pumps which are mounted directly to wood partitions and vibrate against the wood

  • The design of the water system - the pump immediately turns on at any request for water

The first two are fairly easy to correct, make sure the water lines are properly secured and mount the pump using some cushioning material between it and the mounting surface.  As a twist on this, many pop ups are manufactured with  water lines  made of "PEX".   PEX is hydronic tubing manufactured from polyethylene plastic which has, as part of the manufacturing process, a three dimensional molecular bond created within the structure of the plastic which dramatically improves a large number of properties such as heat deformation, abrasion, chemical and stress crack resistance. Impact and tensile strength are increased, shrinkage decreased and low temperature properties improved.  OK, I admit it , I stole the definition of PEX form HERE.  These stiff water lines add to the noise as they can tend to slap around when the pump is running.  Make sure all of the lines are secure and don't move around a lot

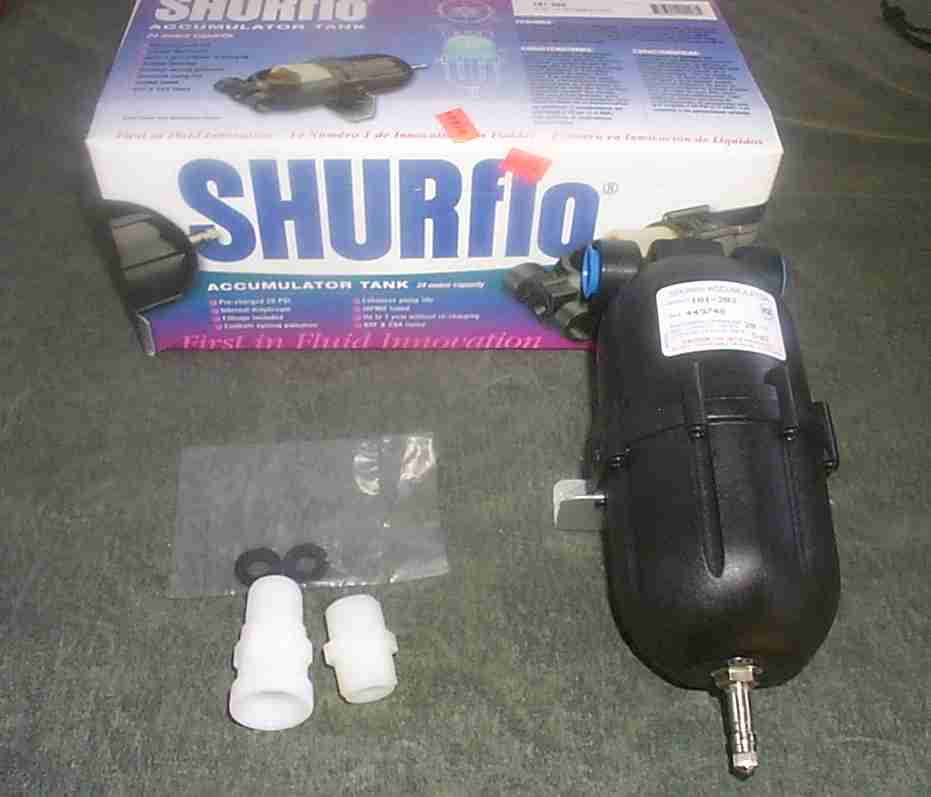
Accumulators tanks reduce pump cycling and eliminate pulsations and water hammer in the pop up water system.  It is basically a pressurized two part tank with a flexible bladder in the middle.  Pressurized air is on one side and the water is on the other.  When you turn on a faucet, the pressurized water form the tank is used first, then the pump turns on to maintain the pressure in your water system.  The accumulator tank "cushions" the pulsation of your water pump.

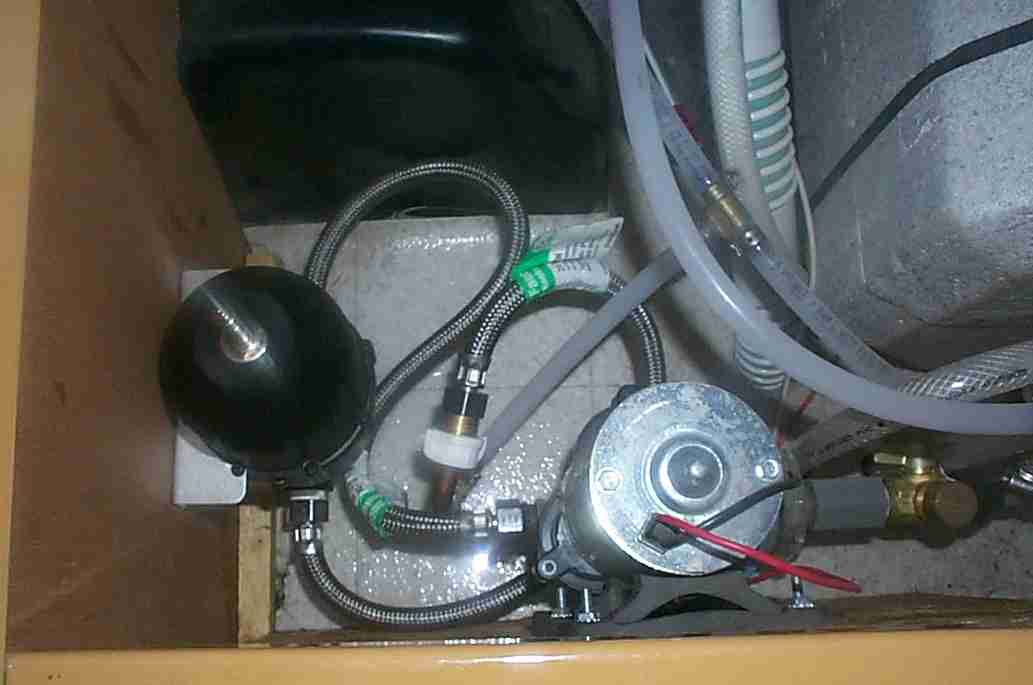
After installing this tank, my pump runs almost silent.

Below is how I did it in my old Santa Fe.  I liked this modification so well it was one of the first things I did to our 2005 Niagara.


Here is the area under my the front dinette seat of our old Santa Fe where the water pump and hot water heater were installed.  Notice the nice open are to install something.  Hmmmm......... AcumStart.jpg (30110 bytes)
I purchased a SHURflo brand tank, but others are available.  It comes with the tank and two 1/2" NPT adaptors.  When looking at the tank lable so you can read it, the inlet side is to the left (it's not well marked). AcumKit.jpg (32667 bytes)
In addition to the tank, you will need two lengths of hose to connect the tank into your water system.  One goes from the output side of the water pump to the inlet side of the accumulator tank.  The second hose goes from the outlet side of the tank back to your water system.  I was originally going to just buy a length of tubing and some hose clamps and make up my own hoses.  But while standing in the plumbing isle of Home Depot I realized that the new flexible "armored" hoses used  to hook up sink faucets would work fine.  A parts list of what I bought is at the bottom of the page. HDParts.jpg (20976 bytes)
So, all I did was insert 1/2" brass pipe nipples in three of the four hose ends.  Remember to use Teflon tape!  I then connected two of the ends to the accumulator tank before I mounted it to the wall.  It's much easier to tighten them before you mount the tank.  Now, bolt the tank to a convenient spot and connect up the other two hose ends.  In the picture to the right you see the accumulator tank on the left side (the black round thing) and the new hoses connecting it to the pump and water system. AcumDone.jpg (32997 bytes)


Parts List

SUREflo Model 181-203 24 oz Accumulator tank  $37.00

2 - Armored hoses (1/2" NPT ends) $4.47 ea

3 - 1/2" Brass Pipe Nipples @ 1.15 ea

 2 - 3/4" #8 bolts $0.83

Tools needed:

Drill/drillbit

Screwdriver

Wrench


SHURflo’s Accumulator Tanks


Revised: May 08, 2007


Copyright © 2001-2007  TRH [tim5055]     All rights reserved   Our Privacy Policy
 

Home  |  E-Mail Tim  | Frequently Asked Questions  | Guest Book