|
Home
 Our
Camping Experience Our
Camping Experience
FAQ
Page
Guest
Book
Natasha Pages:
About
Natasha
Natasha
Pictures
How
Could You?
Doggie
Dictionary
Camping
With Your Dog
Camp Site Pages:
Our
Trips
Fort
Wilderness
DC
Camping
Camper Pages:
Our
Camper
Tow
Vehicle
Site
Statistics
Modification & Service:
Detachable
Power Cable
Modified
Drawers
Mirror
Single
Drain System
Drill
Lift System
LED
Light System
Accumulator
Tank
Florescent
Light
Bike
Rack
Outside
Shower
Batteries
in a PU
Bed
End Tray
Battery
Charge Cable
Stove
Counter
AC
Brace
WH
Wind Guard
RV
Plug @ Home
Awning
Base
12v
Power Adaptor
Battery
Meter
Water
Level Indicator
Tongue
Jack Service
Our
Bunk
Information:
Camping
With Your Dog
Camping
Checklist
Dry
Camping
Pop
Up Brakes
Break
Away Switch
Campsite
Safety
Towing
& Hitch Info
Sway
Information
Gray
Water
Porta
Potti
RV
Air Conditioning
Pop
Up Tires
Changing
a Flat Tire
Pop
Up Refrigerator
Camp
Site Power
Trailer
Dolly
Folding
Camp Table
Awning
Base
Level
Your PopUp
Winterize
Your PopUp
Spring
Set Up
Camp
Cooking Accessories
Buying
a Used PopUp
Message
Board Shorthand
Camping Links:
PopUpTimes
Camping
Links
Camping
Club Links
Manufacturer
Links
GSD Links:
MidAtlantic
GS Rescue
GS
Rescue of LA
Virginia
GS Rescue
Flying
Dog Press
|
Converting Drawers to Shelves
I saw a modification to another Santa Fe by Bill, better know as "Oz
& Us" on the Pop Up Times
/ PopUp
Explorer message boards. He decided that the drawers in the
Santa Fe were difficult to open and the drawer brackets broke too easily.
Take a look at his modification HERE.
Well
I have to agree with him. As I am on my second set of brackets already and
they don't look too good.
An additional advantage to this project is that you will gain additional
storage space as the drawer boxes and workings take up a lot of room. An
additional advantage I didn't think of was weight. By the time I got done removing
parts, I had over 20 pounds of "stuff" that was being taken out. I
weighed the new shelf and parts I was using and it cam in at a very light 5
pounds. So, I saved over 15 pounds!
All photos are thumbnails,
click to see an enlarged version
 Step
Number 1 is to remove the drawers. There is a catch in the right
rear of each drawer to keep it from coming all the way out.
Remember to disengage it or you will be fighting with the drawer. Don't
ask how I know. Step
Number 1 is to remove the drawers. There is a catch in the right
rear of each drawer to keep it from coming all the way out.
Remember to disengage it or you will be fighting with the drawer. Don't
ask how I know.
|
 After
you get the drawers out, turn them over and remove the 7 screws holding
the decorative front on the drawer box. Three of these are
designed to hold the front on and four of them are holding the handles
on the front of the drawer. You will need to get 8 new handle
bolts, as the old ones will be too long once they no longer go through
the drawer box wall. The replacements should be 3/4"
long. After
you get the drawers out, turn them over and remove the 7 screws holding
the decorative front on the drawer box. Three of these are
designed to hold the front on and four of them are holding the handles
on the front of the drawer. You will need to get 8 new handle
bolts, as the old ones will be too long once they no longer go through
the drawer box wall. The replacements should be 3/4"
long.
|
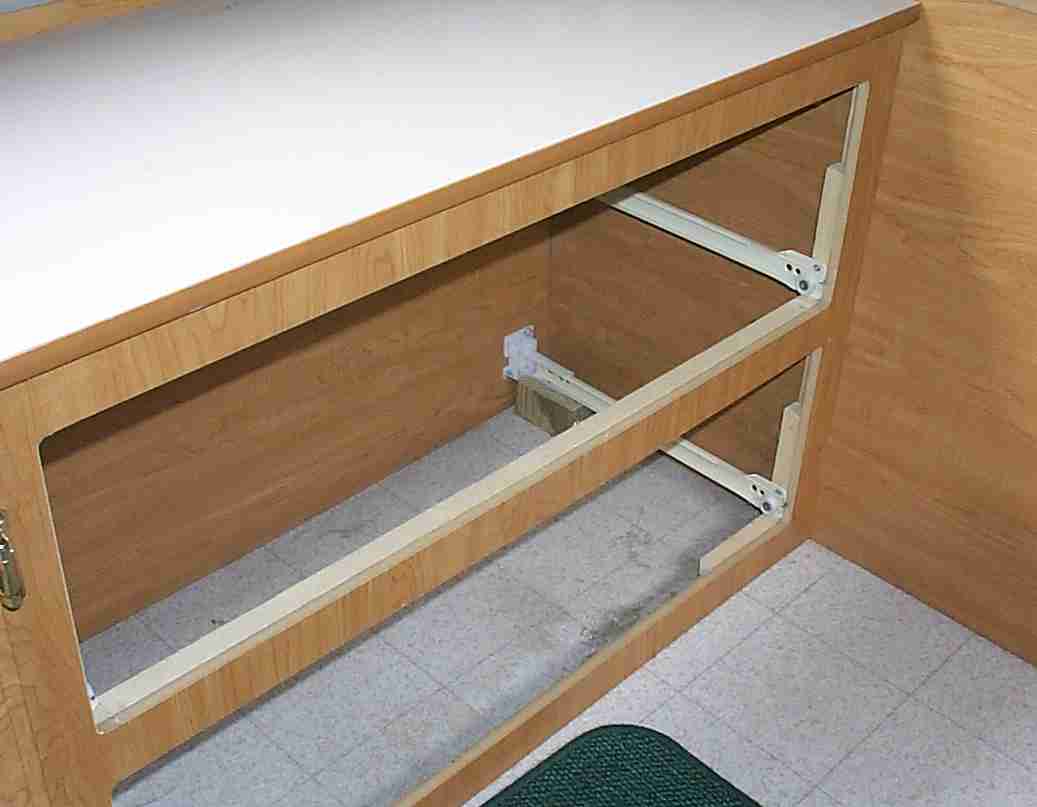
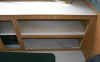
 Here is the cabinet with all of the hardware removed. Note I also
removed the doors on the ajoining cabinet, as I didn't want to work
around them. Additionally, my new shelf is designed to be four
feet long, which will extend past the right hand door. Once you
get all of the hardware out of the way, set your straight edge on the to
of wooden divider that was between the drawers. Extend the
straight edge to the rear and mark the shelf location on the rear wall.
Here is the cabinet with all of the hardware removed. Note I also
removed the doors on the ajoining cabinet, as I didn't want to work
around them. Additionally, my new shelf is designed to be four
feet long, which will extend past the right hand door. Once you
get all of the hardware out of the way, set your straight edge on the to
of wooden divider that was between the drawers. Extend the
straight edge to the rear and mark the shelf location on the rear wall.
|
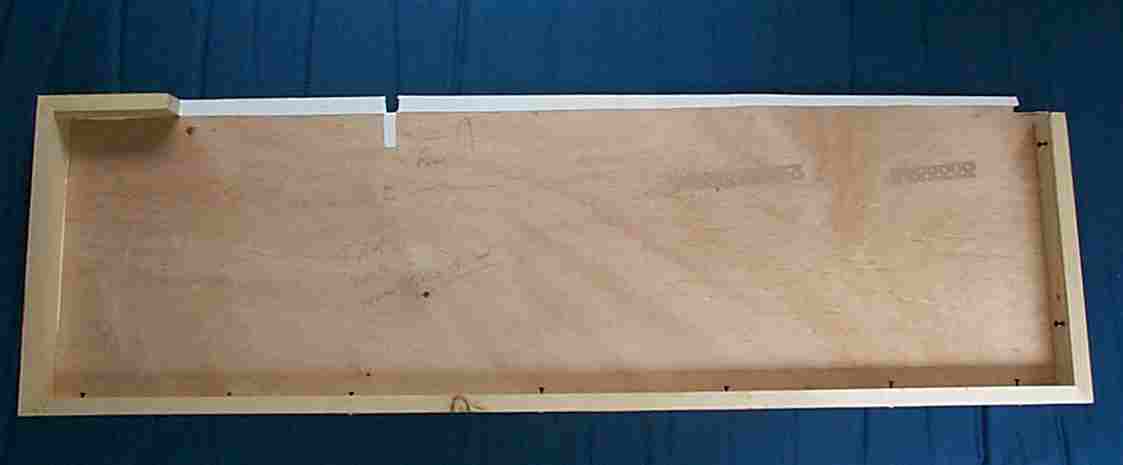
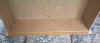
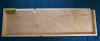 I
was originally going to screw cleats (hanging brackets) to the
walls inside the cabinet and then set the shelf on top of them.
Thinking about it I decided to cut the shelf to length and then attach
the cleats to the bottom of the shelf before I put it in the
cabinet. If you look closely at this photo of the bottom of the
shelf you will note the 1 X 2 pine I used for the cleats. It was
attached to the shelf with wood glue and finish nails. While I
used an air nailer, standard finish nails would also work. Also
note the two notches I had to make in the shelf to go around trim inside
of the stock cabinet. The finished size of this shelf is 14
3/4" X 48". Remember when cutting the luan plywood, cut
from the bottom and it helps if you put a strip of masking tape along
the length of the cut you will make on the finished side. Cut
through the tape to keep the finished side from splintering I
was originally going to screw cleats (hanging brackets) to the
walls inside the cabinet and then set the shelf on top of them.
Thinking about it I decided to cut the shelf to length and then attach
the cleats to the bottom of the shelf before I put it in the
cabinet. If you look closely at this photo of the bottom of the
shelf you will note the 1 X 2 pine I used for the cleats. It was
attached to the shelf with wood glue and finish nails. While I
used an air nailer, standard finish nails would also work. Also
note the two notches I had to make in the shelf to go around trim inside
of the stock cabinet. The finished size of this shelf is 14
3/4" X 48". Remember when cutting the luan plywood, cut
from the bottom and it helps if you put a strip of masking tape along
the length of the cut you will make on the finished side. Cut
through the tape to keep the finished side from splintering
|
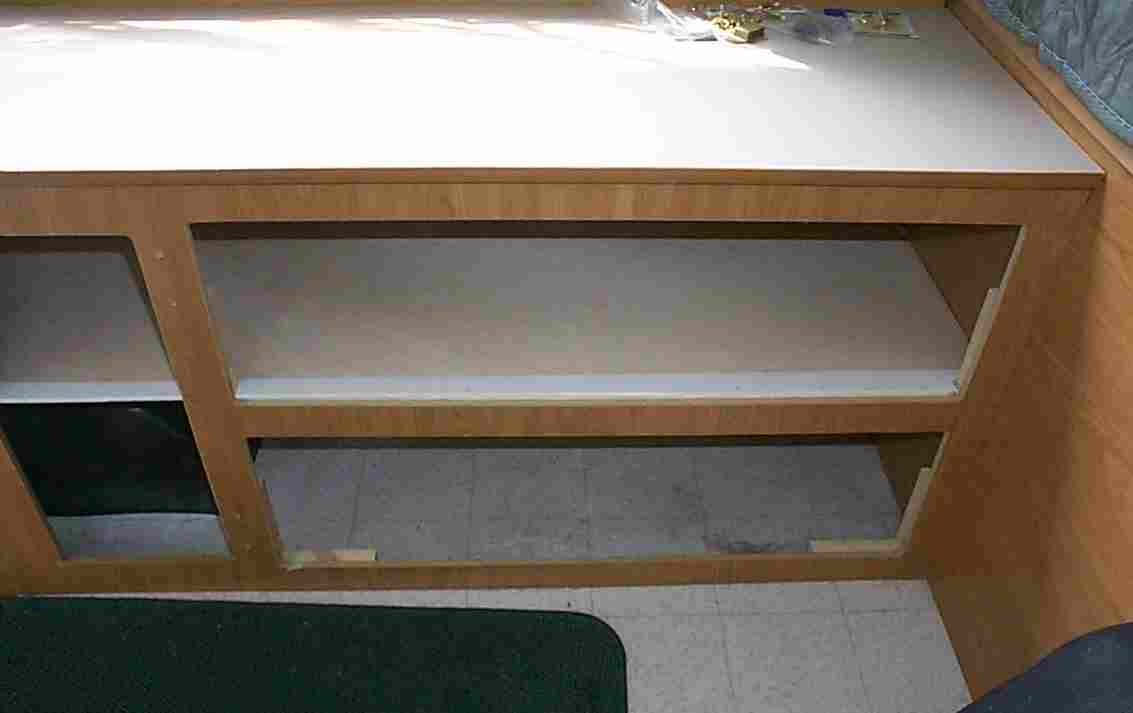
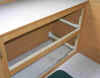
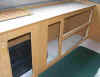
 Here is a photo of the shelf once it was installed. Not it goes
past the original drawer openings to the left, entirely filling the
space of the right hand cabinet door next to the original drawers.
Once the shelf was in place i installed an end on the shelf to keep objects
from sliding off the left side of the shelf into the cabinet
below. If you pre drilled the cleats it is easy to slid the shelf
into the opening (cabinet door opening, not the drawer opening).
Hold the shelf in place and run the screw into the paneling. Pick
screws that will not extend very far past the paneling. You don't
want a screw through an electrical wire, or worse yet through the side
of the pop up.
Here is a photo of the shelf once it was installed. Not it goes
past the original drawer openings to the left, entirely filling the
space of the right hand cabinet door next to the original drawers.
Once the shelf was in place i installed an end on the shelf to keep objects
from sliding off the left side of the shelf into the cabinet
below. If you pre drilled the cleats it is easy to slid the shelf
into the opening (cabinet door opening, not the drawer opening).
Hold the shelf in place and run the screw into the paneling. Pick
screws that will not extend very far past the paneling. You don't
want a screw through an electrical wire, or worse yet through the side
of the pop up.
|
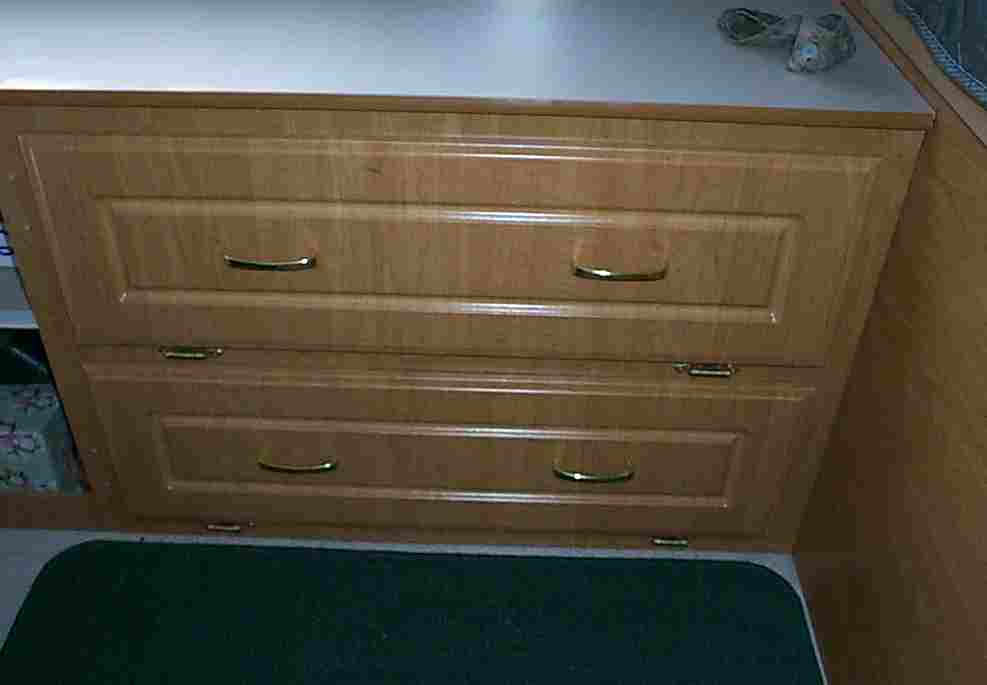
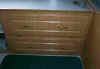 Here is the finished look. I attached each drawer front with 2
stock Coleman hinges. I tried to find the same hinges at Home
Depot, but no luck. Additionally I put a magnetic catch behind
each new drop down door to hold it in place. I recommend that you
pre-drill pilot holes for all screws you are going to put in. This
will keep the wood from splitting. I may add an additional magnetic
catch to each door at a later time.
Here is the finished look. I attached each drawer front with 2
stock Coleman hinges. I tried to find the same hinges at Home
Depot, but no luck. Additionally I put a magnetic catch behind
each new drop down door to hold it in place. I recommend that you
pre-drill pilot holes for all screws you are going to put in. This
will keep the wood from splitting. I may add an additional magnetic
catch to each door at a later time.
|
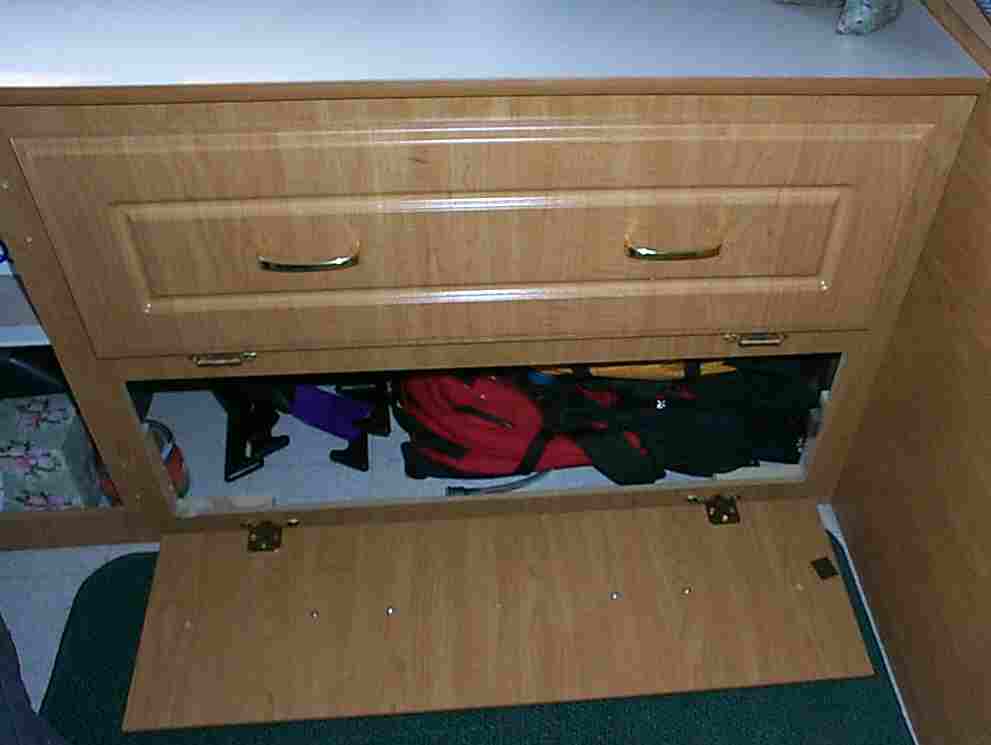
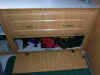 Here is a photo of the bottom door open (I keep wanting to call it a
drawer). I did not add any shelving to the bottom area, deciding
to place objects directly on the flooring. Pay attention to what
you place here as the bottom of the cabinets are not sealed. If
your floor gets wet, water can run under the cabinet and get on whatever
you store in this area. Whe you open this door the handles rest on
the pop up floor
Here is a photo of the bottom door open (I keep wanting to call it a
drawer). I did not add any shelving to the bottom area, deciding
to place objects directly on the flooring. Pay attention to what
you place here as the bottom of the cabinets are not sealed. If
your floor gets wet, water can run under the cabinet and get on whatever
you store in this area. Whe you open this door the handles rest on
the pop up floor
|
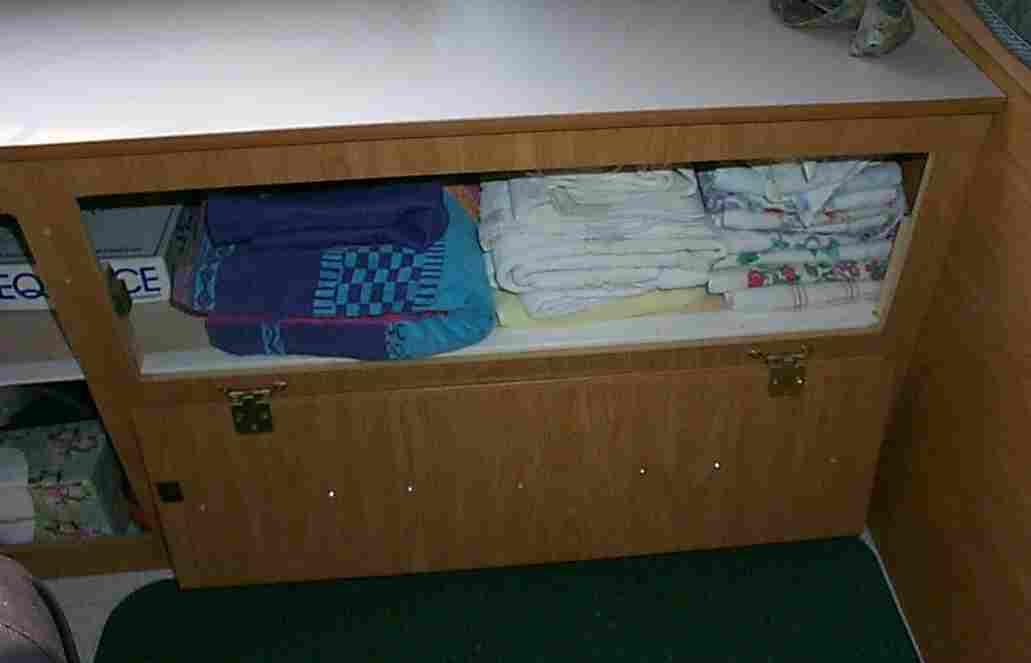
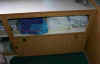 The top shelf is now home to our towels and linens. I did not put
a chain or other device to keep the door from opening all the way.
I may go back at a later time and change this. I want a couple of
trips under my belt first to see how it works out. Right now it
swings down against the lower door.
The top shelf is now home to our towels and linens. I did not put
a chain or other device to keep the door from opening all the way.
I may go back at a later time and change this. I want a couple of
trips under my belt first to see how it works out. Right now it
swings down against the lower door. |
|
Parts List
4 - Coleman door hinges
1 - 1" X 2" pine (used as the cleats/bracket)
1 - 2' X 4' 1/4" Luan plywood (clear on one side for
the shelf)
10 - 1 1/4" drywall screws
Finish nails of several lengths
8 - 3/4" bolts to replace the drawer pull bolts.
Take an old one with you to match the size.
Tool List
Circular Saw, Miter saw, 3 foot straight edge, screw gun
with Phillips tip
|
|
Revised: May 08, 2007 |
|